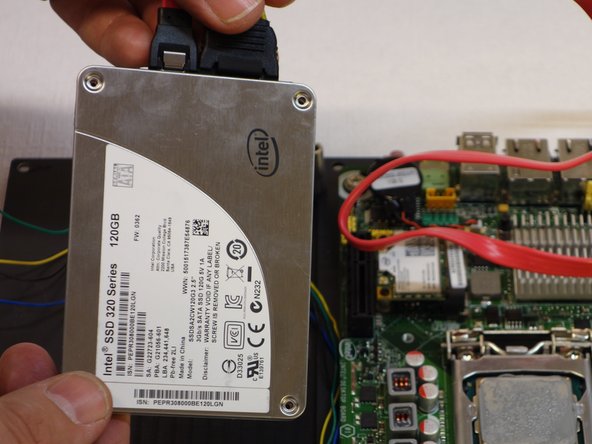
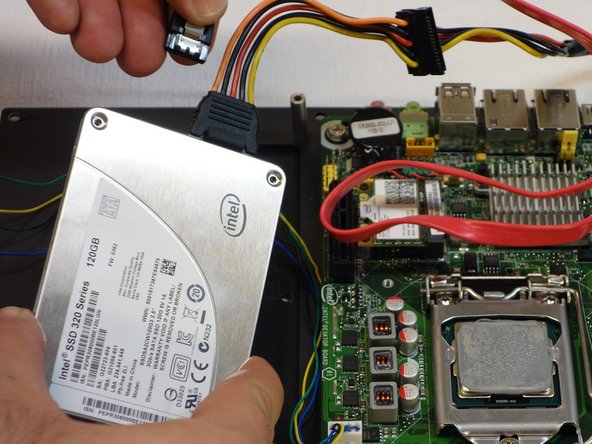
Why! WDi7SSD SSD Hard Drive Replacement

What you need

  1. Why! WDi7SSD SSD Hard Drive Replacement, why! WDi7SSD Opening procedure: step 1, image 1 of 3 Why! WDi7SSD SSD Hard Drive Replacement, why! WDi7SSD Opening procedure: step 1, image 2 of 3 Why! WDi7SSD SSD Hard Drive Replacement, why! WDi7SSD Opening procedure: step 1, image 3 of 3
    • Make sure the computer is disconnected from the power source.

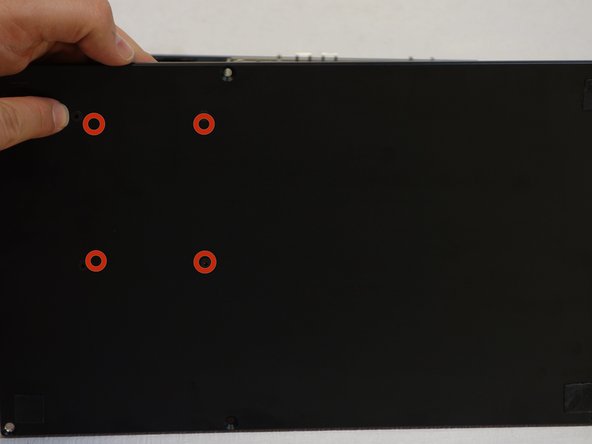
    • Flip the computer over.

    • Remove the six screws with a 2 mm Allen key.

    • Carefully remove the back panel, as well the left and right panel.

  2. Why! WDi7SSD SSD Hard Drive Replacement: step 2, image 1 of 1
    • Now flip up the base panel to which all components are attached.

  3. Why! WDi7SSD SSD Hard Drive Replacement, SSD Hard Drive: step 3, image 1 of 3 Why! WDi7SSD SSD Hard Drive Replacement, SSD Hard Drive: step 3, image 2 of 3 Why! WDi7SSD SSD Hard Drive Replacement, SSD Hard Drive: step 3, image 3 of 3
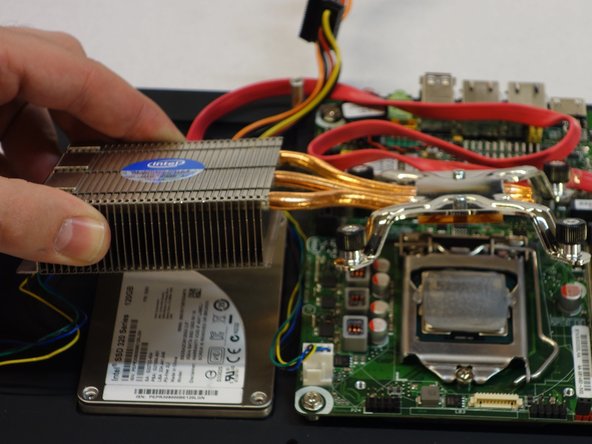
    • Using a Phillips #2 screwdriver, remove the four screws on the heatsink that cools the processor unit.

    • Remove the heatsink.

  4. Why! WDi7SSD SSD Hard Drive Replacement: step 4, image 1 of 3 Why! WDi7SSD SSD Hard Drive Replacement: step 4, image 2 of 3 Why! WDi7SSD SSD Hard Drive Replacement: step 4, image 3 of 3
    • The SSD is now visible.

    • Now flip the computer over and use the Allen wrench to loosen the 1.5 mm screws fixing the SSD.

  5. Why! WDi7SSD SSD Hard Drive Replacement: step 5, image 1 of 2 Why! WDi7SSD SSD Hard Drive Replacement: step 5, image 2 of 2
    • Disconnect the first cable from the SSD. You must press the lever down to do this.

    • The cable may not loosen easily. In this case, carefully use a little force, but not too much.

    • Pay attention do the orientation when assembling. Otherwise, the SSD and cable can be damaged.

  6. Why! WDi7SSD SSD Hard Drive Replacement: step 6, image 1 of 2 Why! WDi7SSD SSD Hard Drive Replacement: step 6, image 2 of 2
    • Disconnect the second cable from the SSD. You must press the lever down to do this.

    • The cable may not loosen easily. In this case, carefully use a little force, but not too much.

    • Pay attention do the orientation when assembling. Otherwise, the SSD and cable can be damaged.

Conclusion

To reassemble the device, follow the instructions in reverse order.

Special thanks to these translators:

de en

100%

These translators are helping us fix the world! Want to contribute?
Start translating ›

Felice Suglia

Member since: 06/15/13

30,908 Reputation

264 Guides authored

0 Comments

Add Comment

View Statistics:

Past 24 Hours: 0

Past 7 Days: 0

Past 30 Days: 3

All Time: 125