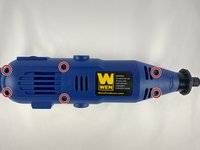
Wen 2307 Fan Replacement

What you need

  1. Wen 2307 Fan Replacement, Front Panel: step 1, image 1 of 1
    • Unscrew the locking sleeve.

  2. Wen 2307 Fan Replacement: step 2, image 1 of 1
    • Remove the hanging clip.

  3. Wen 2307 Fan Replacement: step 3, image 1 of 2 Wen 2307 Fan Replacement: step 3, image 2 of 2
    • Unscrew the six 8mm PH2 screws.

  4. Wen 2307 Fan Replacement: step 4, image 1 of 1
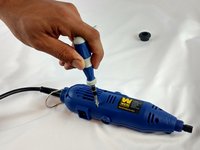
    • While pressing the spindle lock button, unscrew the collet nut and remove it along with the brass collet.

  5. Wen 2307 Fan Replacement: step 5, image 1 of 1
    • To remove the front panel, pry the device apart while holding the device with the other hand.

    • The front panel should come out easily.

  6. Wen 2307 Fan Replacement, Speed Adjustment Assembly: step 6, image 1 of 1
    • Remove the connected wiring from the circuit board.

  7. Wen 2307 Fan Replacement: step 7, image 1 of 1
    • Remove the single 4mm screw retaining the circuit board.

  8. Wen 2307 Fan Replacement: step 8, image 1 of 1
    • Gently pry the circuit board from the back piece.

  9. Wen 2307 Fan Replacement, Motor: step 9, image 1 of 1
    • Gently pull motor assembly out of the panel.

  10. Wen 2307 Fan Replacement: step 10, image 1 of 1
    • Motor separates into two pieces.

  11. Wen 2307 Fan Replacement, Fan: step 11, image 1 of 1
    • The fan assembly is attached to the rotor beam, it can be disassembled to change the fan by simply pulling off the pieces.

Conclusion

To reassemble your device, follow these instructions in reverse order.

2 other people completed this guide.

Joshua Bowery

Member since: 02/08/16

549 Reputation

3 Guides authored

Team

USF Tampa, Team 12-1, Eyestone Spring 2016 Member of USF Tampa, Team 12-1, Eyestone Spring 2016

USFT-EYESTONE-S16S12G1

4 Members

6 Guides authored

0 Comments

Add Comment

View Statistics:

Past 24 Hours: 0

Past 7 Days: 0

Past 30 Days: 3

All Time: 463