Free Shipping on Domestic Orders $75+

Wall Outlet (Type F) Replacement

Views: 13K

View statistics:

Past 24 Hours:
11
Past 7 Days:
74
Past 30 Days:
337
All Time:
12,643
Comments: 0

No one has left comments on this guide. Will you be first?

Go to guide comments
Completed: 5

5 people have marked this guide "completed." Will you be next?

Favorites: 0

No one has favorited (and subscribed to) this guide. Will you be the first?

Time Required: No estimate
Difficulty: Moderate
Community-Contributed Guide

An awesome member of our community made this guide. It was not created by iFixit staff.

Wall Outlet (Type F) Replacement

Introduction

Go to step 1 ↓

A type F power outlet, also known as a Schuko socket, is a common electrical socket used in many European countries. Over time, these outlets may become damaged or worn out, and it's important to replace them to ensure safe and reliable electrical connections.

It's important to note that this guide involves working with electrical wiring, which can be extremely dangerous if not handled properly. If you're not comfortable working with electrical wiring, or if you're unsure about any aspect of the process, we strongly recommend that you seek the assistance of a qualified electrician.

Please be aware that many local jurisdictions have regulations that prohibit unlicensed individuals from performing electrical installations or modifications. Before attempting any electrical work, check your local building codes and regulations to ensure that you are legally permitted to do so. Failure to comply with these regulations may result in fines, invalidated insurance, or difficulties when selling your property.

Assuming you're confident, legally permitted, and capable of working with electrical wiring, this guide will walk you through the steps of replacing a momentary switch, including how to safely disconnect the power supply, removing the old switch, and installing the new one. It's important to remember that electrical work should always be approached with caution, so make sure to follow the instructions carefully and double-check your work at every stage of the process.

    1. Wall Outlet (Type F) Replacement, Turn off power: step 1, image 1 of 3 Wall Outlet (Type F) Replacement, Turn off power: step 1, image 2 of 3 Wall Outlet (Type F) Replacement, Turn off power: step 1, image 3 of 3
      • Find your Breaker Panel.

      • Identify the breaker to turn off.

      • There'll typically be a table listing the circuits corresponding to breakers.

      • Turn off the breaker.

      Ask FixBot

      Add Comment

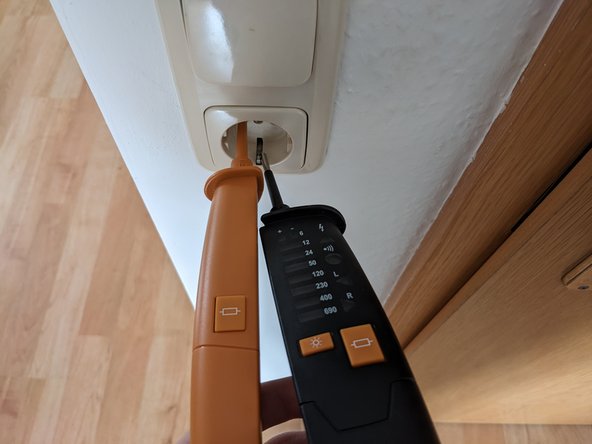
    2. Wall Outlet (Type F) Replacement, Determine voltage absence: step 2, image 1 of 1
      • Use a Duspol or any other two-pole voltage tester to test if there is voltage at the contacts.

      • Do not work on live circuits if you are not an experienced professional.

      Ask FixBot

      Add Comment

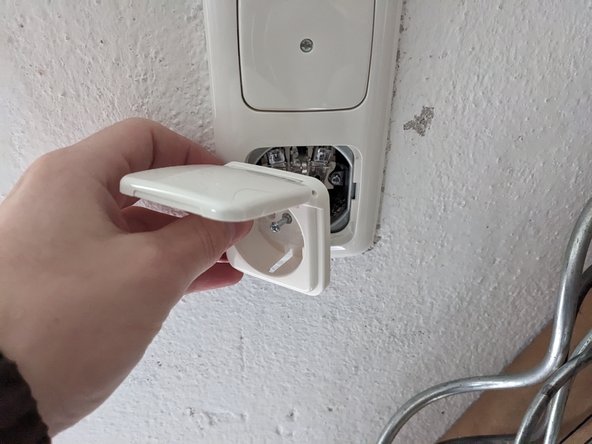
    3. Wall Outlet (Type F) Replacement, Remove the old outlet cover: step 3, image 1 of 3 Wall Outlet (Type F) Replacement, Remove the old outlet cover: step 3, image 2 of 3 Wall Outlet (Type F) Replacement, Remove the old outlet cover: step 3, image 3 of 3
      • Remove the outlet cover by unscrewing the middle captive screw with flat head screwdriver.

      • Remove the frame.

      • If you can't remove the frame because there's a switch on the same frame, take a look at this guide, on how to remove the cover of a switch.

      Ask FixBot

      Add Comment

    4. Wall Outlet (Type F) Replacement, Remove the wall outlet: step 4, image 1 of 1
      • Loosen the holding claws by turning the two screws.

      • If your outlet is mounted inside a cavity wall box you can remove it by loosening the two screws around the perimeter and turning the switch until the two keyholes line up.

      Ask FixBot

      Add Comment

    5. Wall Outlet (Type F) Replacement, Disconnect the wires: step 5, image 1 of 1
      • Disconnect the wires form the old outlet.

      • If the old outlet has Push-In contacts, you can unlock the terminals by pushing down on the clear plastic levers.

      • If you short Earth to Neutral you'll trigger your GFCI/RCD even if the power is off.

      Ask FixBot

      Add Comment

      • Connect the wires to the new outlet.

      • There is no rule on where to connect the Phase Conductor, but it's usually considered best practice to connect it on the right side, as it makes it easier for electricians to test the outlet with a Duspol.

      Ask FixBot

      Add Comment

    6. Wall Outlet (Type F) Replacement, Mount the outlet: step 7, image 1 of 3 Wall Outlet (Type F) Replacement, Mount the outlet: step 7, image 2 of 3 Wall Outlet (Type F) Replacement, Mount the outlet: step 7, image 3 of 3
      • Mount the outlet by following the previous steps in reverse.

      Ask FixBot

      Add Comment

    7. Wall Outlet (Type F) Replacement, Turn the power back on: step 8, image 1 of 1
      • Turn the power back on.

      Ask FixBot

      Add Comment

    8. Wall Outlet (Type F) Replacement, Test the new outlet: step 9, image 1 of 3 Wall Outlet (Type F) Replacement, Test the new outlet: step 9, image 2 of 3 Wall Outlet (Type F) Replacement, Test the new outlet: step 9, image 3 of 3
      • Measure across Hot and Neutral.

      • You want 230V

      • Measure across Hot and Ground.

      • You want 230V

      • Measure across Ground and Neutral.

      • You want 0V

      • Apply load between Hot and Neutral by pressing the two large buttons.

      • If this trips your GFCI, you either swapped Ground and Neutral, or your Neutral belongs to a different GFCI than your Phase Conductor.

      Ask FixBot

      Add Comment

Conclusion

To reassemble your device, follow these instructions in reverse order.

Cancel: I did not complete this guide.

5 other people completed this guide.

Sebastian

Member since: 08/19/18

33,838 Reputation

72 Guides authored

0 Guide Comments

Add Comment

View Statistics:

Past 24 Hours: 11

Past 7 Days: 74

Past 30 Days: 337

All Time: 12,643