Wacom Intuos4 Touch Ring Replacement

What you need

  1. Wacom Intuos4 Touch Ring Replacement, Casing: step 1, image 1 of 3 Wacom Intuos4 Touch Ring Replacement, Casing: step 1, image 2 of 3 Wacom Intuos4 Touch Ring Replacement, Casing: step 1, image 3 of 3
    • Flip device on its back and remove all fourteen 7.1 mm screws using a Phillips #1 screwdriver.

    • There is a single screw located under each of the rubber leg pieces. Use a shimmy tool to remove these pieces to access the screws.

  2. Wacom Intuos4 Touch Ring Replacement: step 2, image 1 of 2 Wacom Intuos4 Touch Ring Replacement: step 2, image 2 of 2
    • Lift the screen's foam backing connecting the motherboard/drawing board to the two smaller express-key boards, placing it onto the motherboard.

    • Separate the outer casing from the rest of the tablet.

  3. Wacom Intuos4 Touch Ring Replacement, Motherboard: step 3, image 1 of 2 Wacom Intuos4 Touch Ring Replacement, Motherboard: step 3, image 2 of 2
    Tool used on this step:
    Tweezers
    $4.99
    Buy
    • Using tweezers, remove the yellow tape covering the three cable connectors.

  4. Wacom Intuos4 Touch Ring Replacement: step 4, image 1 of 2 Wacom Intuos4 Touch Ring Replacement: step 4, image 2 of 2
    • Lift the black plastic clip holding the flat wire to the connector with either tweezers or an iFixit opening tool.

    • Pull on the white plastic tab to disconnect the flat wire.

  5. Wacom Intuos4 Touch Ring Replacement: step 5, image 1 of 2 Wacom Intuos4 Touch Ring Replacement: step 5, image 2 of 2
    • Carefully remove the motherboard from the casing.

    • If you're having trouble, don't force it. Make sure all cables are disconnected and all screws are removed.

  6. Wacom Intuos4 Touch Ring Replacement, Touch Ring: step 6, image 1 of 2 Wacom Intuos4 Touch Ring Replacement, Touch Ring: step 6, image 2 of 2
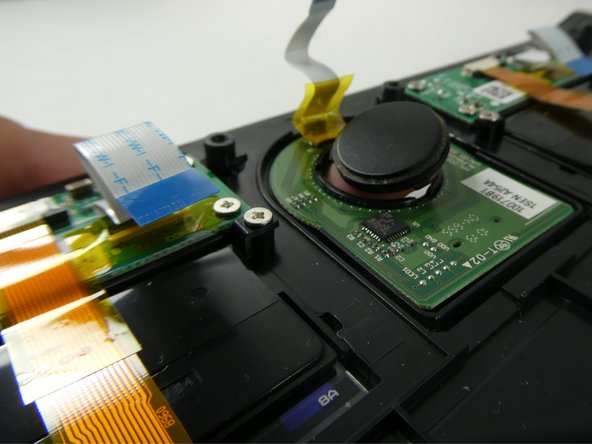
    • Remove the plastic tracking ball by lifting it up and out of its slot.

  7. Wacom Intuos4 Touch Ring Replacement: step 7, image 1 of 1
    • Use an iFixit opening tool to gently lift the circuit board from the slot.

    • If the touch ring doesn't come out immediately, do not force it or you may cause damage to the device. If it is difficult to remove, heat the front face of the touch ring to loosen the glue that holds it in.

Conclusion

To reassemble your device, follow these instructions in reverse order.

One other person completed this guide.

Lillian Avery

Member since: 10/26/22

91 Reputation

1 Guide authored

Team

UMass Dartmouth, Team 3-6, Botvin Fall 2022 Member of UMass Dartmouth, Team 3-6, Botvin Fall 2022

UMASSD-BOTVIN-F22S3G6

4 Members

10 Guides authored

0 Comments

Add Comment

View Statistics:

Past 24 Hours: 1

Past 7 Days: 1

Past 30 Days: 8

All Time: 164