Introduction
A talking toy, that also sings and talks.
When the speaker does not work anymore, it could be a broken wire.
What you need
-
-
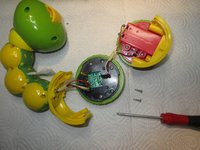
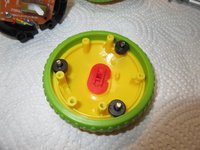
This is Vtech Rolliraupe, a electronic toy which talks and sings. It has three buttons like A, B and C which trigger different sounds or songs.
-
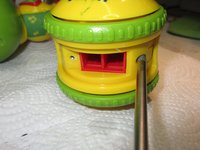
On the backside are many screws. It is manufactures properly and is made in good quality.
-
It works best with two "Batteries" size AAA type LR.
 Ask FixBot
-
-
-
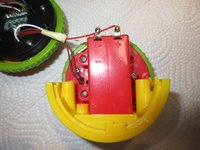
From Step 1 Picture 3 you know how to open the Batteriecase. There you find the next two screws. These two screws are longer as the rest, so lay these two screws separate !
-
On Picture two you see these two screws.
-
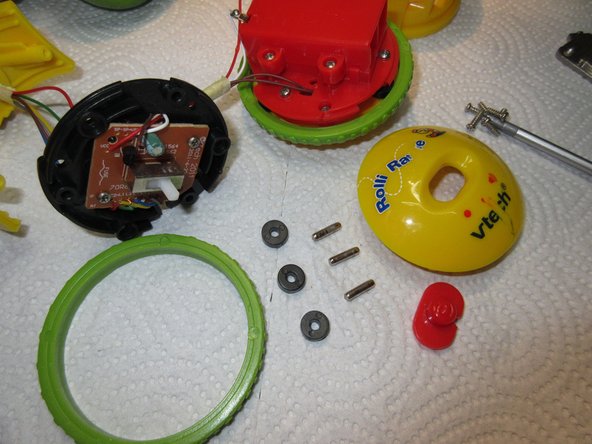
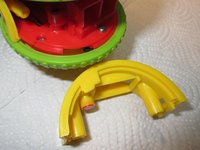
Then you pull away the yellow part and the Rolliraupe opens in three parts: Yellow part, right wheel, left wheel, all together with some wires.
-
-
-
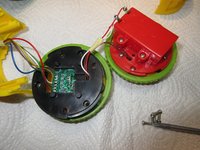
For a view to the speaker, it works better when you remove the batteriecase.
-
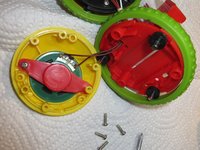
There are three screws easily to open, then just pull it up.
-
Now you only have two wires instead of four, it is easier to work at it now, because for opening the speaker of the wheel you have to screw a lot.
-
-
-
Remove ALL screws. They all have the same length, except the one which holds the speaker itself at last; that one is shorter. The speaker sits under the red part left in first picture
-
Three black rolls on three metal-axles could fall out, just put them back like you see it on the first picture.
-
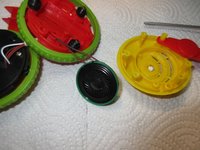
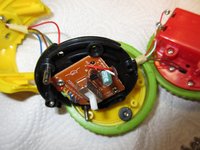
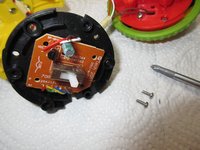
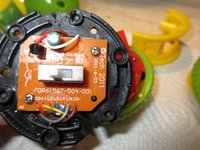
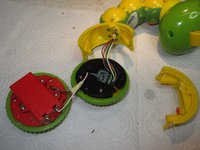
My speaker is okay, like you see on picture 2... The wires are okay and the speakers looks good too. So I reassemble it and had to look at the electronics-board, that you see on the third picture. It is in the other wheel of Rolliraupe. Also, unscrew ALL screws. Then it opens easy.
-
-
-
-
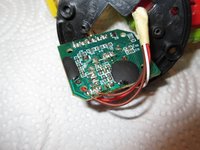
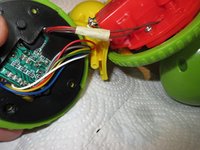
Here, on the first picture, you can see that the BROWN wire is NOT connected to the elctronics board. It is broken. So that is why the speaker does not work. It was bad soldered, so the wire came off.
-
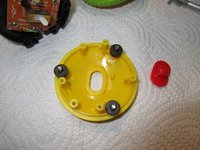
On pictures two and three you see the parts of the wheel, the black rolls and the metal axles and how to put them on the yellow part.
-
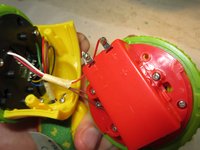
The red part is the on/off switch button. Look how it fits right, look at picture one in Step one for a few of the position of that red button.
-
-
-
...and here you see how these parts from the last step get assembled.
-
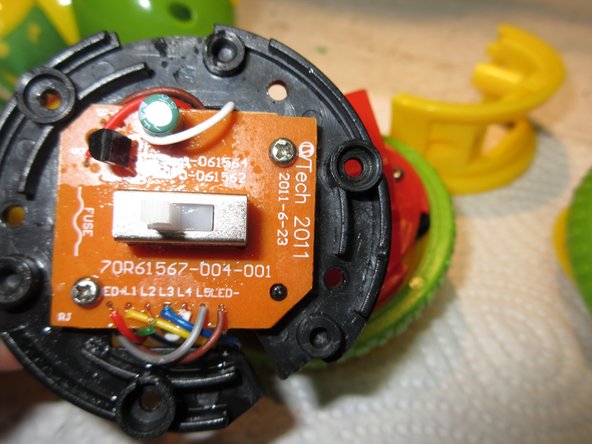
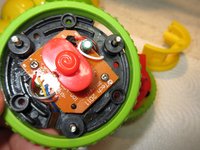
Now removing the elctronics. There are two shorter screws, careful. Now you can turn it around and lay it so you can resolder the wire. On the foto you can read on the left corner on the electronics-board "sp plus" and "sp minus" so here are the two points for the speaker wiring.
-
That are the two brown wires here. They are not put through teh holes, just soldered on the backside.
-
-
-
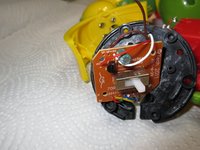
Here we have it. The two brown speaker wires are soldered to the electronics board. It is only a msall spot to solder there so you must have a quiet hand.
-
It is bad produced, you can see on the picture that there are some other wires bad soldered, for example the GREEN one,
-
On the third picture you see again the three black rolls on the three metal axles, so you can see where they have the right places.
-
-
-
Now reassembly. Put on the black part with the electronics, take care of the red button from the switch that it is in right position. I had a little trouble with it because teh red button always fell down or the black rolls falled away. That was something ugly to work. ...Then drill in all scres.
-
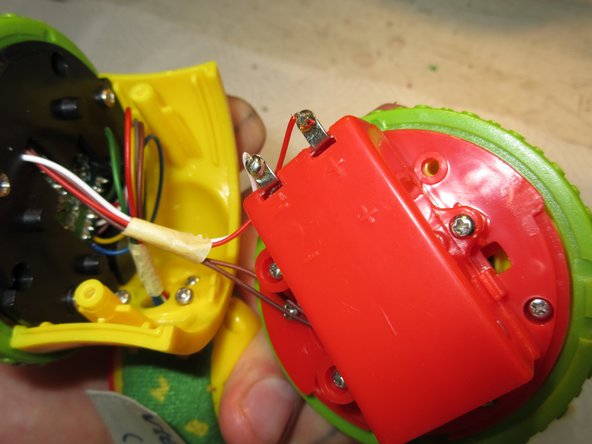
Okay, there are the two preassembeled wheels with wires.
-
It only fits in ONE postion, there is a notch and then it snaps in.
-
Just snap it in, look where is upside and then it is really easy. The wires of the batteriecase have to look upwards.
-
-
-
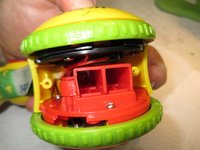
Here you see the coreect position of the wheels.
-
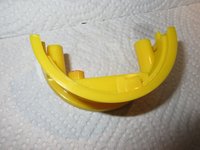
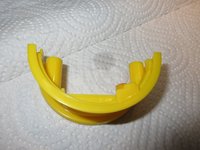
When you look at the yellow part, there are two diferent shapes on the edges. So this part also only fits in one direction.
-
Look at it.
-
-
-
Details of the yellow part, right and left.
-
At last, when the yellow part snaps in, put back the two long screws.
-
Well, now put in the batteries, AAA cells, better take "LR" type.
-
Now be happy, Rolliraupe has her voice back. now she can sing and talk. :D
-
Done :)
-


To reassemble your device, follow these instructions in reverse order.
Cancel: I did not complete this guide.
2 other people completed this guide.
