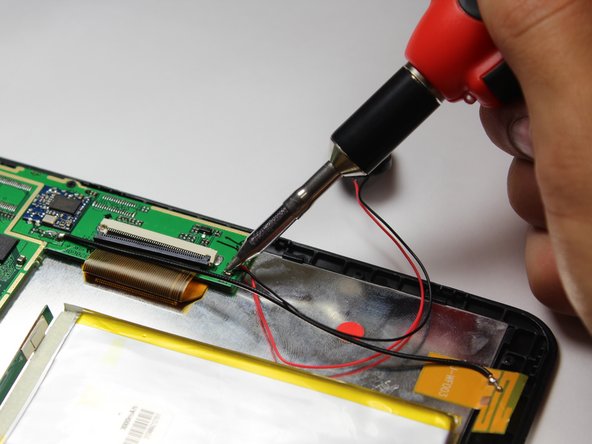
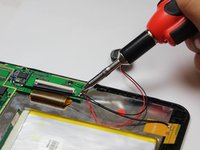
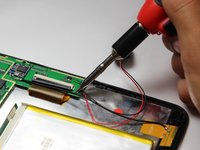
Visual Land Prestige Pro 7D Speaker Replacement

What you need

  1. Visual Land Prestige Pro 7D Speaker Replacement, Back Panel: step 1, image 1 of 1
    • Unscrew the two 4.0mm Phillips head screws found near the ports at the bottom of the device using a PH #00 screwdriver.

  2. Visual Land Prestige Pro 7D Speaker Replacement: step 2, image 1 of 1
    • Be careful when taking the back panel off. The speaker is connected to both the front and back panels, and may get pulled out if you are not gentle when lifting the back panel away.

    • Slide the plastic prying tool in between the front and back panel and pry them apart on all 4 sides.

    • It may be easiest to start on one of the sides, and work your way around the device. The bottom, with the ports, is the most difficult side and can be saved for last.

    • There are small latches that make this difficult. Moderate force may be required to separate the two panels.

  3. Visual Land Prestige Pro 7D Speaker Replacement, Speaker: step 3, image 1 of 1
    • Gently lift the speaker off of the back panel.

  4. Visual Land Prestige Pro 7D Speaker Replacement: step 4, image 1 of 2 Visual Land Prestige Pro 7D Speaker Replacement: step 4, image 2 of 2
    • Soldering guns are hot and can easily damage the device.

    • Desolder the two connection points at the black and red wires.

    • A helpful guide for desoldering can be found here How To Solder and Desolder Connections.

Conclusion

To reassemble your device, follow these instructions in reverse order.

Jennifer Laybourn

Member since: 10/14/14

353 Reputation

2 Guides authored

Team

Cal Poly, Team 10-41, Amido Fall 2014 Member of Cal Poly, Team 10-41, Amido Fall 2014

CPSU-AMIDO-F14S10G41

4 Members

12 Guides authored

0 Comments

Add Comment

View Statistics:

Past 24 Hours: 0

Past 7 Days: 0

Past 30 Days: 0

All Time: 581