
VTech VM3254 Monitor Circuit Board and Screen Replacement

What you need

  1. VTech VM3254 Monitor Circuit Board and Screen Replacement, Battery: step 1, image 1 of 2 VTech VM3254 Monitor Circuit Board and Screen Replacement, Battery: step 1, image 2 of 2
    • Turn the monitor on its back, and remove the two 8 mm Phillips #0 case screws.

  2. VTech VM3254 Monitor Circuit Board and Screen Replacement: step 2, image 1 of 3 VTech VM3254 Monitor Circuit Board and Screen Replacement: step 2, image 2 of 3 VTech VM3254 Monitor Circuit Board and Screen Replacement: step 2, image 3 of 3
    • Use the iFixit Jimmy tool to begin removing the face of the monitor.

    • You may need to use an opening pick to hold the screen open as you move the Jimmy tool around all the edges of the device.

    • Once the screen has been separated, lift it from the case.

    • Be gentle while removing the screen. There are wires connected to the two pieces that may be damaged.

  3. VTech VM3254 Monitor Circuit Board and Screen Replacement: step 3, image 1 of 2 VTech VM3254 Monitor Circuit Board and Screen Replacement: step 3, image 2 of 2
    • Remove the four 8 mm Phillips #00 screws from the bracket that secures the battery.

    • Remove the bracket.

  4. VTech VM3254 Monitor Circuit Board and Screen Replacement: step 4, image 1 of 3 VTech VM3254 Monitor Circuit Board and Screen Replacement: step 4, image 2 of 3 VTech VM3254 Monitor Circuit Board and Screen Replacement: step 4, image 3 of 3
    • Gently remove the battery from its location.

    • Carefully disconnect the bundled cable connector from the circuit board.

  5. VTech VM3254 Monitor Circuit Board and Screen Replacement, Monitor Speaker: step 5, image 1 of 2 VTech VM3254 Monitor Circuit Board and Screen Replacement, Monitor Speaker: step 5, image 2 of 2
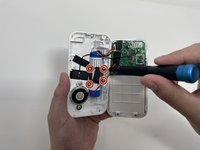
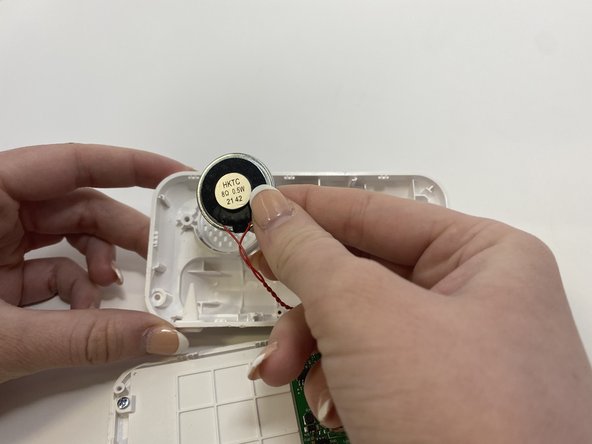
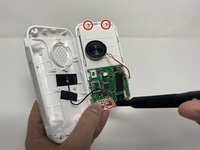
    • Remove the two 7 mm Phillips #00 screws from the speaker.

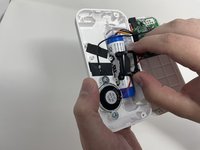
    • Carefully remove the speaker and its cords from the motherboard.

    • Handle gently to not break the motherboard or any other parts.

  6. VTech VM3254 Monitor Circuit Board and Screen Replacement: step 6, image 1 of 1
    • Desolder the wire connecting the speaker to the board.

  7. VTech VM3254 Monitor Circuit Board and Screen Replacement, Monitor Circuit Board and Screen: step 7, image 1 of 2 VTech VM3254 Monitor Circuit Board and Screen Replacement, Monitor Circuit Board and Screen: step 7, image 2 of 2
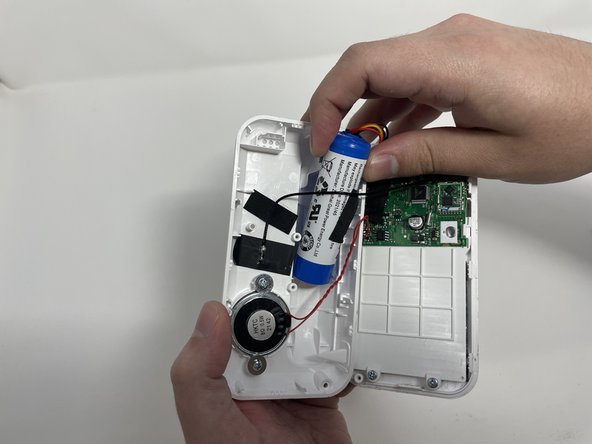
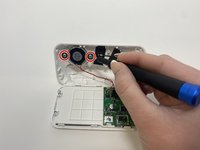
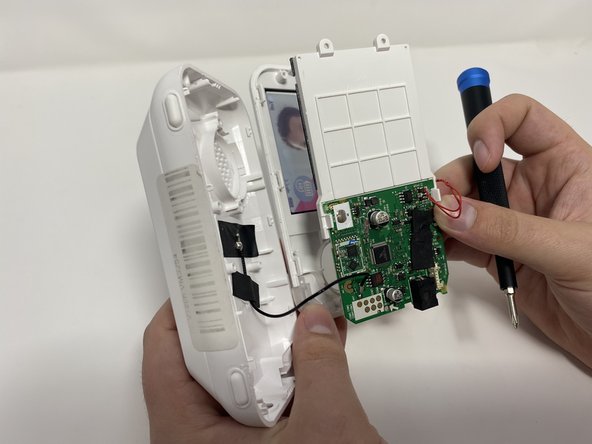
    • Remove the three 8 mm Phillips #00 screws.

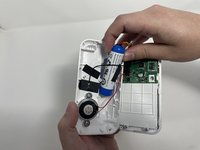
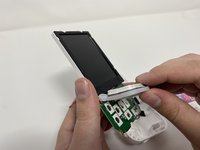
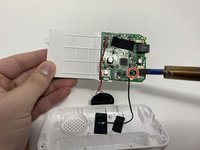
    • Gently remove the screen and circuit board from the case.

  8. VTech VM3254 Monitor Circuit Board and Screen Replacement: step 8, image 1 of 2 VTech VM3254 Monitor Circuit Board and Screen Replacement: step 8, image 2 of 2
    • Remove the button assembly from the front of the screen unit.

    • Flip the screen unit back over and desolder the wire holding it to the case.

Conclusion

To reassemble your device, follow these instructions in reverse order.

Christina Block

Member since: 02/09/23

375 Reputation

4 Guides authored

0 Comments

Add Comment

View Statistics:

Past 24 Hours: 3

Past 7 Days: 11

Past 30 Days: 39

All Time: 700