
VTech Safe And Sound DM221 Buttons Replacement

What you need

  1. VTech Safe And Sound DM221 Buttons Replacement, Buttons: step 1, image 1 of 1
    • Remove the battery cover by sliding it down.

  2. VTech Safe And Sound DM221 Buttons Replacement: step 2, image 1 of 1
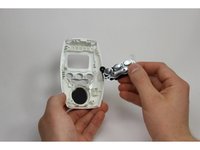
    • Firmly grasp the battery and pull to disconnect the battery from its connector.

  3. VTech Safe And Sound DM221 Buttons Replacement: step 3, image 1 of 1
    • Using a Phillips #00 screwdriver, unscrew the two 5.0 mm screws located at the bottom of the monitor inside of the device.

  4. VTech Safe And Sound DM221 Buttons Replacement: step 4, image 1 of 1
    • Using a plastic opening tool, pry apart the front part of the device from the back. There are many access points, but the best spot to insert the spudger is around the "TALK" button.

    • Avoid using the metal spudger. When working with electronics, it's important to choose a tool that's ESD-safe to avoid accidental damage to the device. The regular black nylon spudger or a plastic opening tool should be used whenever possible.

  5. VTech Safe And Sound DM221 Buttons Replacement: step 5, image 1 of 2 VTech Safe And Sound DM221 Buttons Replacement: step 5, image 2 of 2
    • Remove the buttons from the front part of the device.

    • Tip: The buttons on the front of the device (“POWER,” “SELECT,” “MENU,” “VOLUME”) are all connected as one unit. Pull them out carefully.

Conclusion

To reassemble your device, follow these instructions in reverse order.

Krystal

Member since: 10/01/15

600 Reputation

5 Guides authored

Team

USF Tampa, Team 1-5, Leahy Fall 2015 Member of USF Tampa, Team 1-5, Leahy Fall 2015

USFT-LEAHY-F15S1G5

4 Members

5 Guides authored

0 Comments

Add Comment

View Statistics:

Past 24 Hours: 0

Past 7 Days: 0

Past 30 Days: 2

All Time: 355