
Ubee DVW23C Power Supply Unit Replacement

What you need

  1. Ubee DVW23C Power Supply Unit Replacement, Power Supply Unit: step 1, image 1 of 3 Ubee DVW23C Power Supply Unit Replacement, Power Supply Unit: step 1, image 2 of 3 Ubee DVW23C Power Supply Unit Replacement, Power Supply Unit: step 1, image 3 of 3
    • The DVW32C(B) (The B is only present when provided by certain ISPs) is an easily user-serviceable device

    • It won't turn on and you want to replace the PSU? This guide will show you how.

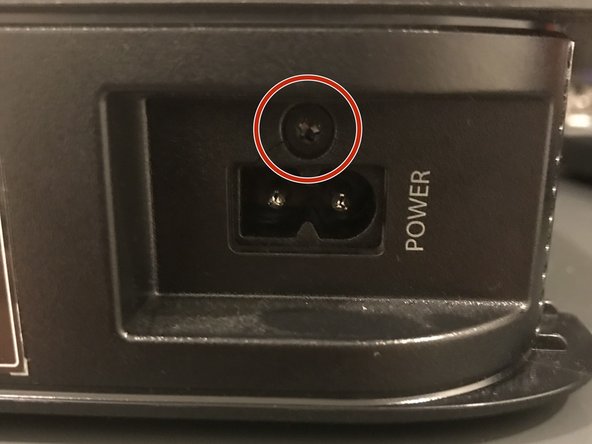
    • Let's get started. You need a T10 Torx Screwdriver for this guide.

  2. Ubee DVW23C Power Supply Unit Replacement: step 2, image 1 of 3 Ubee DVW23C Power Supply Unit Replacement: step 2, image 2 of 3 Ubee DVW23C Power Supply Unit Replacement: step 2, image 3 of 3
    • Unscrew these 4 screws. All screws on this device are T10.

    • Then, flip over the device

  3. Ubee DVW23C Power Supply Unit Replacement: step 3, image 1 of 1
    • Take a pry tool and pull the cover off, on the side facing up from the last step. This is the side without the label.

  4. Ubee DVW23C Power Supply Unit Replacement: step 4, image 1 of 2 Ubee DVW23C Power Supply Unit Replacement: step 4, image 2 of 2
    • You can now see inside.

    • The PSU is marked in red

    • The lights are marked in yellow

    • The Broadcom Chip is marked in green

  5. Ubee DVW23C Power Supply Unit Replacement: step 5, image 1 of 2 Ubee DVW23C Power Supply Unit Replacement: step 5, image 2 of 2
    • Unscrew the 2 screws marked in red.

    • WARNING: The screw by the connector is a different size than the chassis screw. Keep PSU screws and chassis screws separate.

    • Disconnect the PSU Cable from the motherboard.

  6. Ubee DVW23C Power Supply Unit Replacement: step 6, image 1 of 1
    • You can now remove the PSU.

    • Great job! Make sure you properly reconnect the cable connecting the motherboard and PSU after replacement.

Conclusion

To reassemble your device, follow these instructions in reverse order, and plug in the PSU into the motherboard.

One other person completed this guide.

9021007

Member since: 07/13/18

4,599 Reputation

25 Guides authored

0 Comments

Add Comment

View Statistics:

Past 24 Hours: 0

Past 7 Days: 1

Past 30 Days: 5

All Time: 89