Free Shipping on Domestic Orders $75+

Trio Stealth-Mini Screen Replacement

What you need

    1. Trio Stealth-Mini Screen Replacement, Battery: step 1, image 1 of 2 Trio Stealth-Mini Screen Replacement, Battery: step 1, image 2 of 2
      • Locate the indentation at the bottom of the device.

      Ask FixBot

      Add Comment

    2. Trio Stealth-Mini Screen Replacement: step 2, image 1 of 3 Trio Stealth-Mini Screen Replacement: step 2, image 2 of 3 Trio Stealth-Mini Screen Replacement: step 2, image 3 of 3
      • Pull on the indentation and take off the casing of the device.

      Ask FixBot

      Add Comment

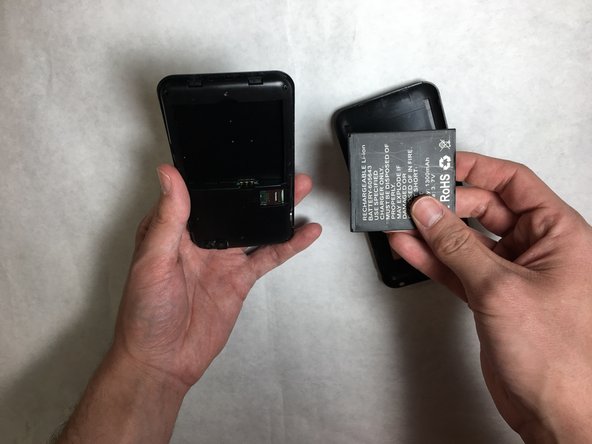
    3. Trio Stealth-Mini Screen Replacement: step 3, image 1 of 2 Trio Stealth-Mini Screen Replacement: step 3, image 2 of 2
      • Remove the faulty battery and insert a replacement in its slot.

      Ask FixBot

      Add Comment

    1. Trio Stealth-Mini Screen Replacement, Screen: step 4, image 1 of 1
      • Remove the six 2.4 mm, Phillips #0 screws circled in the image.

      Ask FixBot

      Add Comment

    2. Trio Stealth-Mini Screen Replacement: step 5, image 1 of 1
      • Remove inner casing exposing the motherboard.

      Ask FixBot

      Add Comment

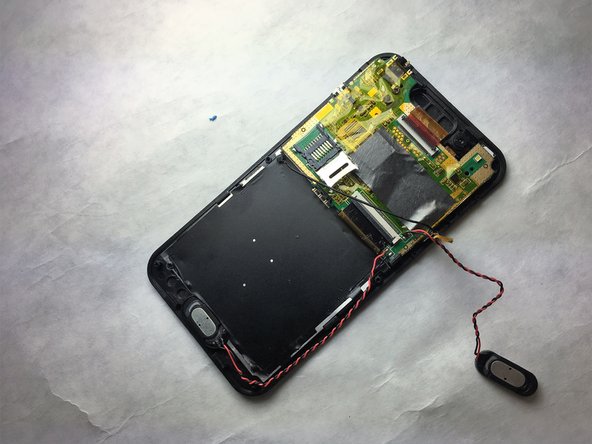
    3. Trio Stealth-Mini Screen Replacement: step 6, image 1 of 2 Trio Stealth-Mini Screen Replacement: step 6, image 2 of 2
      • Remove speakers by peeling back yelllow tape.

      Ask FixBot

      Add Comment

    4. Trio Stealth-Mini Screen Replacement: step 7, image 1 of 1
      • Remove ribbon cable on top of motherboard.

      Ask FixBot

      Add Comment

    5. Trio Stealth-Mini Screen Replacement: step 8, image 1 of 1
      • Peeling back yellow tape, remove the 2.5 mm Phillips #0 screws on top of motherboard.

      Ask FixBot

      Add Comment

    6. Trio Stealth-Mini Screen Replacement: step 9, image 1 of 1
      • Remove the three 2.5 mm Phillips #0 screws attaching screen to main assembly.

      Ask FixBot

      Add Comment

    7. Trio Stealth-Mini Screen Replacement: step 10, image 1 of 1
      • Verify that all screws are detached from screen.

      Ask FixBot

      Add Comment

    8. Trio Stealth-Mini Screen Replacement: step 11, image 1 of 1
      • Detach screen from main assembly.

      Ask FixBot

      Add Comment

Conclusion

To reassemble your device, follow these instructions in reverse order.

Cancel: I did not complete this guide.

Stewart Jenkins

Member since: 03/26/18

207 Reputation

1 Guide authored

Team

IUPUI, Team S1-G1, Harley Spring 2018 Member of IUPUI, Team S1-G1, Harley Spring 2018

IUPUI-HARLEY-S18S1G1

7 Members

48 Guides authored

1 Guide Comment

How can I do step 5? Do i need to push on the rectangle slots? It’s not very descriptive.

Nick “Blue” Wong - Reply Share

Add Comment

View Statistics:

Past 24 Hours: 2

Past 7 Days: 5

Past 30 Days: 27

All Time: 544