
Toshiba Satellite L675D-S7015 Cooling Fan Replacement

What you need

  1. Toshiba Satellite L675D-S7015 Cooling Fan Replacement, Battery: step 1, image 1 of 1
    • Flip the laptop on a scratch free surface, exposing underneath the laptop.

    • Identify the unlocking latches denoted by the red circles.

  2. Toshiba Satellite L675D-S7015 Cooling Fan Replacement: step 2, image 1 of 2 Toshiba Satellite L675D-S7015 Cooling Fan Replacement: step 2, image 2 of 2
    • Simply slide the latches outward to the unlocked position.

    • The latches should stay in the unlocked position. If not, hold them in the unlocked position.

    • With the latches in the unlocked position, slide the battery out, away from the laptop.

  3. Toshiba Satellite L675D-S7015 Cooling Fan Replacement, Keyboard: step 3, image 1 of 2 Toshiba Satellite L675D-S7015 Cooling Fan Replacement, Keyboard: step 3, image 2 of 2
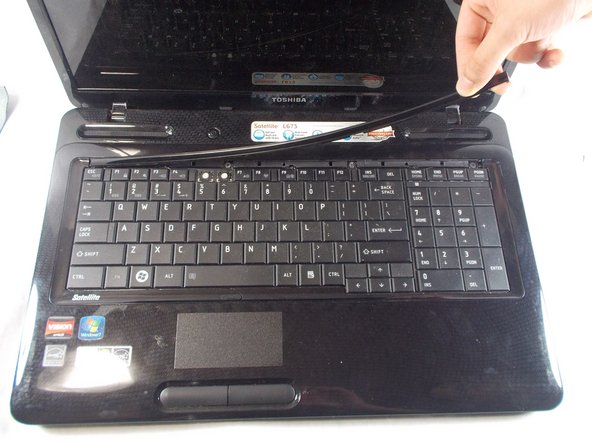
    • Use a spudger to pry under the corner of the thin piece of plastic located above the keyboard.

    • Once part of the plastic guard is up, continue to pull up gently until the piece pops off of the laptop exposing 4 screws.

  4. Toshiba Satellite L675D-S7015 Cooling Fan Replacement: step 4, image 1 of 2 Toshiba Satellite L675D-S7015 Cooling Fan Replacement: step 4, image 2 of 2
    • With the screws exposed, grab your Phillips #1 screwdriver and remove the four 4 mm screws.

    • Make sure you do not lose them since you will need them to reinstall your new keyboard.

  5. Toshiba Satellite L675D-S7015 Cooling Fan Replacement: step 5, image 1 of 2 Toshiba Satellite L675D-S7015 Cooling Fan Replacement: step 5, image 2 of 2
    • With the screws removed, you are ready to take out the keyboard. Lift the keyboard from the top and carefully pull the keyboard away from the laptop.

    • There is a thin connector that wires the keyboard to the motherboard. Pulling on this to hard could cause damage to the clip that will connect your new keyboard to the motherboard and require you to purchase a new one.

  6. Toshiba Satellite L675D-S7015 Cooling Fan Replacement: step 6, image 1 of 2 Toshiba Satellite L675D-S7015 Cooling Fan Replacement: step 6, image 2 of 2
    • With the connector exposed, use a couple spudgers to hold the two clips in and carefully slide out the ribbon connector.

    • Once removed, the keyboard is free to be replaced with a new one.

  7. Toshiba Satellite L675D-S7015 Cooling Fan Replacement, Cooling Fan: step 7, image 1 of 1
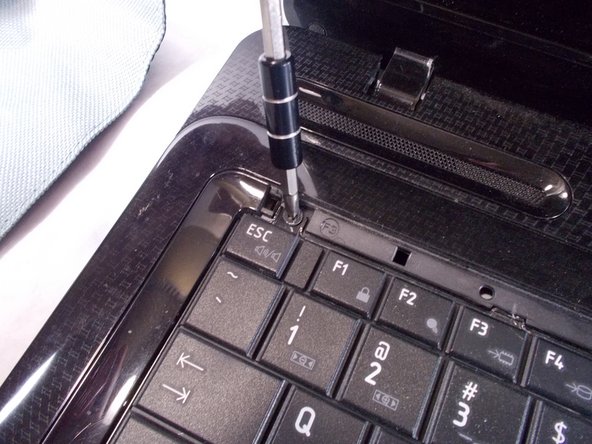
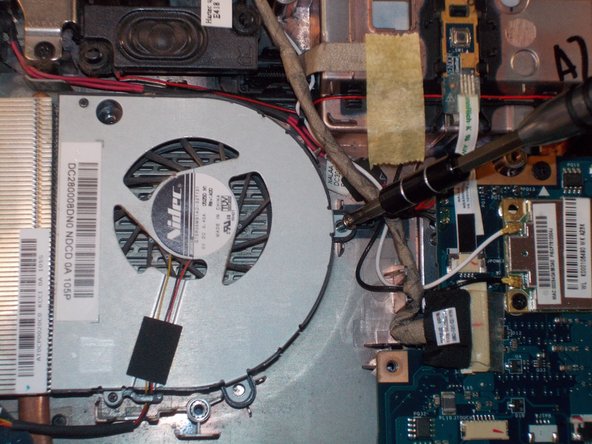
    • With the device flipped on its back, identify the screw shown and remove with Phillips head #1 screwdriver.

  8. Toshiba Satellite L675D-S7015 Cooling Fan Replacement: step 8, image 1 of 1
    • Lift the removal tab upward, you will hear the clips that hold the tab release. Move in a clockwise direction releasing the remaining clips. Once all clips are released, remove the cover.

  9. Toshiba Satellite L675D-S7015 Cooling Fan Replacement: step 9, image 1 of 1
    • With the cover removed, locate and remove single screw with Phillips head #1 screwdriver.

  10. Toshiba Satellite L675D-S7015 Cooling Fan Replacement: step 10, image 1 of 1
    • Turn device over so you are looking at the top of the device. Then, remove these five 5mm screws from under the keyboard.

  11. Toshiba Satellite L675D-S7015 Cooling Fan Replacement: step 11, image 1 of 2 Toshiba Satellite L675D-S7015 Cooling Fan Replacement: step 11, image 2 of 2
    • Locate the track-pad connector ribbon.

    • Pull ribbon away from its connector.

  12. Toshiba Satellite L675D-S7015 Cooling Fan Replacement: step 12, image 1 of 1
    • Pry from under the top case housing along the perimeter of the device with the plastic opening tool.

  13. Toshiba Satellite L675D-S7015 Cooling Fan Replacement: step 13, image 1 of 2 Toshiba Satellite L675D-S7015 Cooling Fan Replacement: step 13, image 2 of 2
    • Locate and remove the two 5mm screws using the screwdriver.

  14. Toshiba Satellite L675D-S7015 Cooling Fan Replacement: step 14, image 1 of 2 Toshiba Satellite L675D-S7015 Cooling Fan Replacement: step 14, image 2 of 2
    • Use a spudger to disconnect the fan wire from its connector.

    • Remove the fan from the device.

    • Be careful not to damage the fan connector pins. A broken pin may require you to completely replace the fan.

Conclusion

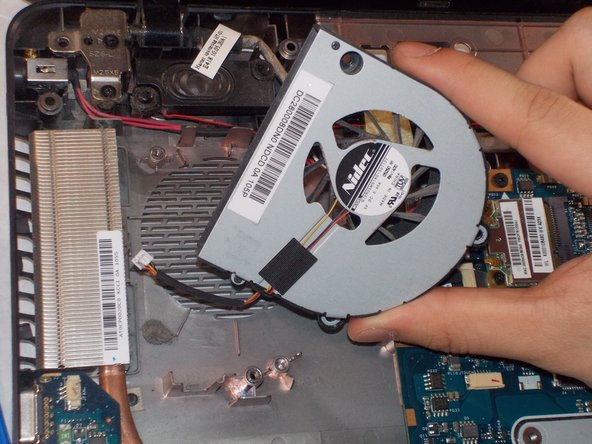
To reassemble your device, follow these instructions in reverse order.

James Pierce

Member since: 03/26/19

157 Reputation

1 Guide authored

0 Comments

Add Comment

View Statistics:

Past 24 Hours: 0

Past 7 Days: 1

Past 30 Days: 6

All Time: 167