
Toshiba Encore Mini Screen Replacement

What you need

  1. Toshiba Encore Mini Screen Replacement, Battery: step 1, image 1 of 2 Toshiba Encore Mini Screen Replacement, Battery: step 1, image 2 of 2
    • To replace the battery, the rear cover must first be removed.

    • Using the flat end of the spudger, gently pry open the back case from the rest of the device.

    • It may be easier to start along one of the long edges and carefully work your way toward the corner, then along the short edge.

  2. Toshiba Encore Mini Screen Replacement: step 2, image 1 of 1
    • Remove the rear cover and set it aside.

  3. Toshiba Encore Mini Screen Replacement: step 3, image 1 of 1
    • Carefully remove the electrical tape that holds the battery in place.

  4. Toshiba Encore Mini Screen Replacement: step 4, image 1 of 2 Toshiba Encore Mini Screen Replacement: step 4, image 2 of 2
    • Using needle-nose tweezers, gently push the large white wire connector (connected to the black, red and blue wires) out of its housing.

  5. Toshiba Encore Mini Screen Replacement: step 5, image 1 of 1
    • Gently lift the battery out of the device.

    • Be careful not to pull on the connecting wires.

  6. Toshiba Encore Mini Screen Replacement, Screen: step 6, image 1 of 3 Toshiba Encore Mini Screen Replacement, Screen: step 6, image 2 of 3 Toshiba Encore Mini Screen Replacement, Screen: step 6, image 3 of 3
    • The audio module must be removed to replace the screen.

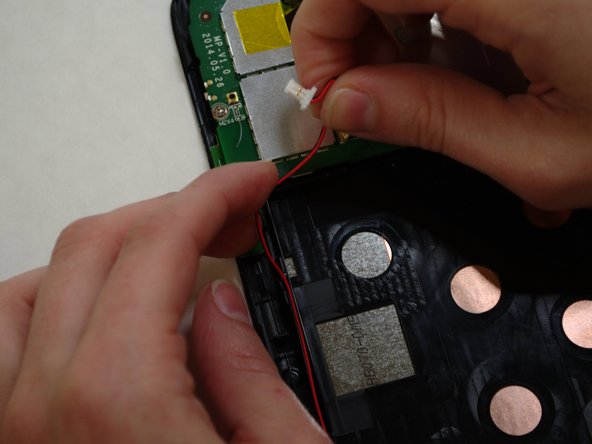
    • Using needle-nose tweezers, carefully push the small white wire connector (red/black wires) out of its housing.

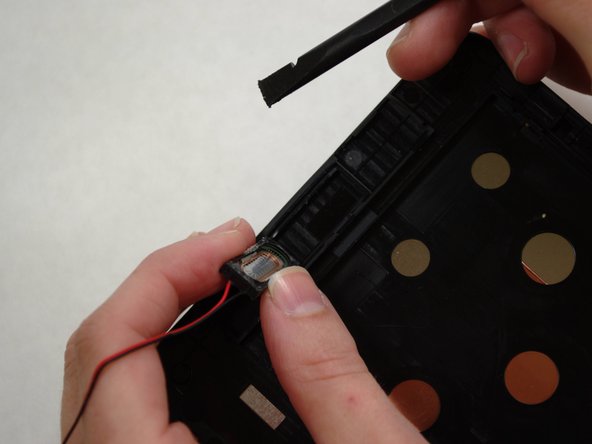
    • Gently remove red/black wire strands from the clips holding them to the back of the screen.

  7. Toshiba Encore Mini Screen Replacement: step 7, image 1 of 2 Toshiba Encore Mini Screen Replacement: step 7, image 2 of 2
    • Gently pry audio module from the back of the screen using tweezers and spudger. Be careful not to pull on the wires.

    • Adhesive on the bottom of the speaker module may make it difficult to remove.

    • Set the audio module and attached wire aside.

  8. Toshiba Encore Mini Screen Replacement: step 8, image 1 of 3 Toshiba Encore Mini Screen Replacement: step 8, image 2 of 3 Toshiba Encore Mini Screen Replacement: step 8, image 3 of 3
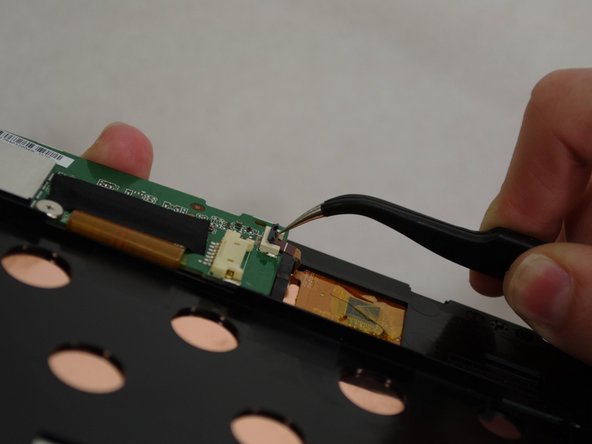
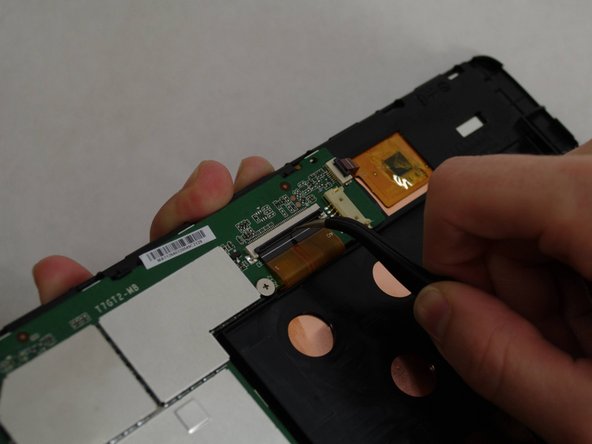
    • Using needle-nose tweezers, carefully flip up the dark gray cover on the right of the device holding the small orange/gold ribbon in place. (It is approximately 1/4" wide.)

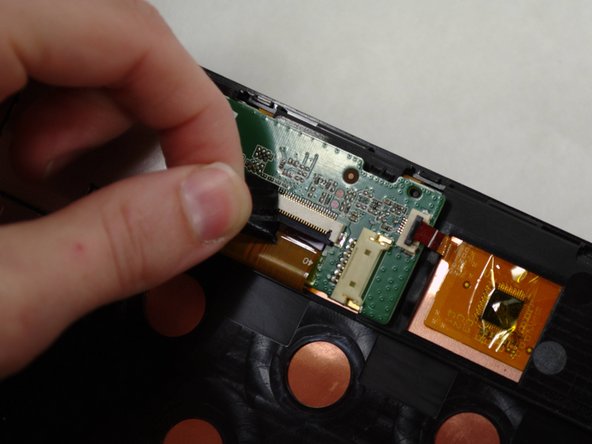
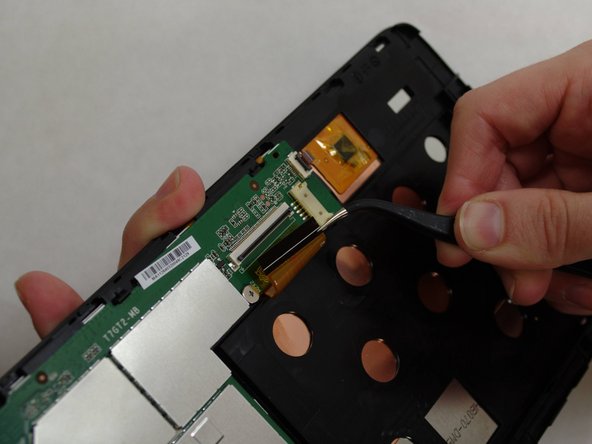
    • With the tweezers, carefully pull the small ribbon out of its housing. It will stay attached to the device at the other end.

  9. Toshiba Encore Mini Screen Replacement: step 9, image 1 of 2 Toshiba Encore Mini Screen Replacement: step 9, image 2 of 2
    • A wide orange/gold ribbon connects the screen to the motherboard. (Ribbon is approximately 1" wide.)

    • Carefully pull the black tape off the ribbon housing and set it aside. You will need to replace the tape when reassembling the device.

  10. Toshiba Encore Mini Screen Replacement: step 10, image 1 of 3 Toshiba Encore Mini Screen Replacement: step 10, image 2 of 3 Toshiba Encore Mini Screen Replacement: step 10, image 3 of 3
    • Damaging this ribbon will permanently disable your device!

    • Using needle-nose tweezers, carefully flip up the dark gray cover.

    • With the tweezers, carefully pull the wide ribbon from its housing. It will stay attached to the device at the other end.

  11. Toshiba Encore Mini Screen Replacement: step 11, image 1 of 3 Toshiba Encore Mini Screen Replacement: step 11, image 2 of 3 Toshiba Encore Mini Screen Replacement: step 11, image 3 of 3
    • Using a Phillips 000 screwdriver, remove the screws holding components together.

    • Remove four 4.2 mm Phillips screws

    • Remove one 3 mm Phillips screw

  12. Toshiba Encore Mini Screen Replacement: step 12, image 1 of 2 Toshiba Encore Mini Screen Replacement: step 12, image 2 of 2
    • Holding the motherboard carefully by the edges, gently lift it up off the screen and carefully set it aside.

    • The motherboard may resist as you try to lift it --this is normal.

  13. Toshiba Encore Mini Screen Replacement: step 13, image 1 of 1
    • Now that your screen is detached from the rest of the device components, it is ready to be replaced.

Conclusion

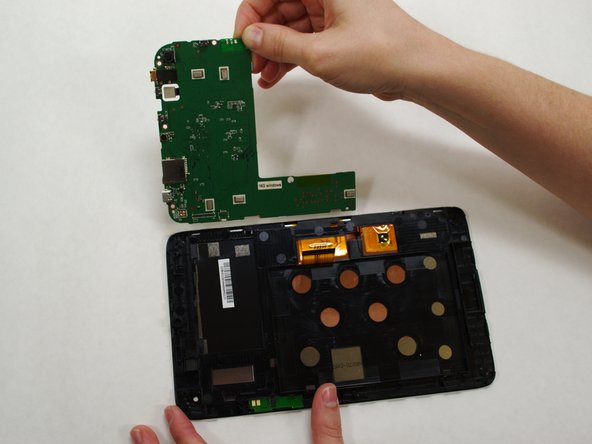
To reassemble your device, follow these instructions in reverse order.

Christine co

Member since: 07/09/15

131 Reputation

1 Guide authored

Team

UW Tacoma, Team 1-3, Liner SU 2015 Member of UW Tacoma, Team 1-3, Liner SU 2015

UWT-LINER-SU15S1G3

4 Members

6 Guides authored

One Comment

What is the small orange/gold ribbon in step 8 used for? I'm assuming that it's what registers touches on the screen because my tablet isn't reading my touches. I ask this because the dark grey bar on my tablet has been broken off, so there's nothing to hold the ribbon in place, and I can't do anything on my tablet because it won't respond to me touching it.

Gregory Banks - Reply

Add Comment

View Statistics:

Past 24 Hours: 0

Past 7 Days: 0

Past 30 Days: 1

All Time: 1,508