
Top Shell

David and 3 other contributors
Last updated on Jan 28, 2014
Views: 2.5K
View statistics:
- Past 24 Hours:
- 1
- Past 7 Days:
- 24
- Past 30 Days:
- 92
- All Time:
- 2,466
Comments: 5
5 comments on steps.
Completed: 3 4
3 people have marked this guide "completed." Will you be next?
4 people have marked this guide "completed." Including you — great job!
Favorites: 0 1
No one has favorited (and subscribed to) this guide. Will you be the first?
1 person has favorited (and subscribed to) this guide — and that's you!
Action Shots
Be an action hero! This guide needs images that better demonstrate how to perform specific actions.
Needs Better Images
Better photos will improve this guide. Help out by taking, editing, or uploading new ones!
Needs More Images
A few more images would make this guide's procedures crystal clear.
Better Introduction
Improve this guide by completing or revising its introduction.
What you need
Tools
-
Spudger4.9


-
-
-
Flip the mouse over and peel off the stickers on the perimeter of the bottom of the mouse.
 Ask FixBot
-
-
-
Use the Phillips #1 screwdriver to remove four 5 mm screws from the bottom of the mouse.
-
Use the Phillips #1 screwdriver to remove the two 9 mm screws from the bottom of the mouse.
-
-
-
Touch your capacitor discharge tool to the capacitor leads on the board to release the stored energy. If leads are inaccessible, wait until you've removed the board from the mouse body.
-
-
-
-
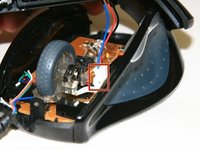
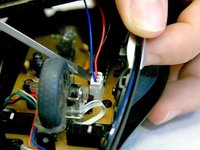
Use a spudger to pry underneath the white plug and pop it out to disconnect the upper board from the lower board.
-
-
-
-
-
Remove the 5 mm round head screw holding the middle piece to the top piece.
-
The outermost shell will now separate from the middle structure.
-
-


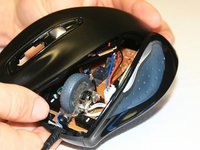
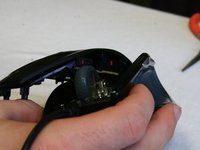
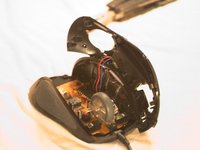



To reassemble your device, follow these instructions in reverse order.
Cancel: I did not complete this guide.
3 other people completed this guide.

Team

Cal Poly, Team 18-36, Regan Winter 2013 Member of Cal Poly, Team 18-36, Regan Winter 2013
CPSU-REGAN-W13S18G36
3 Members
84 Guides authored
