Introduction
If you would like to replace the wheel on a utility cart, or even rearrange the wheels, use this step by step guide to do so. This guide can be useful if a wheel on your utility cart breaks or if you simply want to replace your wheels.
What you need
-
-
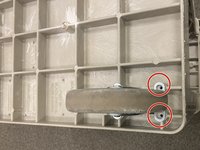
Use the Phillips #2 screwdriver to remove all the screws from the metal plate.
-
-
-
-
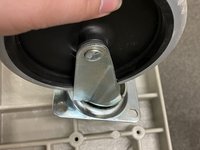
Remove the old wheel.
-
Place the new wheel with the metal plate directly on top of the cart so that the holes on the metal plate are aligned with the holes on the cart.
-


Cancel: I did not complete this guide.
One other person completed this guide.
Team

Texas Tech, Team S3-G11, Cowan Spring 2021 Member of Texas Tech, Team S3-G11, Cowan Spring 2021
TTU-COWAN-S21S3G11
1 Member
3 Guides authored