Free Shipping on Domestic Orders $75+

Thrustmaster T Flight Hotas 4 Bottom Panel Replacement

What you need

    1. Thrustmaster T Flight Hotas 4 Bottom Panel Replacement, J1 Screws on Bottom Panel: step 1, image 1 of 1
      • Be sure to disconnect the controller from the power source before disassembling.

      • Turn the controller upside down.

      • Remove the 20 mm J1 JIS head screw.

      • Remove the six 12 mm J1 JIS head screws.

      • Remove the two 6 mm J1 JIS head screws.

      Ask FixBot

      Add Comment

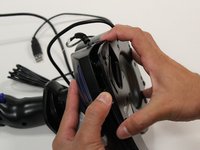
    2. Thrustmaster T Flight Hotas 4 Bottom Panel Replacement: step 2, image 1 of 1
      • Insert opening tool or finger into the divet located beneath the USB port.

      Ask FixBot

      Add Comment

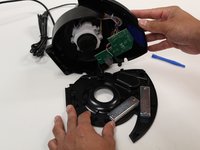
    1. Thrustmaster T Flight Hotas 4 Bottom Panel Replacement, Bottom Panel: step 3, image 1 of 2 Thrustmaster T Flight Hotas 4 Bottom Panel Replacement, Bottom Panel: step 3, image 2 of 2
      • Gently pull the panel away from the controller.

      Ask FixBot

      Add Comment

Conclusion

To reassemble your device, follow these instructions in reverse order.

Cancel: I did not complete this guide.

2 other people completed this guide.

Aaron Banaga

Member since: 09/11/17

556 Reputation

4 Guides authored

Team

CSU Fullerton, Team S2-G1, Bruce Fall 2017 Member of CSU Fullerton, Team S2-G1, Bruce Fall 2017

CSUF-BRUCE-F17S2G1

3 Members

110 Guides authored

0 Guide Comments

Add Comment

View Statistics:

Past 24 Hours: 1

Past 7 Days: 7

Past 30 Days: 79

All Time: 7,489