
ThinkPad T420 Keyboard reinstallation Replacement

Prerequisite Only
This is a prerequisite-only guide! This guide is part of another procedure and isn’t meant to be used alone.
  1. ThinkPad T420 Keyboard reinstallation Replacement, Keyboard reinstallation: step 1, image 1 of 3 ThinkPad T420 Keyboard reinstallation Replacement, Keyboard reinstallation: step 1, image 2 of 3 ThinkPad T420 Keyboard reinstallation Replacement, Keyboard reinstallation: step 1, image 3 of 3
    • If you are upgrading the RAM this will be done last. Once both modules are installed, perform this step without reinstalling the screw, then reinstall the screw once the module is accepted and working.

    • Reconnect the keyboard to the motherboard. Once connected, slide the top (volume controls) in first.

    • Once the top of the keyboard is pushed in, slide the keyboard down to re-engage the lower clips until they are not visible.

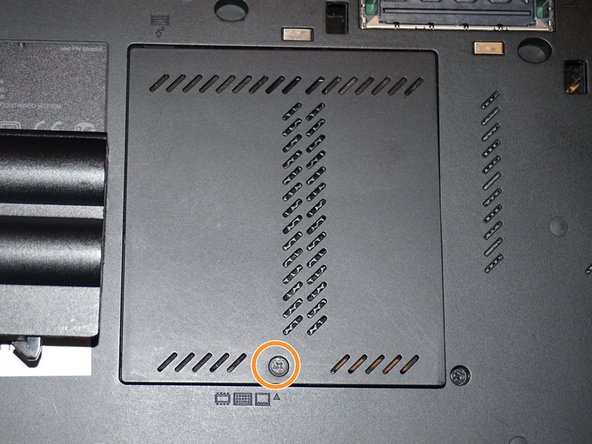
    • Replace the silver screw and RAM door.

  2. ThinkPad T420 Keyboard reinstallation Replacement, Reinstall the keyboard screw: step 2, image 1 of 3 ThinkPad T420 Keyboard reinstallation Replacement, Reinstall the keyboard screw: step 2, image 2 of 3 ThinkPad T420 Keyboard reinstallation Replacement, Reinstall the keyboard screw: step 2, image 3 of 3
    • Reinstall the keyboard screw.

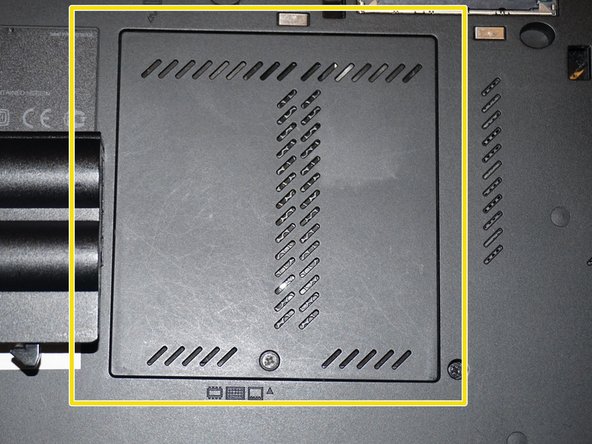
    • Reinstall the RAM door.

    • When the cover is properly reinstalled, it will be flush with the laptop.

Conclusion

To reassemble your device, follow these instructions in reverse order.

Nick

Member since: 11/10/09

98,614 Reputation

63 Guides authored

Team

Master Techs Member of Master Techs

Community

329 Members

1,451 Guides authored

0 Guide Comments

Add Comment

View Statistics:

Past 24 Hours: 0

Past 7 Days: 5

Past 30 Days: 12

All Time: 181