
Thermal Pad Replacement

Sparky and one other contributor
Last updated on Jul 10, 2026
Views: 897
View statistics:
- Past 24 Hours:
- 10
- Past 7 Days:
- 83
- Past 30 Days:
- 389
- All Time:
- 897
Comments: 0
No one has left comments on this guide. Will you be first?
Go to guide commentsCompleted: 0 1
No one has marked this guide "completed." Will you be the first?
1 person has marked this guide "completed." It's you — great job!
Favorites: 0 1
No one has favorited (and subscribed to) this guide. Will you be the first?
1 person has favorited (and subscribed to) this guide — and that's you!
Needs More Images
A few more images would make this guide's procedures crystal clear.
Community-Contributed Guide
An awesome member of our community made this guide. It was not created by iFixit staff.
What you need
Parts
-
-
×4


Tools
-
-
-
Before you start, make sure to ground yourself and your work surface properly to prevent damage from static electricity.
 Ask FixBot
-
-
-
Unscrew the four heatsink screws from the back of the graphics card.
-
These are the ones nearest the PCIe connector, with the springs.
-
-
-
Gently lift the GPU and its backplate off the heatsink.
-
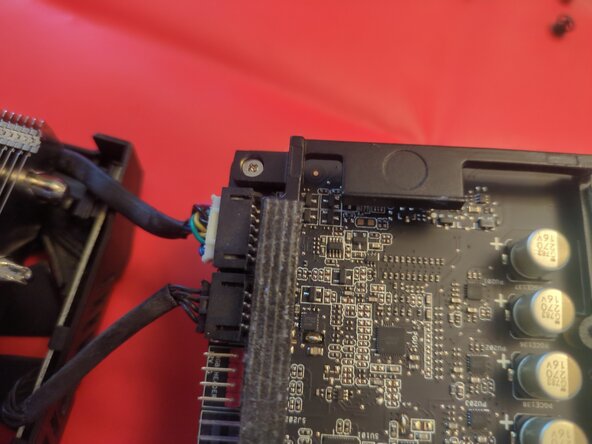
Unplug the two cables holding the halves together.
-
-
-
Only the GPU die requires thermal paste; the other chips are covered by thermal pads under the black reinforcing frame.
-
Clean off the thermal paste and apply fresh paste.
-
Skip this step and the next when replacing the thermal pads.
-
-
-
When reassembling, place the GPU on the heatsink, lining up the four holes for the screws.
-
Start each of the screws in their threaded holes before tightening any of them.
-
Reconnect the two cables into the black sockets after the heatsink is secured.
-
-
-
-
-
-
Remove the backplate, then carefully remove the black metal frame.
-
Use thermal putty or thick thermal pads to cover the three sets of VRAM chips and the row of VRMs (under the big pad on the left).
-




To reassemble your device, follow these instructions in reverse order.

