Introduction
This guide will walk you through the process of replacing the chain on a Stihl chainsaw. This guide will also show how to properly sharpen a worn out chain. Chainsaws are dangerous tools. Before you start working on your saw, make sure you have the proper personal protective equipment. This includes gloves, a long sleeve shirt and pants, eye protection, and chainsaw chaps if you are planning to run the saw. After you read this guide you should be able to safely disassemble and reassemble your chainsaw.
As with any piece of dangerous equipment, turn off the chainsaw before you begin the repair.
What you need
-
-
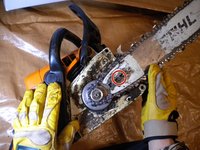
Loosen the nuts on the chain cover with the wrench side of the scrench until the cover comes off of the saw.
 Ask FixBot
-
-
-
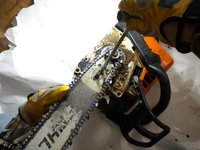
Clean out the grooves on the chainsaw bar. This will help with the next step.
-
-
-
-
Place the bar and chain back onto the saw.
-
The bolt slot on the bar will slide onto the bolts on the saw.
-
The chain will go around the gear towards the back of the saw.
-
-
-
Tighten the chain by turning the tightening screw.
-
Insert the screwdriver end of the scrench into the screw and turn clockwise.
-
-
-
Skip one tooth to continue to sharpen on the same side. Use the same number of file strokes on each tooth.
-
Continue to sharpen until you reach the original tooth that was marked. You can then sharpen the set of teeth facing the other way with the same process.
-


Cancel: I did not complete this guide.
3 other people completed this guide.
Team

Michigan Tech, Team 1-3, Lauer Spring 2016 Member of Michigan Tech, Team 1-3, Lauer Spring 2016
MTU-LAUER-S16S1G3
1 Member
1 Guide authored