Introduction
This disassembly process was for goal to analyse and identify potential areas which could be repaired by even a novice to avoid the product being thrown away if a problem occurs.
-
-
Continuing with the bottom section of the Steampod (where the steam comes out), locate the first two Phillips screw at the back and work your way to the front.
-
Do keep in mind that the screw heads are not the same size hence various magnitudes of screwdrivers will be required.
-
No. 1: M1.7X10
-
No. 2 & 3: M1.7X5
-
No. 4: M3.0X8
-
No. 5: MM2.0X8
 Ask FixBot
-
-
-
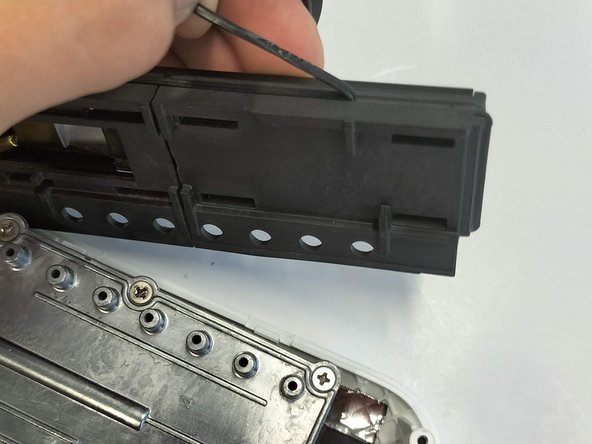
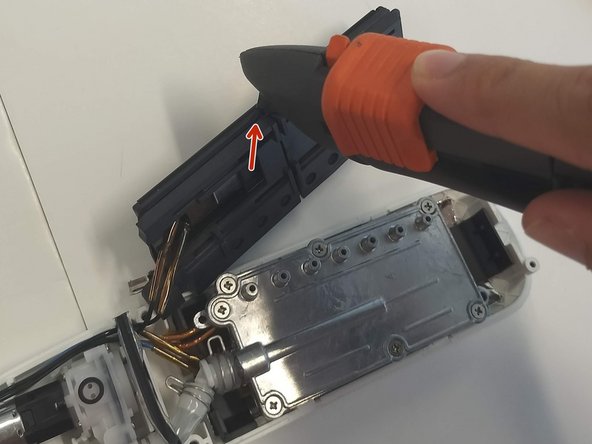
Once all of the screws keeping the casings together are detached, use a thin and flexible object such as a card or an opening tool to separate the two sections.
-
Only pull apart the two parts once you have fully gone around with the card to avoid anything breaking. The heating plate will want to stay with the black casing hence slowly push it through the hole as it is mainly connected to the white casing along with the wires and pump.
-
Rotate the upper handle alongside the upper black casing to get a clear working space when disassembling the lower section.
-
-
-
Identify and unscrew the single silver Phillips screw(M2.4X5.5) located on the heating plate. This keeps the rubber sealing and the main heating element.
-
Remove lightly the rubber section then we will be able to easily separate the top black part which contains the PTC plate and the bottom silver section which consists of a steam chamber and another PTC heating element.
-
Try to remove the rubber sealing which was wrapped around the two heater support. In this case it happened that they were glued together, making it impossible to access the next part if we didn't get rid of it.
-
-
-
As we had no way to separate the rubber sealing and the heating support, the only solution was to cut the middle section with a cutter which kept both supports together. This however meant that the reassembly could be possible but would not have the same elasticity from the rubber.
-
Slide one of the heating support outwards, which leaves us with the PTC heating element and one side of the heating support. However, we were unable to continue further due to the two golden wires which prevented the sliding of the heating support. this suggests the only way to fully disassemble this component will have to be soldering.
-
-
-
Identify the seven Phillips screw located on the upper part of the steam chamber and 6 smaller versions located underneath, which contained the PTC heating element.
-
In our case, we were unable to proceed any further as we were only able to unscrew the first two of the seven screws. The screws happened to be extremely tightly shut or were perhaps purposefully glued together to prevent any kind of opening.
-
This was mainly due to the lack of support and flat surface which prevented the application of a large force without breaking the casing or other components.
-
-
-
-
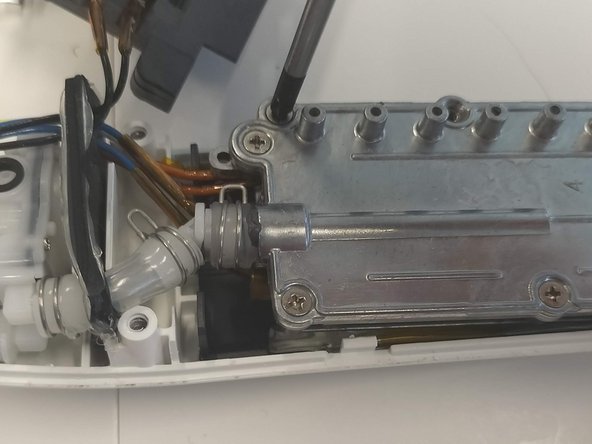
Onto the tubing and pump section, use needle-nose pliers to squeeze the metal clamps around the tube and release them in the middle. This will facilitate the disassembly of the tubes.
-
Locate the opaque rubber section which serves as connecting between the water reservoir and the pump system. Pinch the sides and gently lift it out of its support. You will be able to dislodge the entire system now, which will allow for more space to work with
-
-
Tool used on this step:Tweezers$4.99
-
There is a white tube connector which is held in place by being simply pushed in. This means by pinching the sides and pulling it, we will be able to remove the connector and the tubes attached to it from the pump.
-
Removing the individual tubes is relatively straightforward: use a needle or a pair of tweezers to grab the outer section of the tube (there is an inner and outer section to prevent leaks). Gently pull the small white tube connector the other way as to get it out the inner tube as well.
-
-
-
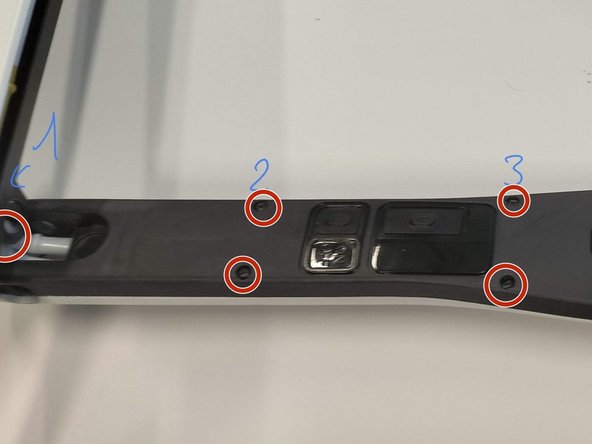
Onto the upper section, turn around the product as to get locate the screws holding the black and white casing together.
-
There is a total of 9 screws (4 pairs + one large located at the bottom). They are all of different size hence multiple screwdrivers will be needed again.
-
No.1&4: M3.0X8
-
No. 2&3 : M1.6X8
-
No. 5: M1.8X6
-
-
-
Use a flexible and thin tool such as a card or an opening tool to the upper and lower section.
-
We can get rid of the white casing as the circuit and the heating plate is more connected to the black upper section.
-
-
-
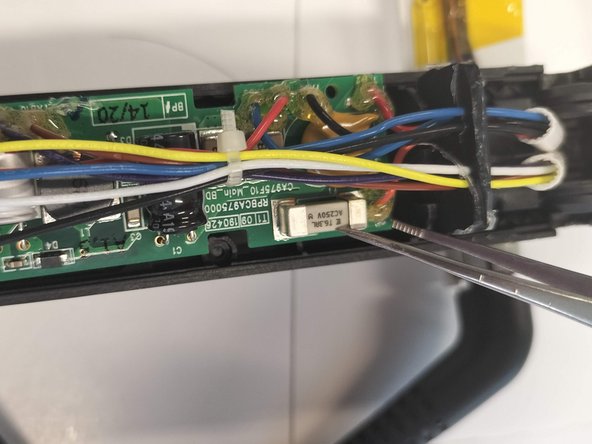
Use a pair of tweezers to get underneath the circuit. Use them as a kind of lever to push the circuit out of its support. Do proceed with care as the board is relatively thin and brittle which increases the risk of it snapping or breaking.
-
Another precaution might be when handling metallic tools with relatively sharp edges, handle with care as to not scratch or damage the circuit and the small components.
-
Once both edges are lifted, simply pull the black rubber sealing which is located in between the circuit and the heating plate.
-
-
-
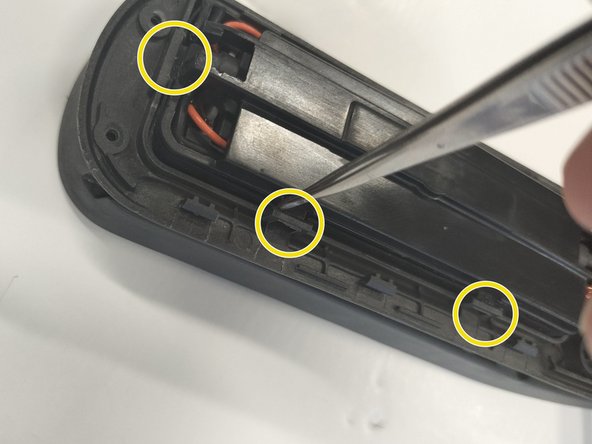
Similarly to removing the circuit board, use a pair of small tweezers which can get in between the main heating plate and the casing which holds it in place with the help of finger joints.
-
There are a total of 7 joints which keeps it in place, but you only need to take care of the bottom part first (closest to the circuit board) and the side which only has 2. They can be hard to locate and quite tricky to remove so take your time to avoid causing any damage.
-
We can now discard the black casing as well, which leaves us with the raw components which can be repaired
-
However, upon inspecting the heating plate further, we were unable to separate the components located in this box due to the use of rubber seals and soldered wires, making it very hard to disassemble without permanently damaging the product.
-
-
-
Once fully disassemble, if you do not have the correct tools, you will need the help of a professional. To facilitate their process, you should be able to locate which area or component needs repair, and inform them about the joining methods.
-
In this instance, if we were to replace or repair the motor (situated in the bottom right part of the 1st image) due to some sort problem, the professional would need to get rid of the sealing glue and the solder on the circuit board to detach the connected wires.
-
-
-
KSTools flat screwdriver: 3mm
-
KSTools Phillips screwdriver: 00, 0, 1
-
Wiha Phillips screwdriver: PH0 x 50
-
Dexter Phillips screwdriver: CrV-32
-
Needle-nose pliers
-
Cutter
-
Precision tweezers
-


1 Guide Comment
help me, my power button pulled down, i think has broke. i try find the sparepart but no one sell the sparepart