Free Shipping on Domestic Orders $75+

Soundboks 4 DC Cable Replacement

What you need

    1. Soundboks 4 DC Cable Replacement, Getting Ready: step 1, image 1 of 1
      • Turn off your speaker by removing the battery

      Ask FixBot

      Add Comment

    2. Soundboks 4 DC Cable Replacement, Remove the UI Panel: step 2, image 1 of 3 Soundboks 4 DC Cable Replacement, Remove the UI Panel: step 2, image 2 of 3 Soundboks 4 DC Cable Replacement, Remove the UI Panel: step 2, image 3 of 3
      • Unscrew the UI panel with the 3mm Hex bit - 6 screws in total

      • Pull the panel out at an angle. Pulling it straight can damage the PCBA!

      Ask FixBot

      Add Comment

    3. Soundboks 4 DC Cable Replacement, Unplug and cut the DC Wire: step 3, image 1 of 3 Soundboks 4 DC Cable Replacement, Unplug and cut the DC Wire: step 3, image 2 of 3 Soundboks 4 DC Cable Replacement, Unplug and cut the DC Wire: step 3, image 3 of 3
      • Unplug the connector by pressing the top

      • Cut the cable

      Ask FixBot

      Add Comment

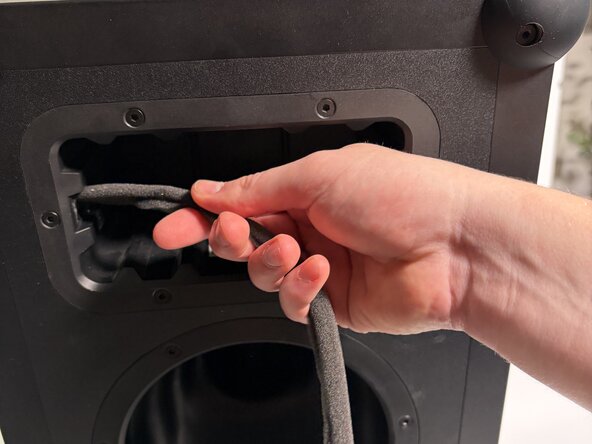
    4. Soundboks 4 DC Cable Replacement, Untie the wire harness: step 4, image 1 of 1
      • Untie the wire harness

      • Make sure to tie the wire harness once re-assembling it

      Ask FixBot

      Add Comment

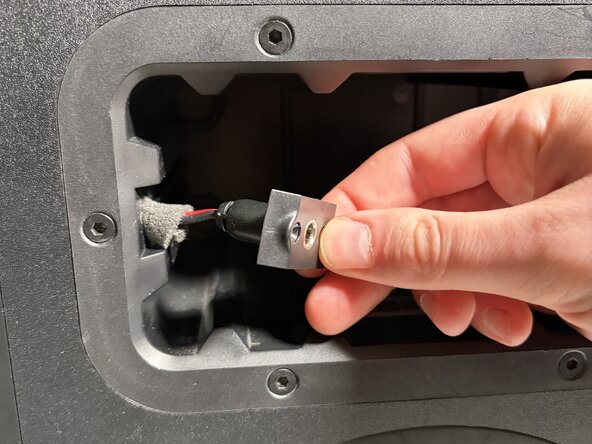
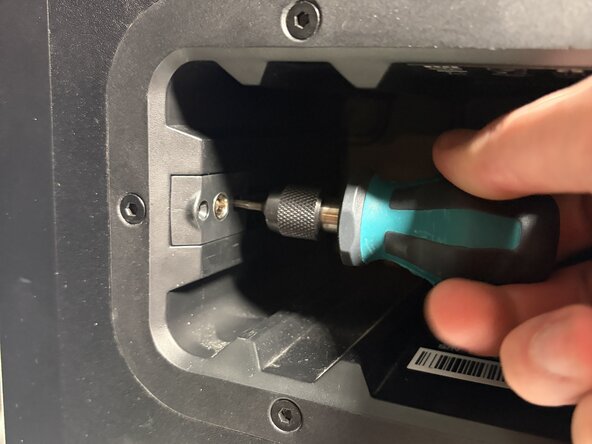
    5. Soundboks 4 DC Cable Replacement, Remove the DC Connector: step 5, image 1 of 3 Soundboks 4 DC Cable Replacement, Remove the DC Connector: step 5, image 2 of 3 Soundboks 4 DC Cable Replacement, Remove the DC Connector: step 5, image 3 of 3
      • Unscrew the DC plug connector with the 2mm Hex bit - 2 screws

      • Pull the connector and wire all the way out.

      Ask FixBot

      Add Comment

    6. Soundboks 4 DC Cable Replacement, Insert and fasten the new wire: step 6, image 1 of 3 Soundboks 4 DC Cable Replacement, Insert and fasten the new wire: step 6, image 2 of 3 Soundboks 4 DC Cable Replacement, Insert and fasten the new wire: step 6, image 3 of 3
      • You must insert the wire in the speaker - before assembling the wire

      • Insert and fasten the new DC Plug with the 2mm Hex screws

      • Do not over-tighten the screws

      Ask FixBot

      Add Comment

    7. Soundboks 4 DC Cable Replacement, Assemble the ferrite: step 7, image 1 of 3 Soundboks 4 DC Cable Replacement, Assemble the ferrite: step 7, image 2 of 3 Soundboks 4 DC Cable Replacement, Assemble the ferrite: step 7, image 3 of 3
      • Pass the wire through the provided ferrite

      • Loop the wire through the ferrite

      Ask FixBot

      Add Comment

    8. Soundboks 4 DC Cable Replacement, Foam assembly: step 8, image 1 of 2 Soundboks 4 DC Cable Replacement, Foam assembly: step 8, image 2 of 2
      • Wrap the foam around the ferrite

      Ask FixBot

      Add Comment

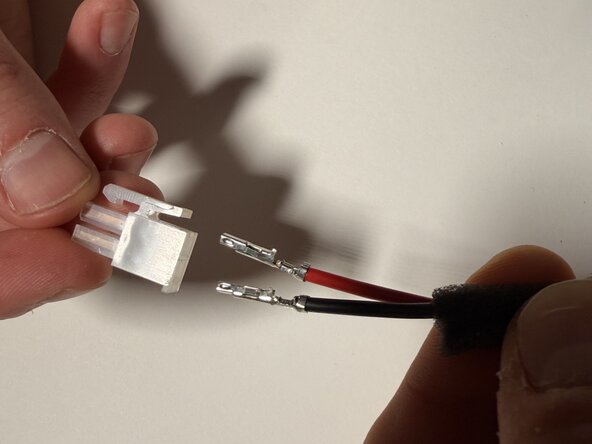
    9. Soundboks 4 DC Cable Replacement, Connector assembly: step 9, image 1 of 3 Soundboks 4 DC Cable Replacement, Connector assembly: step 9, image 2 of 3 Soundboks 4 DC Cable Replacement, Connector assembly: step 9, image 3 of 3
      • Make sure the red cable is placed as indicated in the picture

      • Plug the wire as indicated, make sure the molex crimps face towards the molex clip

      • Push the cables into the connector until you hear a "click"

      • It only fits in one direction - make sure you hear the click and check it!

      • Check: Pull the wires (medium strenght), to check that they don't come out.

      Ask FixBot

      Add Comment

Conclusion

To reassemble your device, follow these instructions in reverse order.

Cancel: I did not complete this guide.

One other person completed this guide.

SOUNDBOKS Tech Crew

Member since: 09/17/26

1 Reputation

4 Guides authored

0 Guide Comments

Add Comment

View Statistics:

Past 24 Hours: 1

Past 7 Days: 34

Past 30 Days: 34

All Time: 34