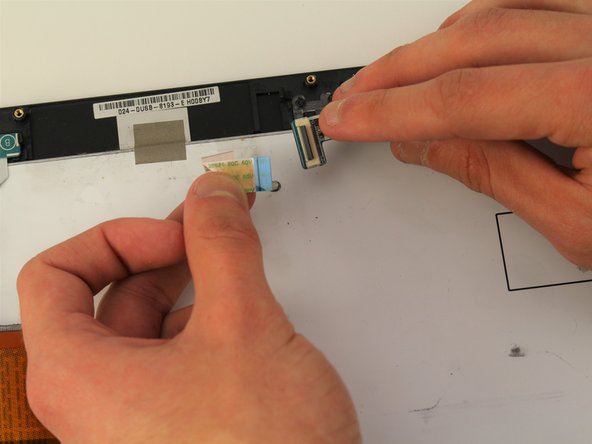
Sony Vaio PCG-4121GL AUX Board Replacement

What you need

  1. Sony Vaio PCG-4121GL AUX Board Replacement, Battery: step 1, image 1 of 2 Sony Vaio PCG-4121GL AUX Board Replacement, Battery: step 1, image 2 of 2
    • Remove the two 3mm Phillips #0 screws on the bottom of the computer that secure the plastic backing.

  2. Sony Vaio PCG-4121GL AUX Board Replacement: step 2, image 1 of 3 Sony Vaio PCG-4121GL AUX Board Replacement: step 2, image 2 of 3 Sony Vaio PCG-4121GL AUX Board Replacement: step 2, image 3 of 3
    • Pull the bottom plate towards yourself until it unhinges fully.

    • Once the plate is free from the backing remove it completely.

  3. Sony Vaio PCG-4121GL AUX Board Replacement: step 3, image 1 of 1
    • Look for the blue tab that is located to the bottom left of the battery.

  4. Sony Vaio PCG-4121GL AUX Board Replacement: step 4, image 1 of 3 Sony Vaio PCG-4121GL AUX Board Replacement: step 4, image 2 of 3 Sony Vaio PCG-4121GL AUX Board Replacement: step 4, image 3 of 3
    • Pull the blue tab towards yourself until you hear a click.

    • Once the blue tab is released, pull up on the battery.

    • Once the battery can move freely, take it out completely.

    • It may be helpful to have a spudger to make it easier to release the blue tab.

  5. Sony Vaio PCG-4121GL AUX Board Replacement, AUX Board: step 5, image 1 of 2 Sony Vaio PCG-4121GL AUX Board Replacement, AUX Board: step 5, image 2 of 2
    • Remove seven 3mm Phillips #0 screws from the bottom of the computer.

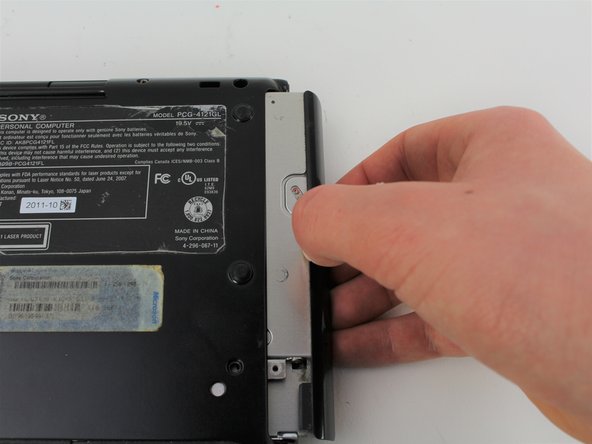
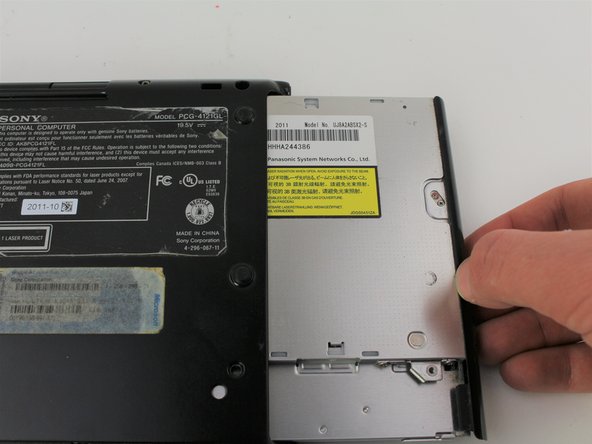
    • Remove eight 5mm Phillips #0 screws.

  6. Sony Vaio PCG-4121GL AUX Board Replacement: step 6, image 1 of 3 Sony Vaio PCG-4121GL AUX Board Replacement: step 6, image 2 of 3 Sony Vaio PCG-4121GL AUX Board Replacement: step 6, image 3 of 3
    • Carefully remove the disk drive from its compartment.

  7. Sony Vaio PCG-4121GL AUX Board Replacement: step 7, image 1 of 2 Sony Vaio PCG-4121GL AUX Board Replacement: step 7, image 2 of 2
    • Remove the three 2mm Phillips #00 screws located on the top right edge.

  8. Sony Vaio PCG-4121GL AUX Board Replacement: step 8, image 1 of 2 Sony Vaio PCG-4121GL AUX Board Replacement: step 8, image 2 of 2
    • Gently pull apart the top and bottom plastic bodies.

    • Carefully remove the cable connectors.

    • Slowly detach bottom component to avoid tearing wires/connectors.

  9. Sony Vaio PCG-4121GL AUX Board Replacement: step 9, image 1 of 3 Sony Vaio PCG-4121GL AUX Board Replacement: step 9, image 2 of 3 Sony Vaio PCG-4121GL AUX Board Replacement: step 9, image 3 of 3
    • Pull apart your device and set aside the screen of your laptop.

    • Locate the AUX Board in the top right of the computer body.

  10. Sony Vaio PCG-4121GL AUX Board Replacement: step 10, image 1 of 2 Sony Vaio PCG-4121GL AUX Board Replacement: step 10, image 2 of 2
    • Remove the 2mm Phillips #0 screw.

    • Carefully pull the cable connector out to the left.

    • Once both are no longer connected remove the AUX Board completely.

Conclusion

To reassemble your device, follow these instructions in reverse order.

2 other people completed this guide.

Miguel Camarena

Member since: 01/24/19

367 Reputation

3 Guides authored

Team

Cal Poly, Team S2-G2, White Winter 2019 Member of Cal Poly, Team S2-G2, White Winter 2019

CPSU-WHITE-W19S2G2

4 Members

10 Guides authored

0 Comments

Add Comment

View Statistics:

Past 24 Hours: 1

Past 7 Days: 9

Past 30 Days: 30

All Time: 1,480