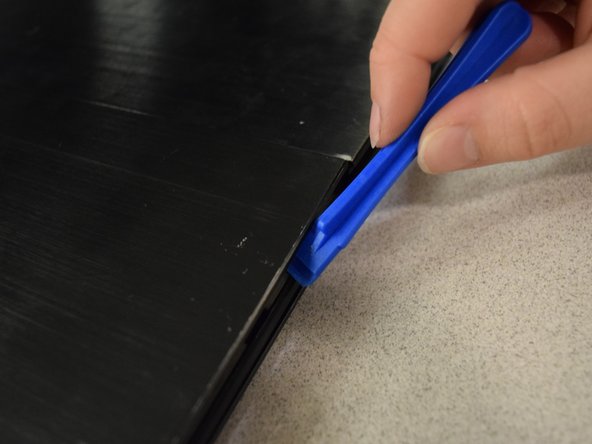
Sony Vaio Fit 13A SVF13NA1EL Screen Replacement

What you need

  1. Sony Vaio Fit 13A SVF13NA1EL Screen Replacement, Screen: step 1, image 1 of 2 Sony Vaio Fit 13A SVF13NA1EL Screen Replacement, Screen: step 1, image 2 of 2
    • Unlock the screen and flip it so that the screen is in tablet mode.

  2. Sony Vaio Fit 13A SVF13NA1EL Screen Replacement: step 2, image 1 of 1
    • Looking at the back of the screen, remove all 8 screws using a Phillips #0

  3. Sony Vaio Fit 13A SVF13NA1EL Screen Replacement: step 3, image 1 of 3 Sony Vaio Fit 13A SVF13NA1EL Screen Replacement: step 3, image 2 of 3 Sony Vaio Fit 13A SVF13NA1EL Screen Replacement: step 3, image 3 of 3
    • Use a plastic spudger to carefully remove the back cover of the screen.

  4. Sony Vaio Fit 13A SVF13NA1EL Screen Replacement: step 4, image 1 of 1
    • Reveal internal screen components

    • Remove all 10 screws

  5. Sony Vaio Fit 13A SVF13NA1EL Screen Replacement: step 5, image 1 of 2 Sony Vaio Fit 13A SVF13NA1EL Screen Replacement: step 5, image 2 of 2
    • Carefully remove each end of the connector strip from the back panel.

    • Make sure to flip the white portions of the chips for easy release from the LCD connector.

    • Feed the disconnected ribbon highlighted in blue through the slot in the metal frame.

    • Disconnect section of the screen connector highlighted in blue.

  6. Sony Vaio Fit 13A SVF13NA1EL Screen Replacement: step 6, image 1 of 2 Sony Vaio Fit 13A SVF13NA1EL Screen Replacement: step 6, image 2 of 2
    • Gently pull up on the tape at the bottom of the ribbon to unplug the screen connector from the screen.

  7. Sony Vaio Fit 13A SVF13NA1EL Screen Replacement: step 7, image 1 of 1
    • The screen can now be removed and replaced.

Conclusion

To reassemble your device, follow these instructions in reverse order.

2 other people completed this guide.

0 Comments

Add Comment

View Statistics:

Past 24 Hours: 0

Past 7 Days: 5

Past 30 Days: 47

All Time: 3,525