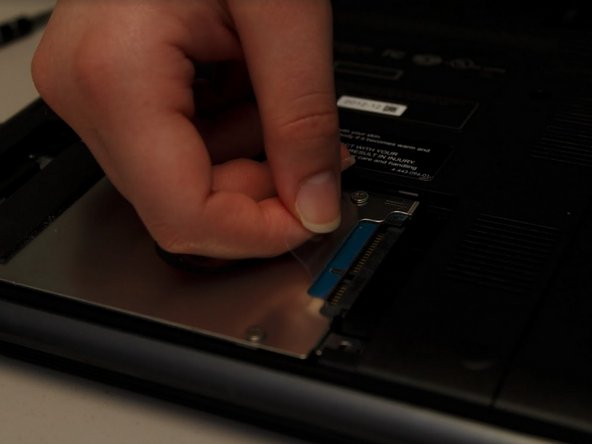
Sony VAIO SVE14AJ16L Hard Drive Replacement

What you need

  1. Sony VAIO SVE14AJ16L Hard Drive Replacement, Hard Drive: step 1, image 1 of 1
    • Turn off your laptop before starting.

    • Turn the closed laptop upside down so that the bottom is facing you.

  2. Sony VAIO SVE14AJ16L Hard Drive Replacement: step 2, image 1 of 2 Sony VAIO SVE14AJ16L Hard Drive Replacement: step 2, image 2 of 2
    • Remove the two screws on the hard drive cover with a Phillips #0 screwdriver.

    • Remove the hard drive cover.

  3. Sony VAIO SVE14AJ16L Hard Drive Replacement: step 3, image 1 of 3 Sony VAIO SVE14AJ16L Hard Drive Replacement: step 3, image 2 of 3 Sony VAIO SVE14AJ16L Hard Drive Replacement: step 3, image 3 of 3
    • Remove the two screws holding the hard drive in place with a Phillips #0 screwdriver.

    • Using the plastic tab, slide the hard drive out away from the main portion of the laptop.

    • Lift the hard drive out of the laptop using the tab.

  4. Sony VAIO SVE14AJ16L Hard Drive Replacement: step 4, image 1 of 3 Sony VAIO SVE14AJ16L Hard Drive Replacement: step 4, image 2 of 3 Sony VAIO SVE14AJ16L Hard Drive Replacement: step 4, image 3 of 3
    • Remove the four screws holding the hard drive bracket to the hard drive using a Phillips #0 screwdriver.

Conclusion

To reassemble your device, follow these instructions in reverse order.

One other person completed this guide.

0 Comments

Add Comment

View Statistics:

Past 24 Hours: 1

Past 7 Days: 6

Past 30 Days: 16

All Time: 821