
Sony VAIO PCG-F360 Single Key Replacement

What you need

  1. Sony VAIO PCG-F360 Single Key Replacement, Battery: step 1, image 1 of 1
    • Position the laptop screen-side down as shown.

    • In this position the battery housing will be located on the right hand side.

  2. Sony VAIO PCG-F360 Single Key Replacement: step 2, image 1 of 1
    • Lift the panel up and then out to gain access to the battery.

  3. Sony VAIO PCG-F360 Single Key Replacement: step 3, image 1 of 1
    • Use the indentations to pull the old battery out.

  4. Sony VAIO PCG-F360 Single Key Replacement: step 4, image 1 of 1
    • The battery is now removed and it is safe to move on to uninstalling other components.

  5. Sony VAIO PCG-F360 Single Key Replacement, Single Key: step 5, image 1 of 3 Sony VAIO PCG-F360 Single Key Replacement, Single Key: step 5, image 2 of 3 Sony VAIO PCG-F360 Single Key Replacement, Single Key: step 5, image 3 of 3
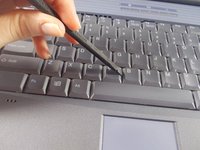
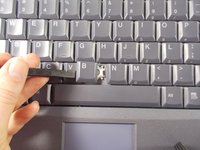
    • Use the pludger to pop off the key by prying under it.

    • You now can clean and replace the key.

Conclusion

To reassemble your device, follow these instructions in reverse order.

Hannah Millea

Member since: 03/11/14

401 Reputation

4 Guides authored

Team

0 Comments

Add Comment

View Statistics:

Past 24 Hours: 1

Past 7 Days: 2

Past 30 Days: 5

All Time: 189