
Sony UBP-UX80 Motherboard Replacement

What you need

  1. Sony UBP-UX80 Motherboard Replacement, Top Cover: step 1, image 1 of 3 Sony UBP-UX80 Motherboard Replacement, Top Cover: step 1, image 2 of 3 Sony UBP-UX80 Motherboard Replacement, Top Cover: step 1, image 3 of 3
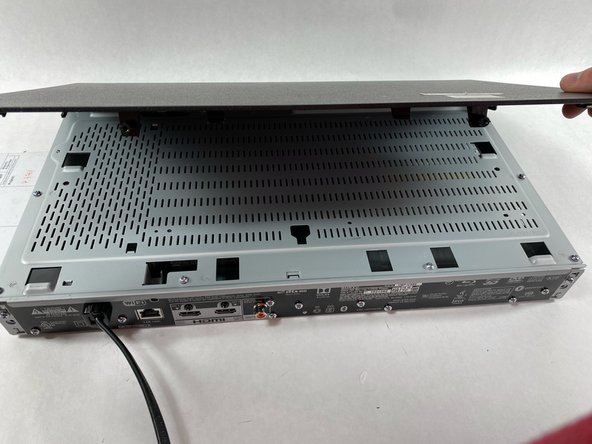
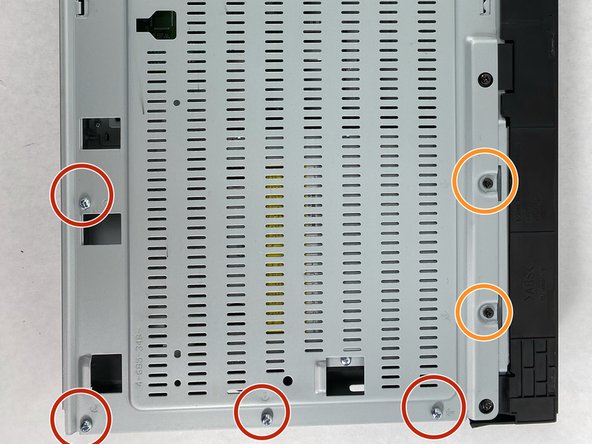
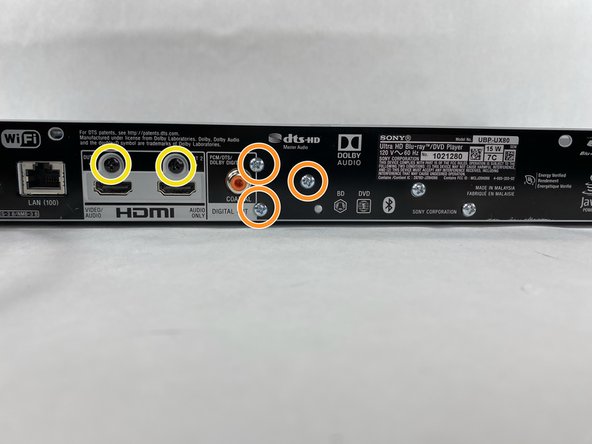
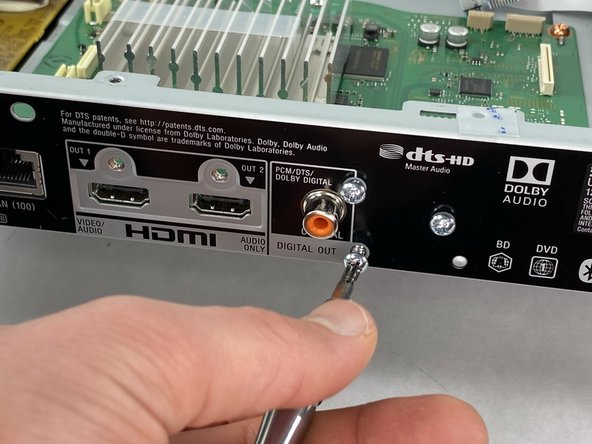
    • Use a Phillips #2 screwdriver to remove the two 10.5 mm screws that secure the two side panels onto the back of the player.

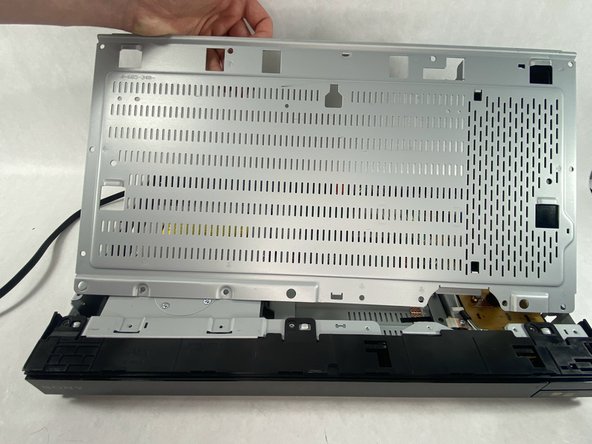
    • Slide both covers back about a 1/2 inch, then pull them away from the case.

  2. Sony UBP-UX80 Motherboard Replacement: step 2, image 1 of 3 Sony UBP-UX80 Motherboard Replacement: step 2, image 2 of 3 Sony UBP-UX80 Motherboard Replacement: step 2, image 3 of 3
    • Use a Phillips #2 screwdriver to remove the two 10.5 mm screws on the side of the case, each connecting to a tab on the cover.

    • Similar to the previous step, it is identical cases on both sides of the device.

    • Use a Phillips #2 screwdriver to remove the two 10.5 mm screws (one next to the Wi-Fi logo and one next to the Blu-ray logo).

  3. Sony UBP-UX80 Motherboard Replacement: step 3, image 1 of 2 Sony UBP-UX80 Motherboard Replacement: step 3, image 2 of 2
    • Press in the tabs found on the front-sides of the case (connected to the front panel).

    • Slide the top cover forward.

    • Lift off the case.

  4. Sony UBP-UX80 Motherboard Replacement: step 4, image 1 of 3 Sony UBP-UX80 Motherboard Replacement: step 4, image 2 of 3 Sony UBP-UX80 Motherboard Replacement: step 4, image 3 of 3
    • Find the eleven 10.5 mm silver screws and two 6 mm black screws on the perimeter of the silver cover plate.

    • Remove the silver screws using a Phillips #2 screwdriver and the black ones using a Phillips #1 screwdriver.

    • Life the back of the cover up and off of the chasis.

  5. Sony UBP-UX80 Motherboard Replacement, Motherboard: step 5, image 1 of 1
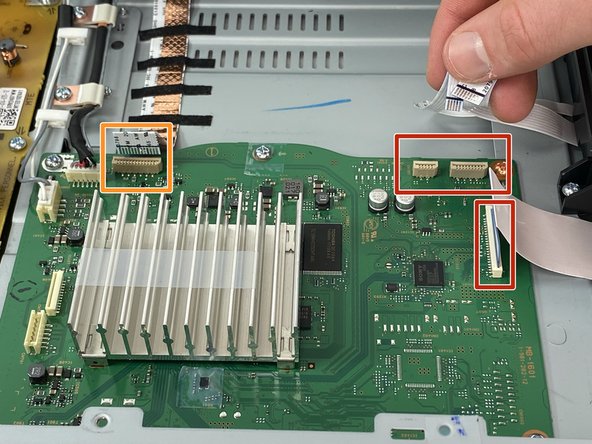
    • Remove the four ribbon connections running to the motherboard:

    • Remove the three ribbon cables from the disk drive by pulling straight up.

    • Remove one ribbon cable from the front panel by pulling straight up.

  6. Sony UBP-UX80 Motherboard Replacement: step 6, image 1 of 1
    • Disconnect the two power connections from the power board.

    • Disconnect the power connection from the front panel.

    • Do not pull on the wires

  7. Sony UBP-UX80 Motherboard Replacement: step 7, image 1 of 3 Sony UBP-UX80 Motherboard Replacement: step 7, image 2 of 3 Sony UBP-UX80 Motherboard Replacement: step 7, image 3 of 3
    • Use a Phillips #2 screwdriver to remove the seven 10.5 mm screws that secure the motherboard to the case.

    • Remove the three 10.5 mm silver screws from the back of the case.

    • Remove the two 7 mm black screws from the back of the case.

  8. Sony UBP-UX80 Motherboard Replacement: step 8, image 1 of 2 Sony UBP-UX80 Motherboard Replacement: step 8, image 2 of 2
    • Lift the front of the motherboard using the heat sink, slide forward and out of the case.

Conclusion

To reassemble your device, follow these instructions in reverse order.

Kenny Young

Member since: 03/13/23

413 Reputation

3 Guides authored

Team

0 Comments

Add Comment

View Statistics:

Past 24 Hours: 0

Past 7 Days: 0

Past 30 Days: 4

All Time: 79