
Sony SRS-X55 DC POWER CONNECTION

What you need

  1. Sony SRS-X55 DC POWER CONNECTION, DC POWER CONNECTION: step 1, image 1 of 1
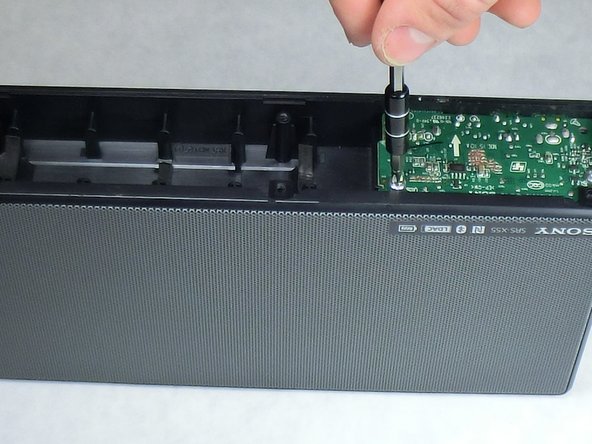
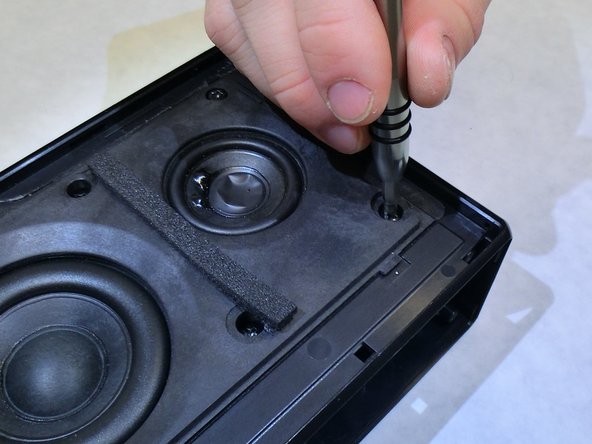
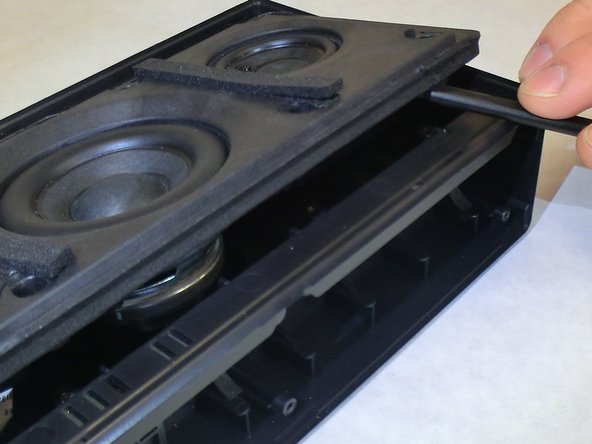
    • Remove the six 9 mm screws on the bottom panel using the Phillips head #2.

  2. Sony SRS-X55 DC POWER CONNECTION: step 2, image 1 of 1
    • Use the spudger tool to pry the bottom panel from the body.

  3. Sony SRS-X55 DC POWER CONNECTION: step 3, image 1 of 3 Sony SRS-X55 DC POWER CONNECTION: step 3, image 2 of 3 Sony SRS-X55 DC POWER CONNECTION: step 3, image 3 of 3
    • Unplug the wiring connecting the battery to the IO board using the tweezers, then remove the battery.

  4. Sony SRS-X55 DC POWER CONNECTION: step 4, image 1 of 3 Sony SRS-X55 DC POWER CONNECTION: step 4, image 2 of 3 Sony SRS-X55 DC POWER CONNECTION: step 4, image 3 of 3
    • Remove the 3.5 mm silver screws on top of the I/O board using Phillips head #2 screw driver.

  5. Sony SRS-X55 DC POWER CONNECTION: step 5, image 1 of 1
    • Use the plastic spudger to lift the I/O board from the speaker body.

  6. Sony SRS-X55 DC POWER CONNECTION: step 6, image 1 of 2 Sony SRS-X55 DC POWER CONNECTION: step 6, image 2 of 2
    • Insert the plastic sudger into the seam where the metal speaker cover meets the speaker body. Slide the sudger along the edge to detach the two components and set aside the cover.

  7. Sony SRS-X55 DC POWER CONNECTION: step 7, image 1 of 2 Sony SRS-X55 DC POWER CONNECTION: step 7, image 2 of 2
    • Remove the 8.9 mm screws holding the speaker assembly to the speaker body using Phillips head #2 screw driver.

  8. Sony SRS-X55 DC POWER CONNECTION: step 8, image 1 of 3 Sony SRS-X55 DC POWER CONNECTION: step 8, image 2 of 3 Sony SRS-X55 DC POWER CONNECTION: step 8, image 3 of 3
    • Place the plastic spudger under one of the tabs on the face of the speaker assembly and gently lift it from the speaker body.

    • Wires connect the speaker assembly to the inside of the speaker body. Move on to the next step before lifting speakers entirely from body to avoid damaging wires.

  9. Sony SRS-X55 DC POWER CONNECTION: step 9, image 1 of 3 Sony SRS-X55 DC POWER CONNECTION: step 9, image 2 of 3 Sony SRS-X55 DC POWER CONNECTION: step 9, image 3 of 3
    • Use the tweezers to disconnect the two cables from the input board and motherboard and finish lifting the speaker assembly from the speaker body.

  10. Sony SRS-X55 DC POWER CONNECTION: step 10, image 1 of 3 Sony SRS-X55 DC POWER CONNECTION: step 10, image 2 of 3 Sony SRS-X55 DC POWER CONNECTION: step 10, image 3 of 3
    • Remove the 9 mm screws on the back of the speaker assembly using Phillips head #2 screw driver.

    • Lift both speaker covers from the speaker assembly.

  11. Sony SRS-X55 DC POWER CONNECTION: step 11, image 1 of 1
    • Remove the 6.3 mm screws holding each of the auxiliary speakers into the speaker assembly with Phillips head #2 screw driver.

    • The speakers are magnetic so they will attract the screws.

  12. Sony SRS-X55 DC POWER CONNECTION: step 12, image 1 of 2 Sony SRS-X55 DC POWER CONNECTION: step 12, image 2 of 2
    • Gently lift the auxiliary speakers from the speaker assembly.

    • CAUTION: Lift the auxiliary speakers slowly to prevent damaging the wires; they are held in place by a mild adhesive.

    • Lift the sub-woofer from the speaker assembly.

  13. Sony SRS-X55 DC POWER CONNECTION: step 13, image 1 of 2 Sony SRS-X55 DC POWER CONNECTION: step 13, image 2 of 2
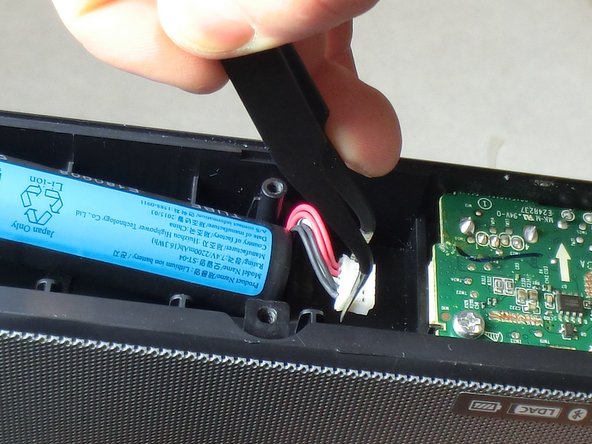
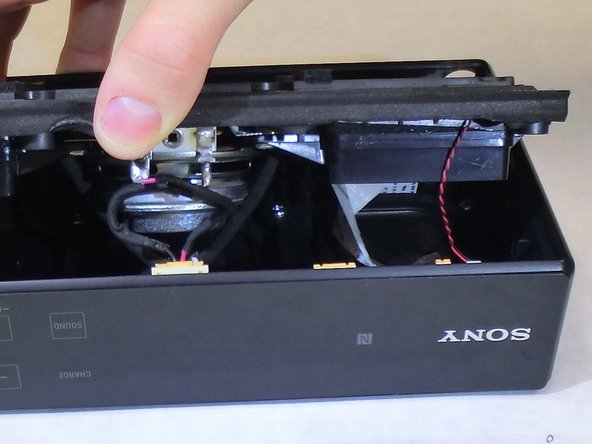
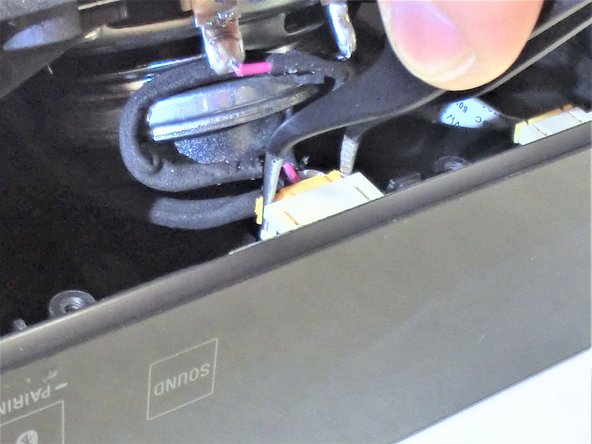
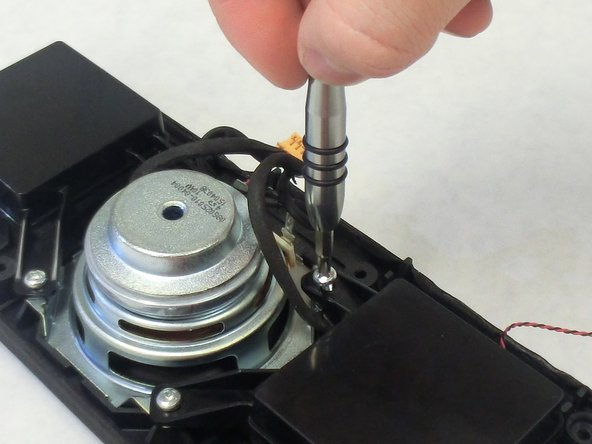
    • Place the tip of the soldering iron against the wire terminals until the connection separates on its own. The three terminal locations are shown.

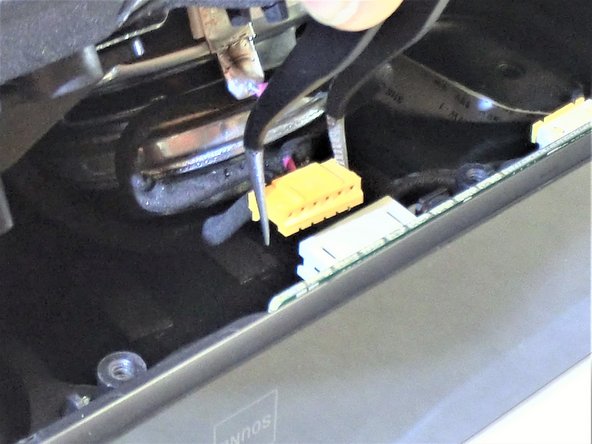
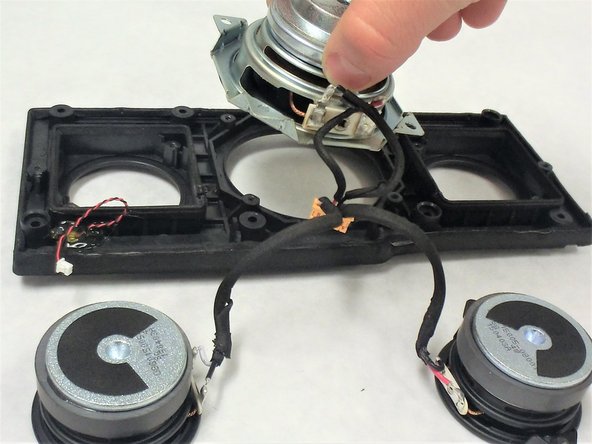
    • Reconnect the leads to the proper terminals. Use either of the other speakers as a reference if needed; they will have the same wire configuration.

    • For step-by-step instructions on soldering check out this link How To Solder and Desolder Connections.

Conclusion

To reassemble your device, follow these instructions in reverse order.

4 other people completed this guide.

Chris Sparzo

Member since: 01/26/17

351 Reputation

2 Guides authored

Team

IUPUI, Team 2-3, Baechle Spring 2017 Member of IUPUI, Team 2-3, Baechle Spring 2017

IUPUI-BAECHLE-S17S2G3

3 Members

3 Guides authored

6 Comments

Hello, Thanks for your tuto … Please can you help me to buy a new central loudspeaker … I only found "already used parts" on eBay an would like to buy a new "not used" part ? Thanks in advance for your answer

CARDON Pascal - Reply

I own a SONY SRS X55 speaker, and the kids have lost its charger and I also noticed that a (yellow part) from the DC IN JACK is also missing. how do I order the missing part? as its pointless for me to order the charger whilst i’m missing this part.

pumlakb - Reply

hi im in the same situation as Pascal I cant find where to buy the 10W bass speaker online.

Steve Chaney

steve.chaney - Reply

Hi Steve,

I have the same problem. Did you find some 10w bass speaker?

Sven from germany

El Duderino -

Tuchplet is damaging and new tuchplet ripleys

laladharmendralala - Reply

Add Comment

View Statistics:

Past 24 Hours: 1

Past 7 Days: 3

Past 30 Days: 12

All Time: 3,529