Introduction
If the buttons on your Sony RMT-VB201U remote control aren't working properly, follow this guide to restore their functionality. Remove the batteries before beginning the repair.
What you need
-
-
-
Press down on the textured part of the battery cover with your finger, then slide the cover away from the controller while maintaining downward pressure to reveal the batteries.
-
Lift the cover up and away from the controller.
-
Use a plastic spudger to push against the negative end of each battery, then lift the batteries out of the compartment.
 Ask FixBot
-
-
-
Insert a plastic spudger into the seam between the controller's outer plastic shell halves.
-
Apply gentle, increasing pressure to create a small opening.
-
Insert an opening pick into the space to keep the housing separated.
-
Slide the spudger around the perimeter of the controller to release the clips holding the front and back casings together.
-
Continue around the perimeter until the two halves separate and the internal components are exposed.
-
-
-
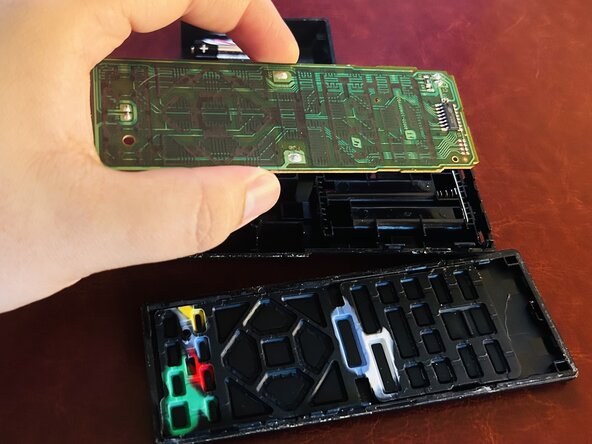
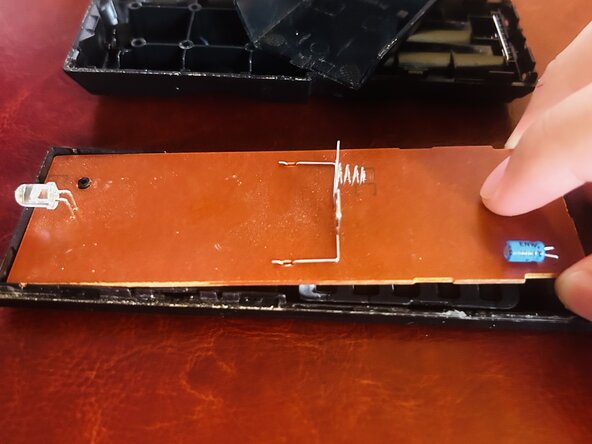
Remove the circuit board by its edges using your fingers.
-
Place the board green side down to protect the components on the brown side.
-
Push the rubber keypad away from the button side of the plastic cover to remove it.
-
-
-
-
Dampen a cotton swab with 90%+ isopropyl alcohol.
-
Lightly clean the green side of the circuit board with the swab to remove dust, debris, and contamination.
-
-
-
Apply an even coat of conductive carbon paint to any worn contact surfaces on the rubber keypad.
-
Set the keypad aside and allow the paint to cure and air dry for 5–10 minutes.
-
-
-
Place the cured circuit board green side down onto the rubber keypad, with the rubber button side facing into the cover.
-
Align the green side neatly so no edges extend past the keypad.
-
-
-
Align both halves of the plastic case and press them together. The plastic pins may require firm pressure to fully seat.
-
Check the seam line for gaps to confirm a proper seal around the entire case.
-
-
-
Insert the negative end (flat side) of the first battery into the spring contact inside the battery port.
-
Insert the positive end (pointed side) of the battery into the opposite contact.
-
Repeat this process for the second battery.
-
Replace the battery cover.
-
-
-
Press the power button to confirm the controller powers on.
-
Aim the controller at the Blu-ray player and confirm the player powers on and the LED light activates.
-
-






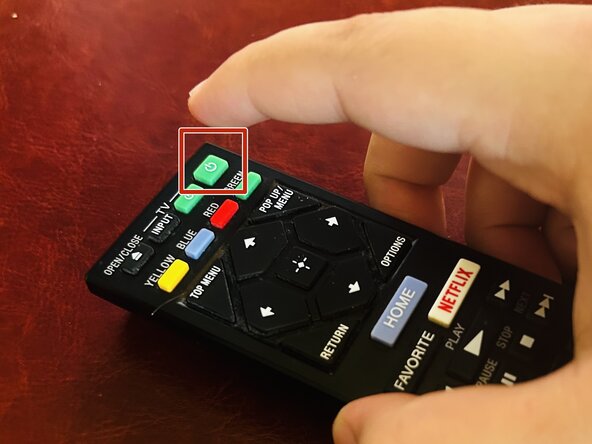


After completing the repair, test the remote by pressing each button to make sure all of the rubber buttons are working properly.
Thank you for using my guide!

Team

Austin Community College, Team 34-6, Kapoor Summer 2026 Member of Austin Community College, Team 34-6, Kapoor Summer 2026
AUSTINCC-KAPOOR-SU26S34G6
1 Member
12 Guides authored
