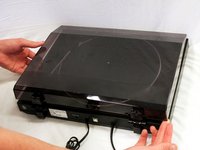
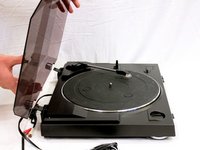
Sony PS-LX300USB Dust Cover Replacement

What you need

  1. Sony PS-LX300USB Dust Cover Replacement, Dust Cover: step 1, image 1 of 1
    • Turn the turntable around so that the back side is visible.

  2. Sony PS-LX300USB Dust Cover Replacement: step 2, image 1 of 2 Sony PS-LX300USB Dust Cover Replacement: step 2, image 2 of 2
    • Begin by releasing the left latch. Apply downward pressure to the square, black button using a flathead screw driver.

    • Once the latch is released, lift upward.

    • Use your left hand to hold the left side of the dust cover above the latch. This ensures the latch does not reconnect.

  3. Sony PS-LX300USB Dust Cover Replacement: step 3, image 1 of 1
    • Use a flat head screw driver to apply pressure to the black square button on the right side.

  4. Sony PS-LX300USB Dust Cover Replacement: step 4, image 1 of 2 Sony PS-LX300USB Dust Cover Replacement: step 4, image 2 of 2
    • Once both the right and left buttons are released, pull the dust cover upwards.

    • The dust cover is now disconnected and ready for replacement.

Conclusion

To reassemble your device, follow these instructions in reverse order.

Sean

Member since: 09/27/17

109 Reputation

1 Guide authored

Team

Cal Poly, Team S8-G3, Banghart Fall 2017 Member of Cal Poly, Team S8-G3, Banghart Fall 2017

CPSU-BANGHART-F17S8G3

5 Members

5 Guides authored

0 Comments

Add Comment

View Statistics:

Past 24 Hours: 1

Past 7 Days: 6

Past 30 Days: 22

All Time: 2,292