
Sony ICF-C1T Tuner Dial Replacement

What you need

  1. Sony ICF-C1T Tuner Dial Replacement, Tuner Dial: step 1, image 1 of 1
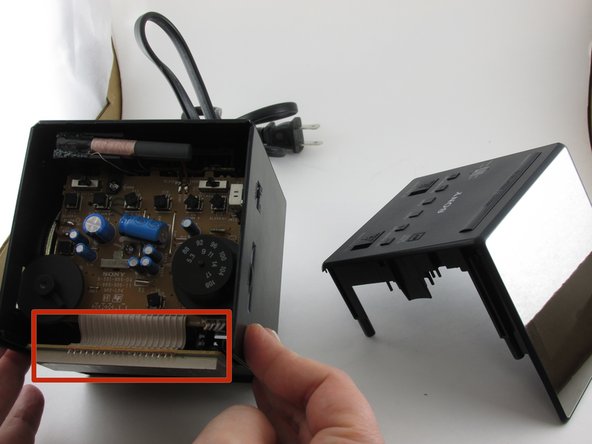
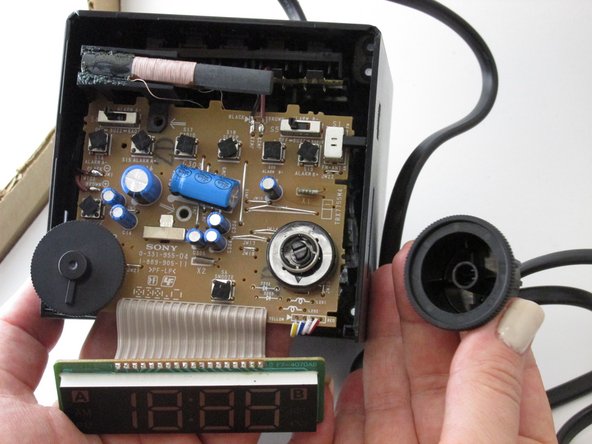
    • Using the Phillips #00 screwdriver, remove four 14mm screws from the underside of the device.

    • Make sure that the clock is unplugged and the battery is removed before tampering with the device to avoid electrical shock.

  2. Sony ICF-C1T Tuner Dial Replacement: step 2, image 1 of 1
    • Use the opening tool to pry apart the edges of the top and side portions of the device.

  3. Sony ICF-C1T Tuner Dial Replacement: step 3, image 1 of 2 Sony ICF-C1T Tuner Dial Replacement: step 3, image 2 of 2
    • Separate the device by gently pulling up on the top portion.

    • Use caution when pulling the device apart as the clock display is located close to the front face plate and is connected by multiple wires.

  4. Sony ICF-C1T Tuner Dial Replacement: step 4, image 1 of 2 Sony ICF-C1T Tuner Dial Replacement: step 4, image 2 of 2
    • To remove the motherboard, gently pull apart the sides of the device.

    • Do not pull hard on the motherboard, because it is still connected by multiple wires inside the device.

    • Be careful of sharp pieces on the motherboard.

    • Having help for this step might make things quicker and easier.

  5. Sony ICF-C1T Tuner Dial Replacement: step 5, image 1 of 3 Sony ICF-C1T Tuner Dial Replacement: step 5, image 2 of 3 Sony ICF-C1T Tuner Dial Replacement: step 5, image 3 of 3
    • Remove the tuner dial by pulling it off of the motherboard. This can take a little force to remove.

Conclusion

To reassemble your device, follow these instructions in reverse order.

One Comment

Thanks, this was not fun but the guide helped.

Campbell Kerr - Reply

Add Comment

View Statistics:

Past 24 Hours: 0

Past 7 Days: 11

Past 30 Days: 32

All Time: 1,536