
Sony Handycam HDR-CX380 Camera Shell Replacement

What you need

  1. Sony Handycam HDR-CX380 Camera Shell Replacement, Battery: step 1, image 1 of 1
    • Rotate your camera such that the underside is facing you and the lens is facing the ground.

    • You should be able to see the camera's label, and it should be rotated 90 degrees counterclockwise.

  2. Sony Handycam HDR-CX380 Camera Shell Replacement: step 2, image 1 of 1
    • Using your left thumb, push down the slider to the left of the SD card slot.

    • When inserting a new battery or reinserting the one you removed, you can ignore this step.

  3. Sony Handycam HDR-CX380 Camera Shell Replacement: step 3, image 1 of 2 Sony Handycam HDR-CX380 Camera Shell Replacement: step 3, image 2 of 2
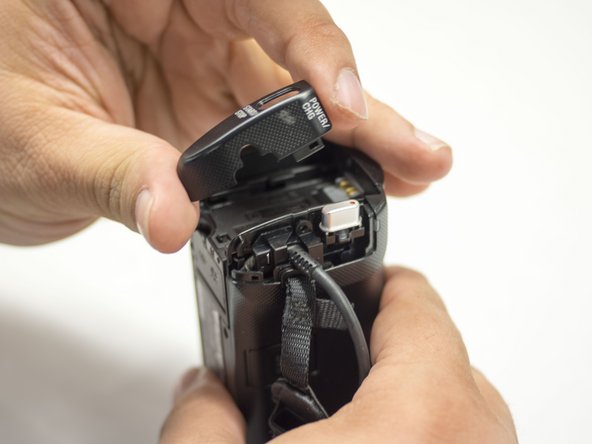
    • Using your right index finger and thumb, pull the battery toward you and then away from the camera.

  4. Sony Handycam HDR-CX380 Camera Shell Replacement, Camera Shell: step 4, image 1 of 1
    • Orient the camera with the battery side facing up.

  5. Sony Handycam HDR-CX380 Camera Shell Replacement: step 5, image 1 of 1
    • Remove the single 4.5 mm Phillips #00 screw.

    • Remove the single 5.5 mm Phillips #00 screw.

  6. Sony Handycam HDR-CX380 Camera Shell Replacement: step 6, image 1 of 2 Sony Handycam HDR-CX380 Camera Shell Replacement: step 6, image 2 of 2
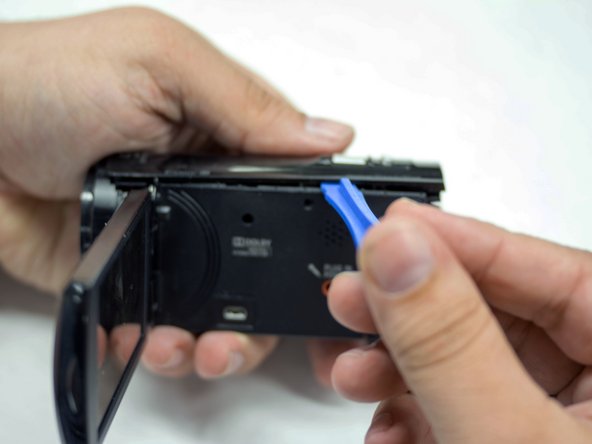
    • With the blue plastic opening tools, gently pry the plastic casing surrounding the start/stop button free.

    • Remove the casing using your right thumb and index finger.

  7. Sony Handycam HDR-CX380 Camera Shell Replacement: step 7, image 1 of 1
    • Flip open the LCD panel to get to the side panel.

    • Remove the three 5.5 mm Phillips #00 screws.

  8. Sony Handycam HDR-CX380 Camera Shell Replacement: step 8, image 1 of 1
    • Turn the camera around to the grip side and remove the 5.5 mm Phillips Head screw using your J00 Phillips Head screwdriver.

  9. Sony Handycam HDR-CX380 Camera Shell Replacement: step 9, image 1 of 1
    • With the bottom of the camera facing up, remove the two 5.5mm Phillips #00 screws.

  10. Sony Handycam HDR-CX380 Camera Shell Replacement: step 10, image 1 of 2 Sony Handycam HDR-CX380 Camera Shell Replacement: step 10, image 2 of 2
    • Orient the camera so the bottom is facing you.

    • Use the blue plastic opening tools to gently ease the camera shell off of the camera.

    • Rotate the camera so the LCD side panel is facing you and gently pry the shell off from the camera.

Zackary Williams

Member since: 02/04/16

457 Reputation

3 Guides authored

Team

USF Tampa, Team 16-5, Blackwell Winter 2016 Member of USF Tampa, Team 16-5, Blackwell Winter 2016

USFT-BLACKWELL-W16S16G5

3 Members

16 Guides authored

View Statistics:

Past 24 Hours: 0

Past 7 Days: 0

Past 30 Days: 1

All Time: 288