
Sony Cyber-shot DSC-TX100V OLED/LCD Assembly Replacement

What you need

  1. Sony Cyber-shot DSC-TX100V OLED/LCD Assembly Replacement, OLED/LCD Assembly: step 1, image 1 of 3 Sony Cyber-shot DSC-TX100V OLED/LCD Assembly Replacement, OLED/LCD Assembly: step 1, image 2 of 3 Sony Cyber-shot DSC-TX100V OLED/LCD Assembly Replacement, OLED/LCD Assembly: step 1, image 3 of 3
    • Remove the battery

    • Remove the five 2.5mm Philips #0 screws.

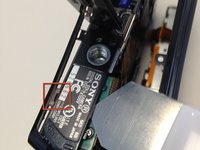
    • Remove the one 2.5mm Philips #0 screw inside the HDMI case.

  2. Sony Cyber-shot DSC-TX100V OLED/LCD Assembly Replacement: step 2, image 1 of 1
    • Gently work and pull the front cover off of the camera

  3. Sony Cyber-shot DSC-TX100V OLED/LCD Assembly Replacement: step 3, image 1 of 1
    • Gently pull and disconnect the ribbon cable connecting the front cover to the main body

  4. Sony Cyber-shot DSC-TX100V OLED/LCD Assembly Replacement: step 4, image 1 of 3 Sony Cyber-shot DSC-TX100V OLED/LCD Assembly Replacement: step 4, image 2 of 3 Sony Cyber-shot DSC-TX100V OLED/LCD Assembly Replacement: step 4, image 3 of 3
    Tool used on this step:
    iSesamo Opening Tool
    $9.99
    Buy
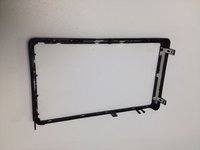
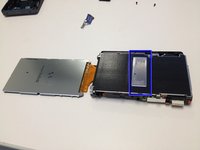
    • Using an iSesamo Opening Tool, Spudger, or flat dull opening tool, gently pry off the cover of the OLED/LCD assembly.

    • Take care of the tab/clip at the bottom, it can be a little tricky.

    • iSesamo Opening Tool is highly recommended

  5. Sony Cyber-shot DSC-TX100V OLED/LCD Assembly Replacement: step 5, image 1 of 2 Sony Cyber-shot DSC-TX100V OLED/LCD Assembly Replacement: step 5, image 2 of 2
    • Remove the copper phillips screw holding the HDMI mounting plate and detach the mounting plate.

  6. Sony Cyber-shot DSC-TX100V OLED/LCD Assembly Replacement: step 6, image 1 of 3 Sony Cyber-shot DSC-TX100V OLED/LCD Assembly Replacement: step 6, image 2 of 3 Sony Cyber-shot DSC-TX100V OLED/LCD Assembly Replacement: step 6, image 3 of 3
    Tool used on this step:
    iSesamo Opening Tool
    $9.99
    Buy
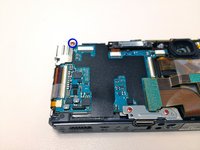
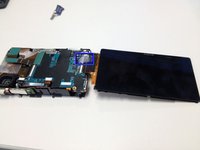
    • Using an iSesamo Opening Tool, Spudger, or flat dull opening tool, gently pry the OLED/LCD assembly from the adhesive strip on the main body.

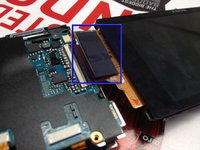
    • Note: where the adhesive strip is located.

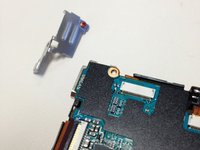
    • Turn the device over and remove the clear tape and black tape.

    • Important: Save the clear and black tape, they will be used for the replacement unit.

  7. Sony Cyber-shot DSC-TX100V OLED/LCD Assembly Replacement: step 7, image 1 of 1
    • Gently pull the small flat ribbon cable from the main body

    • In order to disconnect the large flat ribbon cable, you need to flip up the black ribbon clamp located on the main body where the socket is located

  8. Sony Cyber-shot DSC-TX100V OLED/LCD Assembly Replacement: step 8, image 1 of 1
    • Reattach new display, and reconnect all components

    • Test camera to ensure the new screen is working

    • Congrats!

Conclusion

To reassemble your device, follow these instructions in reverse order.

One other person completed this guide.

Tim

Member since: 03/12/12

2,163 Reputation

2 Guides authored

0 Comments

Add Comment

View Statistics:

Past 24 Hours: 0

Past 7 Days: 7

Past 30 Days: 33

All Time: 4,280