
Installing Sony Cyber-shot DSC-P9 Lens

What you need

  1. Installing Sony Cyber-shot DSC-P9 Lens, Battery: step 1, image 1 of 1
    • Slide the battery latch down the side of the camera with your hands.

    • The latch will automatically pop open.

  2. Installing Sony Cyber-shot DSC-P9 Lens: step 2, image 1 of 1
    • Unlatch the clip over the battery.

    • The battery will partially pop out.

  3. Installing Sony Cyber-shot DSC-P9 Lens: step 3, image 1 of 2 Installing Sony Cyber-shot DSC-P9 Lens: step 3, image 2 of 2
    • Remove the battery from the camera.

  4. Installing Sony Cyber-shot DSC-P9 Lens, Outer Casing: step 4, image 1 of 2 Installing Sony Cyber-shot DSC-P9 Lens, Outer Casing: step 4, image 2 of 2
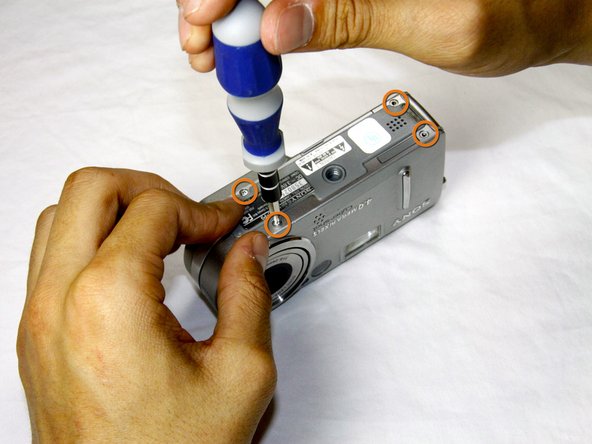
    • Remove the four 3.0mm Phillips #000 screws on the top of the camera with the phillips screwdriver.

    • Remove the additional four 3.0mm Phillips #000 screws on the bottom of the camera.

  5. Installing Sony Cyber-shot DSC-P9 Lens: step 5, image 1 of 2 Installing Sony Cyber-shot DSC-P9 Lens: step 5, image 2 of 2
    • Once the screws are removed, slowly remove the back casing from the rest of the camera.

  6. Installing Sony Cyber-shot DSC-P9 Lens: step 6, image 1 of 2 Installing Sony Cyber-shot DSC-P9 Lens: step 6, image 2 of 2
    • Then, pull the front case away from the rest of the camera.

  7. Installing Sony Cyber-shot DSC-P9 Lens: step 7, image 1 of 1
    • After the casing is removed, the camera should look as shown.

  8. Installing Sony Cyber-shot DSC-P9 Lens, Lens: step 8, image 1 of 2 Installing Sony Cyber-shot DSC-P9 Lens, Lens: step 8, image 2 of 2
    • Dislodge the round casing from the lens.

    • Pull it away from the rest of the camera.

  9. Installing Sony Cyber-shot DSC-P9 Lens: step 9, image 1 of 1
    • Unscrew the two 4.0mm Phillips #000 screws from the display.

  10. Installing Sony Cyber-shot DSC-P9 Lens: step 10, image 1 of 1
    • Pull the two ribbon cables out of their slots on the back circuit board.

  11. Installing Sony Cyber-shot DSC-P9 Lens: step 11, image 1 of 1
    • Remove the three 4.0mm Phillips #000 screws holding the back panel in place.

  12. Installing Sony Cyber-shot DSC-P9 Lens: step 12, image 1 of 3 Installing Sony Cyber-shot DSC-P9 Lens: step 12, image 2 of 3 Installing Sony Cyber-shot DSC-P9 Lens: step 12, image 3 of 3
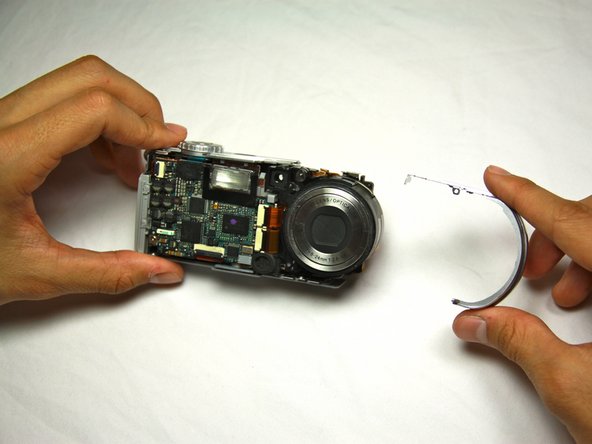
    • Work the back panel out from under the small grey clip.

    • Slide the back panel off of the camera by dislodging it from the remaining clips.

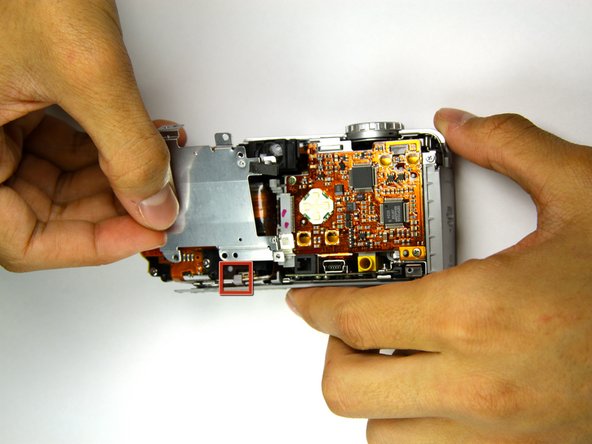
    • Below is a flat, orange cable connecting the lens to the motherboard.

    • Be careful not to bend the back plate during this process.

  13. Installing Sony Cyber-shot DSC-P9 Lens: step 13, image 1 of 1
    • Turn the camera over so that you can see the front of the lens.

    • Two connectors link the lens to the motherboard.

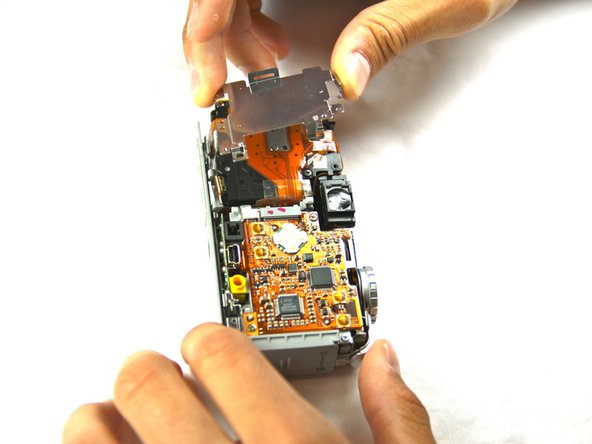
    • Gently bring the lens away from the camera.

  14. Installing Sony Cyber-shot DSC-P9 Lens: step 14, image 1 of 1
    • Using the flat end of the plastic spudger tool, flip up the black tabs on the connectors.

    • Be careful not to exert too much force, as the connectors are delicate.

  15. Installing Sony Cyber-shot DSC-P9 Lens: step 15, image 1 of 3 Installing Sony Cyber-shot DSC-P9 Lens: step 15, image 2 of 3 Installing Sony Cyber-shot DSC-P9 Lens: step 15, image 3 of 3
    • Gently pull out the cables and move the lens away from the rest of the camera.

    • You should now have two distinct, separate components.

Sean Sayles

Member since: 05/09/12

7 Reputation

1 Guide authored

Team

Cal Poly, Team 17-25, Amido Spring 2012 Member of Cal Poly, Team 17-25, Amido Spring 2012

CPSU-AMIDO-S12S17G25

4 Members

14 Guides authored

View Statistics:

Past 24 Hours: 0

Past 7 Days: 10

Past 30 Days: 19

All Time: 1,365