Free Shipping on Domestic Orders $75+

Sony Alpha NEX-3N Mainboard Replacement

What you need

    1. Sony Alpha NEX-3N Mainboard Replacement, Getting Started: step 1, image 1 of 2 Sony Alpha NEX-3N Mainboard Replacement, Getting Started: step 1, image 2 of 2
      • Remove battery and card

      Ask FixBot
      Add Comment

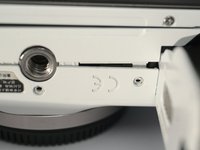
    2. Sony Alpha NEX-3N Mainboard Replacement, Back Case 1: step 2, image 1 of 3 Sony Alpha NEX-3N Mainboard Replacement, Back Case 1: step 2, image 2 of 3 Sony Alpha NEX-3N Mainboard Replacement, Back Case 1: step 2, image 3 of 3
      • Right side, remove 1 M1.4x3.7 screw

      • Left side, remove 3 M1.4x3.7 screws

      • Bottom side, remove 5 M1.4x3.7 screws, including 2 in battery bay. 2 of them out of this photo, you can find them.

      • Do NOT touch screws on the bottom of LCD assembly.

      Ask FixBot
      Add Comment

    3. Sony Alpha NEX-3N Mainboard Replacement, Back Case 2: step 3, image 1 of 1
      • Pop the flash.

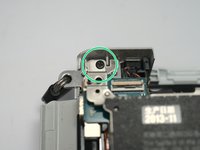
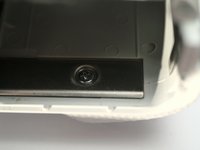
      • In flash room, remove 1 (one) M1.4x3.8 black screw.

      Ask FixBot

      Add Comment

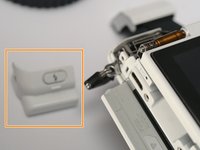
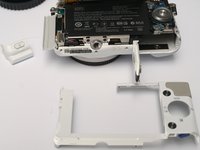
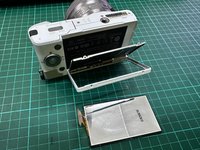
    4. Sony Alpha NEX-3N Mainboard Replacement, Back Case 3: step 4, image 1 of 3 Sony Alpha NEX-3N Mainboard Replacement, Back Case 3: step 4, image 2 of 3 Sony Alpha NEX-3N Mainboard Replacement, Back Case 3: step 4, image 3 of 3
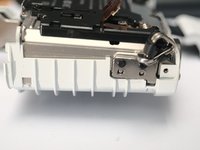
      • Remove LCD hinge cover, by sliding to the left.

      • Remove back cover, actually just a plastic frame.

      Ask FixBot

      Add Comment

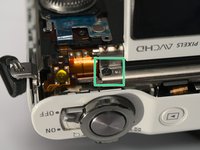
    5. Sony Alpha NEX-3N Mainboard Replacement, LCD assembly: step 5, image 1 of 2 Sony Alpha NEX-3N Mainboard Replacement, LCD assembly: step 5, image 2 of 2
      • Remove 1 M1.4x2 screw

      • Remove another M1.4x2 screw, sorry for the angle.

      Ask FixBot

      Add Comment

    6. Sony Alpha NEX-3N Mainboard Replacement, LCD Assembly: step 6, image 1 of 3 Sony Alpha NEX-3N Mainboard Replacement, LCD Assembly: step 6, image 2 of 3 Sony Alpha NEX-3N Mainboard Replacement, LCD Assembly: step 6, image 3 of 3
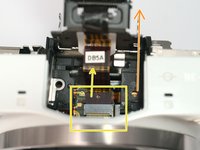
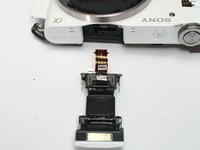
      • CAUTION. Sony makes world's MOST BRITTLE FPC!

      • Loosen LCD assemble with caution!

      • Release FPC cable, the connector is flip type.

      Ask FixBot
      Add Comment

    7. Sony Alpha NEX-3N Mainboard Replacement, The LCD assembly: step 7, image 1 of 1
      • The LCD assembly

      Ask FixBot
      Add Comment

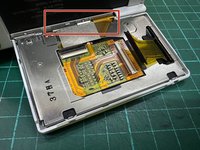
    8. Sony Alpha NEX-3N Mainboard Replacement, Dismantle the LCD Part: step 8, image 1 of 3 Sony Alpha NEX-3N Mainboard Replacement, Dismantle the LCD Part: step 8, image 2 of 3 Sony Alpha NEX-3N Mainboard Replacement, Dismantle the LCD Part: step 8, image 3 of 3
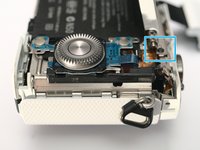
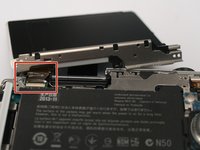
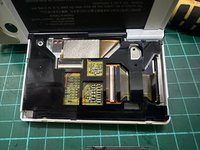
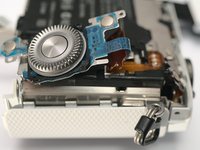
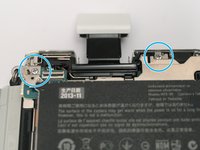
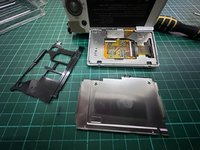
      • After unscrew 4pcs screw you will remove the steel black plate, then slowly pull the black frame there to see the ribbon stripe.

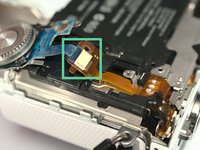
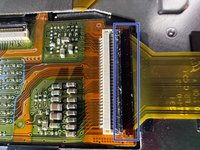
      • Slowly pull the very fragile ribbon lock which i marking with the blue boxes. around just 1mm to unlock the ribbon.. unlucky i broke mine..

      Ask FixBot
      Add Comment

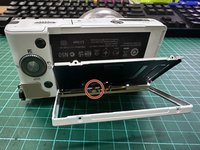
    9. Sony Alpha NEX-3N Mainboard Replacement, Dismantle the LCD Part: step 9, image 1 of 3 Sony Alpha NEX-3N Mainboard Replacement, Dismantle the LCD Part: step 9, image 2 of 3 Sony Alpha NEX-3N Mainboard Replacement, Dismantle the LCD Part: step 9, image 3 of 3
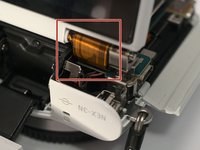
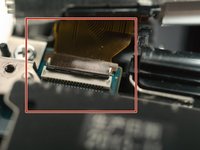
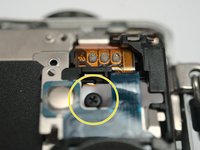
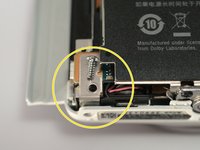
      • you can see the ribbon already pull out but be carefull with the others 2 ribbon when your try to pull out this ribbon.

      • the the circle marker that show others ribbon you need to be carefull. goodluck!

      Ask FixBot

      Add Comment

    1. Sony Alpha NEX-3N Mainboard Replacement, Keypad: step 10, image 1 of 3 Sony Alpha NEX-3N Mainboard Replacement, Keypad: step 10, image 2 of 3 Sony Alpha NEX-3N Mainboard Replacement, Keypad: step 10, image 3 of 3
      • Remove 1 M1.4x2 screw

      • Lift the keypad.

      • Detach FPC

      Ask FixBot

      Add Comment

    1. Sony Alpha NEX-3N Mainboard Replacement, Screws: step 11, image 1 of 1
      • Remove 3 M1.4x3.6 black screws, 2 of them out of focus

      Ask FixBot

      Add Comment

    2. Sony Alpha NEX-3N Mainboard Replacement: step 12, image 1 of 2 Sony Alpha NEX-3N Mainboard Replacement: step 12, image 2 of 2
      • Slide the flash assembly backwards with caution.

      • Detach flash FPC by pulling it out of the socket.

      • High Voltage! Do NOT touch metal on FPC.

      • Then remove the flash assembly.

      Ask FixBot

      Add Comment

    3. Sony Alpha NEX-3N Mainboard Replacement: step 13, image 1 of 1
      • Remove that part whatever called, by sliding it backwards.

      Ask FixBot

      Add Comment

    1. Sony Alpha NEX-3N Mainboard Replacement, Screws: step 14, image 1 of 3 Sony Alpha NEX-3N Mainboard Replacement, Screws: step 14, image 2 of 3 Sony Alpha NEX-3N Mainboard Replacement, Screws: step 14, image 3 of 3
      • 1 ST1.7x5

      • 2 ST1.7x5

      • 1 M1.4x3.6 black

      Ask FixBot

      Add Comment

    2. Sony Alpha NEX-3N Mainboard Replacement, The Grip: step 15, image 1 of 2 Sony Alpha NEX-3N Mainboard Replacement, The Grip: step 15, image 2 of 2
      • Remove 2 ST1.7x5 screws from inside the battery bay. (one of them not shown, deeper inside) insert screw driver through a hole in the shielding cover.

      • Pop the grip off. From back, push to the right, then it flies forward.

      Ask FixBot

      Add Comment

    3. Sony Alpha NEX-3N Mainboard Replacement, More Screws: step 16, image 1 of 1
      • Remove 2 M1.4x2 black screws

      Ask FixBot

      Add Comment

    4. Sony Alpha NEX-3N Mainboard Replacement, Pop the Shielding Cover: step 17, image 1 of 2 Sony Alpha NEX-3N Mainboard Replacement, Pop the Shielding Cover: step 17, image 2 of 2
      • with caution and patient.

      Ask FixBot

      Add Comment

    5. Sony Alpha NEX-3N Mainboard Replacement, One More Shield: step 18, image 1 of 3 Sony Alpha NEX-3N Mainboard Replacement, One More Shield: step 18, image 2 of 3 Sony Alpha NEX-3N Mainboard Replacement, One More Shield: step 18, image 3 of 3
      • 1 M1.4x3.6

      Ask FixBot

      Add Comment

    6. Sony Alpha NEX-3N Mainboard Replacement, Detach 7000 FPCs: step 19, image 1 of 1
      • Sensor power, flip

      • Sensor signal, flip

      • Shutter, pull

      • Lens contacts, pull. Did I mention that Sony makes world's most brittle FPC?

      • Whatever, pull

      • Whatever, pull

      • Shutter charger motor FPC, (backside, pull out)

      Ask FixBot

      Add Comment

    7. Sony Alpha NEX-3N Mainboard Replacement: step 20, image 1 of 1
      • Flip the Mainboard up

      • Pull out one more FPC

      • Discharge then desolder 4 wires.

      • CAUTION! Possible high DC voltage >300V

      Ask FixBot

      Add Comment

    8. Sony Alpha NEX-3N Mainboard Replacement: step 21, image 1 of 1
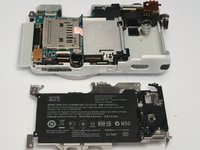
      • Lift main board and plastic frame with flash capacitor.

      Ask FixBot

      Add Comment

Conclusion

To reassemble your device, follow these instructions in reverse order.

Cancel: I did not complete this guide.

Terrance

Member since: 11/17/09

7,063 Reputation

19 Guides authored

0 Guide Comments

Add Comment

View Statistics:

Past 24 Hours: 1

Past 7 Days: 2

Past 30 Days: 24

All Time: 429