
15% Off Selected iFixit Tools — Limited Time
Free Shipping on Domestic Orders $75+

OLPC XO-1.5 Screen Portion Replacement

What you need

  1. OLPC XO-1.5 Screen Portion Replacement, Battery: step 1, image 1 of 1
    • Place the laptop upside down with the handle away from you.

    Ask FixBot

    Add Comment

  2. OLPC XO-1.5 Screen Portion Replacement: step 2, image 1 of 1
    • Slide the tabs out, towards the green edges, to show the open lock symbol.

    • The right tab will stay in place, but the left tab must be held in position while you remove the battery.

    Ask FixBot

    Add Comment

  3. OLPC XO-1.5 Screen Portion Replacement: step 3, image 1 of 3 OLPC XO-1.5 Screen Portion Replacement: step 3, image 2 of 3 OLPC XO-1.5 Screen Portion Replacement: step 3, image 3 of 3
    • Lift the middle of the battery to remove it.

    Ask FixBot

    Add Comment

  4. OLPC XO-1.5 Screen Portion Replacement, Screen Portion: step 4, image 1 of 1
    • Using the Phillips screwdriver, unscrew the 5 size M2 x .4 x 4mm screws underneath the battery.

    Ask FixBot

    Add Comment

  5. OLPC XO-1.5 Screen Portion Replacement: step 5, image 1 of 1
    • Turn the laptop so that the red XO symbol is right side up.

    • Pull off the white plastic panel with your fingers. There will be 4 tabs that hold the white panel in place. It will require moderate force to remove.

    • If you are having difficulty pulling off the white plastic panel, use a spudger.

    Ask FixBot

    Add Comment

  6. OLPC XO-1.5 Screen Portion Replacement: step 6, image 1 of 1
    • Unscrew the 4 size M2 x .4 x 4mm screws that are connected to the green plastic.

    Ask FixBot

    Add Comment

  7. OLPC XO-1.5 Screen Portion Replacement: step 7, image 1 of 1
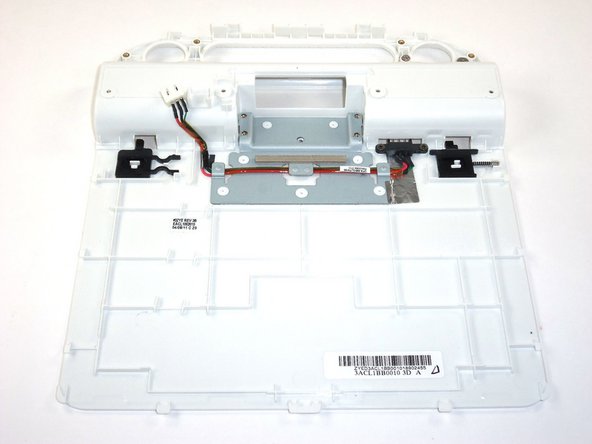
    • Unplug the white connector with black cables on each end on the left of the hinge.

    Ask FixBot

    Add Comment

  8. OLPC XO-1.5 Screen Portion Replacement: step 8, image 1 of 1
    • Using the Phillips screwdriver, unscrew the 4 size M3 x .5 x 5mm screws holding the metal to the rest of the laptop.

    Ask FixBot

    Add Comment

  9. OLPC XO-1.5 Screen Portion Replacement: step 9, image 1 of 1
    • Carefully lift the top half that has the screen away from the bottom half.

    • There is still one black cable connecting the two halves. Be sure not to break it.

    Ask FixBot

    Add Comment

  10. OLPC XO-1.5 Screen Portion Replacement: step 10, image 1 of 2 OLPC XO-1.5 Screen Portion Replacement: step 10, image 2 of 2
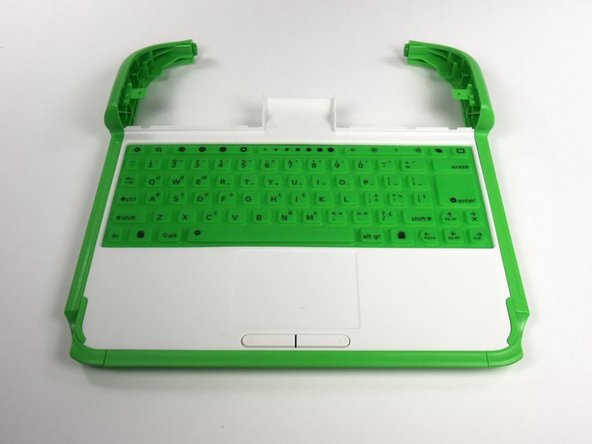
    • Rotate the laptop 180 degrees so that the XO logo is now upside down.

    • Remove the center part of green handle. Push the white plastic back cover down away from the keyboard and top half. This should separate easily from the rest of the device.

    Ask FixBot

    Add Comment

  11. OLPC XO-1.5 Screen Portion Replacement: step 11, image 1 of 1
    • Turn the laptop upside down, exposing the bottom inside of the keyboard.

    • This is similar to how the laptop was positioned when removing the battery, except now the white panel is gone.

    Ask FixBot

    Add Comment

  12. OLPC XO-1.5 Screen Portion Replacement: step 12, image 1 of 1
    • Slide the black cable (the one that holds the two halves together) out of its connector.

    Ask FixBot

    Add Comment

  13. OLPC XO-1.5 Screen Portion Replacement: step 13, image 1 of 2 OLPC XO-1.5 Screen Portion Replacement: step 13, image 2 of 2
    • Separate the screen portion from the rest of the laptop.

    Ask FixBot

    Add Comment

Conclusion

To reassemble your device, follow these instructions in reverse order.

Cancel: I did not complete this guide.

2 other people completed this guide.

Sam Clark

Member since: 10/05/12

61 Reputation

1 Guide authored

Team

Cal Poly, Team 3-19, Amido Fall 2012 Member of Cal Poly, Team 3-19, Amido Fall 2012

CPSU-AMIDO-F12S3G19

6 Members

10 Guides authored

0 Guide Comments

Add Comment

View Statistics:

Past 24 Hours: 1

Past 7 Days: 6

Past 30 Days: 25

All Time: 1,384