Introduction
Note following the guide will void your warranty. In case the product is still under warranty, contract the manufacturer for a replacement.
What you need
-
-
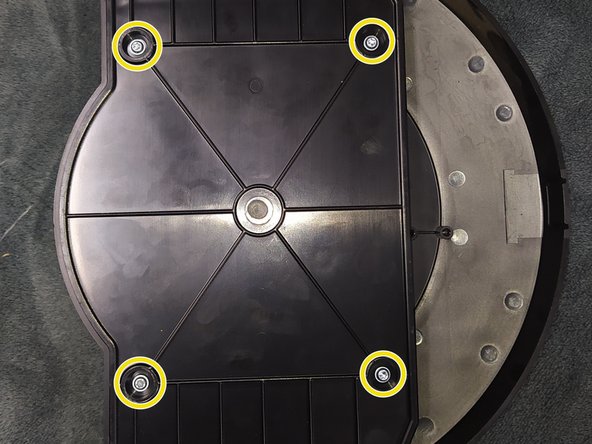
Remove all 4 screws with Torx T10 bit/driver (See Picture 2)
-
Then, remove the back panel to reveal the main PCB (See Picture 3)
-
-
-
Slide the main PCB downwards, just a few millimeters for the top side to be lifted.(See Picture 1)
-
You will see the microSD card on the board.
-
-
-
-
The latest firmware can be downloaded from the link below.
-
Scroll down and dowload the latest firmware for the SolarLog 300.
-
-
-
By using a microSD card reader insert the new SD card into your computer.
-
Copy the downloaded firmware file to the new empty microSD card.
-
Rename the firmware file to: firmware_update.bin
-
-
-
Put the microSD card back into the unit and reverse the steps you took to take it apart.
-
Power up the unit and the screen will show FW indicating that the new firmware update has started.
-
Note all previous configuration and save data will be lost.
-


To reassemble your device, follow these instructions in reverse order.
