Introduction
Traction pads are used to give you extra grip when you have one foot out of the bindings. This guide is about detaching and attaching traction pads.
What you need
-
-
Use a plastic or metal scraper to remove the existing traction pad.
 Ask FixBot
-
-
-
-
If there is any residual adhesive left from the old traction pad, soak it with adhesive remover.
-
Let the adhesive remover sit for a few minutes.
-
Wipe away the residue using a towel and water.
-
Dry the the surface where the new traction pad will be placed.
-
-
-
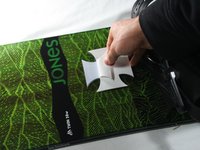
Peel the back off of the new traction pad to reveal the adhesive.
-
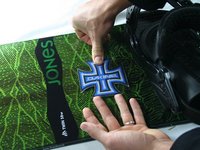
When placed, the traction pad should be about an inch away from the rear binding.
-
To avoid creating air bubbles, start with one corner of the pad and roll the rest down.
-
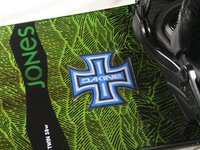
Press down firmly to help it stick to the board and remove any air bubbles that may have occurred.
-
Give the adhesive a minimum of 12 hours to dry before use.
-


Team

Cal Poly, Team 17-4, Forte Winter 2014 Member of Cal Poly, Team 17-4, Forte Winter 2014
CPSU-FORTE-W14S17G4
5 Members
11 Guides authored