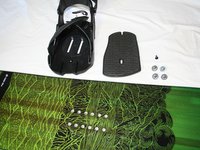
Snowboard Binding Replacement

What you need

  1. Snowboard Binding Replacement, Binding: step 1, image 1 of 3 Snowboard Binding Replacement, Binding: step 1, image 2 of 3 Snowboard Binding Replacement, Binding: step 1, image 3 of 3
    • Release the binding straps by lifting up on the buckle and pulling towards the direction of the end of the ladder.

    • Not all binding straps will release the same way. If you are having trouble releasing your binding straps, please refer to your owner's manual.

  2. Snowboard Binding Replacement: step 2, image 1 of 2 Snowboard Binding Replacement: step 2, image 2 of 2
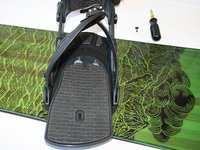
    • Move the straps and the highback plate out of the way in order to have clear access to the foot pad screw.

    • The highback plate is the vertical support plate located on the heel side of the binding.

  3. Snowboard Binding Replacement: step 3, image 1 of 2 Snowboard Binding Replacement: step 3, image 2 of 2
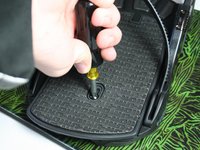
    • Use a #2 Phillips screwdriver to remove the panhead, 10mm wide, M4 x 12mm screw located in the middle of the foot pad.

  4. Snowboard Binding Replacement: step 4, image 1 of 3 Snowboard Binding Replacement: step 4, image 2 of 3 Snowboard Binding Replacement: step 4, image 3 of 3
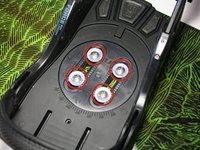
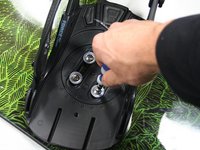
    • Use a #2 Phillips screwdriver to remove the four ovalhead M6 x 12mm screws that attach the base plate of the binding to the board.

    • Lift or slide the binding off the board and set the screws aside.

Conclusion

To reassemble your device, follow these instructions in reverse order.

2 other people completed this guide.

Loren Sunding

Member since: 01/14/14

118 Reputation

1 Guide authored

Team

Cal Poly, Team 17-4, Forte Winter 2014 Member of Cal Poly, Team 17-4, Forte Winter 2014

CPSU-FORTE-W14S17G4

5 Members

9 Guides authored

0 Comments

Add Comment

View Statistics:

Past 24 Hours: 0

Past 7 Days: 8

Past 30 Days: 87

All Time: 13,385