
Sirius Stiletto 2 LCD Display Replacement

What you need

  1. Sirius Stiletto 2 LCD Display Replacement, Battery: step 1, image 1 of 1
    • From the back of the device, slide the back panel downwards to unlock the panel.

    • Lift the panel up, exposing the battery.

  2. Sirius Stiletto 2 LCD Display Replacement: step 2, image 1 of 2 Sirius Stiletto 2 LCD Display Replacement: step 2, image 2 of 2
    • Pinch the battery from both sides and lift the battery to remove it.

  3. Sirius Stiletto 2 LCD Display Replacement, Front Cover: step 3, image 1 of 1
    • Unscrew the four 6.68mm (1.43mm diameter) Philips #00 screws.

    • If needed, remove the sticker to see the screws

  4. Sirius Stiletto 2 LCD Display Replacement: step 4, image 1 of 2 Sirius Stiletto 2 LCD Display Replacement: step 4, image 2 of 2
    • Start by using a plastic opening tool to loosen the front cover from the sides.

    • Work your way to the bottom of the cover then the top.

    • Carefully pry the front cover off.

  5. Sirius Stiletto 2 LCD Display Replacement, LCD Display: step 5, image 1 of 1
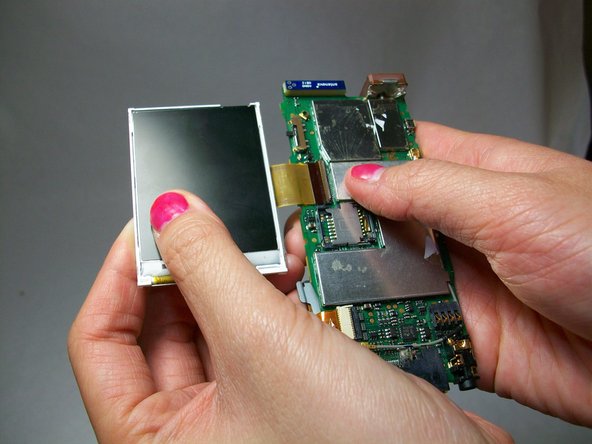
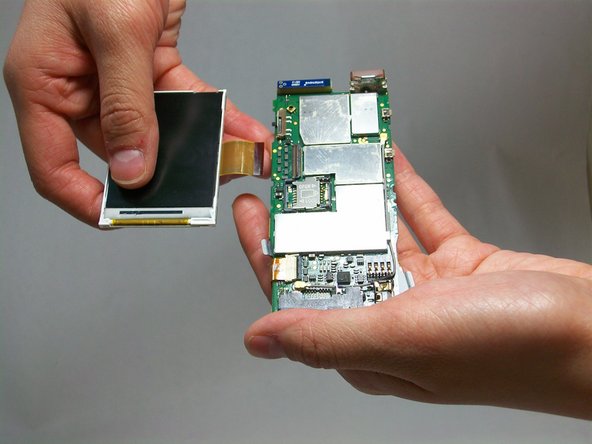
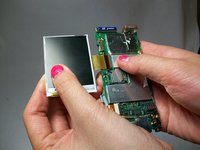
    • Gently lift the latch on the the ribbon cable connector inward (towards the motherboard).

  6. Sirius Stiletto 2 LCD Display Replacement: step 6, image 1 of 2 Sirius Stiletto 2 LCD Display Replacement: step 6, image 2 of 2
    • Carefully grip the screen and pull it away from the ribbon connector located on the motherboard.

  7. Sirius Stiletto 2 LCD Display Replacement: step 7, image 1 of 1
    • LCD display (left).

Conclusion

To reassemble your device, follow these instructions in reverse order.

One other person completed this guide.

Benjamin Her

Member since: 01/21/15

555 Reputation

5 Guides authored

Team

USF Tampa, Team 6-6, Brown Winter 2015 Member of USF Tampa, Team 6-6, Brown Winter 2015

USFT-BROWN-W15S6G6

4 Members

5 Guides authored

0 Comments

Add Comment

View Statistics:

Past 24 Hours: 0

Past 7 Days: 4

Past 30 Days: 9

All Time: 405