Free Shipping on Domestic Orders $75+

Sidekick II Keyboard Replacement

What you need

    1. Sidekick II Keyboard Replacement, Outer Casing: step 1, image 1 of 1
      • Use the plastic opening tool to remove the 4 buttons on each corner of the Sidekick.

      • Gently pry open button and remove button.

      • Do this for each of the 3 buttons remaining.

      Ask FixBot

      Add Comment

    2. Sidekick II Keyboard Replacement: step 2, image 1 of 2 Sidekick II Keyboard Replacement: step 2, image 2 of 2
      • The bumpers on the top and bottom of the phone can be removed by simply "peeling" them off.

      Ask FixBot

      Add Comment

    3. Sidekick II Keyboard Replacement: step 3, image 1 of 1
      • Use the T6 Torx Screwdriver to remove the 4 screws that are underneath the 4 buttons you removed in step one.

      Ask FixBot

      Add Comment

    4. Sidekick II Keyboard Replacement: step 4, image 1 of 1
      • Flip the screen up halfway (90 degrees), to reveal the 2 screws above the right side of the keyboard.

      • Use the Torx 6 screwdriver to remove these 2 screws.

      • Be careful in handling the phone after removing the screws, because the two main bodies of the phone are no longer attached.

      Ask FixBot

      Add Comment

    5. Sidekick II Keyboard Replacement: step 5, image 1 of 1
      • After removing the 6 screws and both bumpers, the phone will be easy to separate into the two main bodies.

      • You can use your hands to simply pull apart the top casing from the bottom casing.

      Ask FixBot

      Add Comment

    1. Sidekick II Keyboard Replacement, Keyboard: step 6, image 1 of 2 Sidekick II Keyboard Replacement, Keyboard: step 6, image 2 of 2
      • Remove screen from case

      Ask FixBot

      Add Comment

    2. Sidekick II Keyboard Replacement: step 7, image 1 of 1
      • Remove both black "rivets" from the back of the case with the plastic opening tool.

      Ask FixBot

      Add Comment

    3. Sidekick II Keyboard Replacement: step 8, image 1 of 1
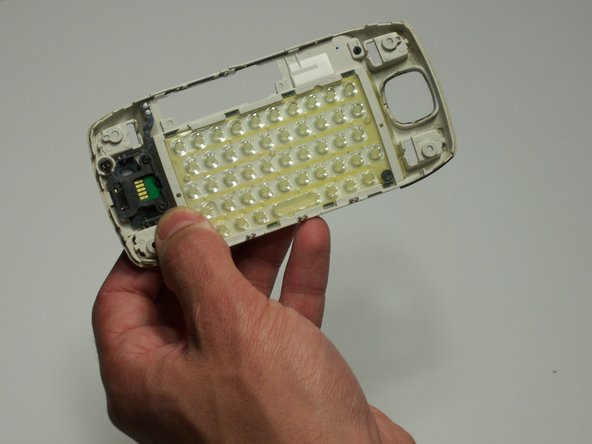
      • Push keyboard out of the front of the casing with your thumbs.

      • Make sure not to press too hard; you may break the board.

      Ask FixBot

      Add Comment

Finish Line

Cancel: I did not complete this guide.

michael albaum

Member since: 01/20/10

108 Reputation

6 Guides authored

Team

Cal Poly, Team 3-19, Maness Winter 2010 Member of Cal Poly, Team 3-19, Maness Winter 2010

CPSU-MANESS-W10S3G19

4 Members

54 Guides authored

0 Guide Comments

Add Comment

View Statistics:

Past 24 Hours: 1

Past 7 Days: 9

Past 30 Days: 36

All Time: 2,468