
Sharper Image SVC430 Lens Replacement

What you need

  1. Sharper Image SVC430 Lens Replacement, Sharper Image SVC430 Disassembly: step 1, image 1 of 2 Sharper Image SVC430 Lens Replacement, Sharper Image SVC430 Disassembly: step 1, image 2 of 2
    • Power off your device before you begin.

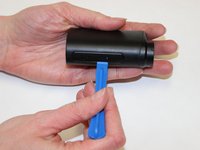
    • Use your thumb to push down on the lever that says "open" while simultaneously pushing up the latch with your other thumb.

  2. Sharper Image SVC430 Lens Replacement: step 2, image 1 of 2 Sharper Image SVC430 Lens Replacement: step 2, image 2 of 2
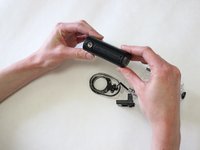
    • Once the latch is free, simply pull the front of the waterproof case off and slide the camera out.

  3. Sharper Image SVC430 Lens Replacement: step 3, image 1 of 3 Sharper Image SVC430 Lens Replacement: step 3, image 2 of 3 Sharper Image SVC430 Lens Replacement: step 3, image 3 of 3
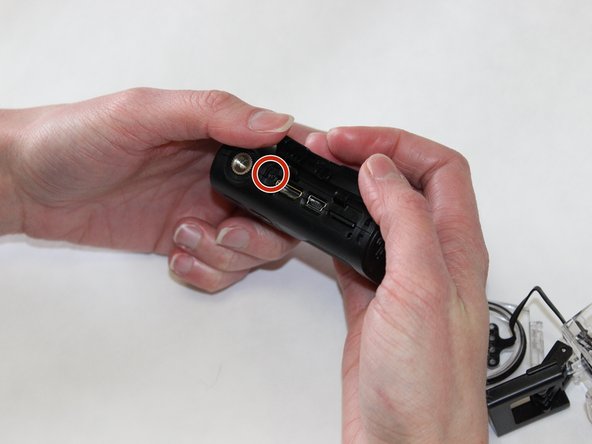
    • Locate the bottom of the device.

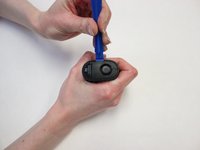
    • Now, using the metal screwdriver, unscrew the screw on the bottom of the device.

  4. Sharper Image SVC430 Lens Replacement: step 4, image 1 of 2 Sharper Image SVC430 Lens Replacement: step 4, image 2 of 2
    • This panel should come off easily, do not apply too much pressure.

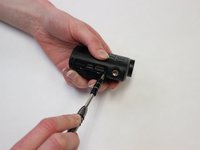
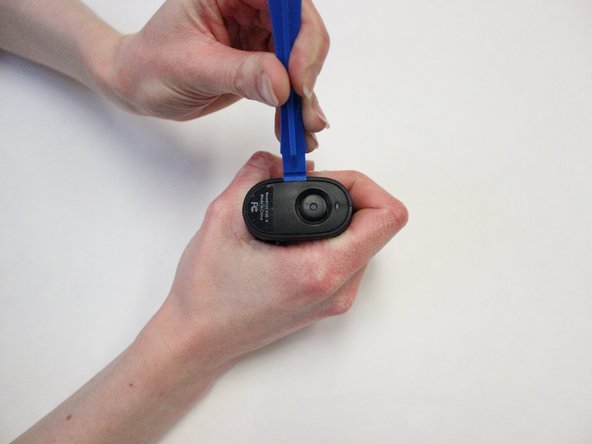
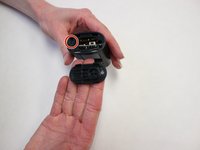
    • Use the plastic opening tool to pry open the plastic panel from the top of the camera.

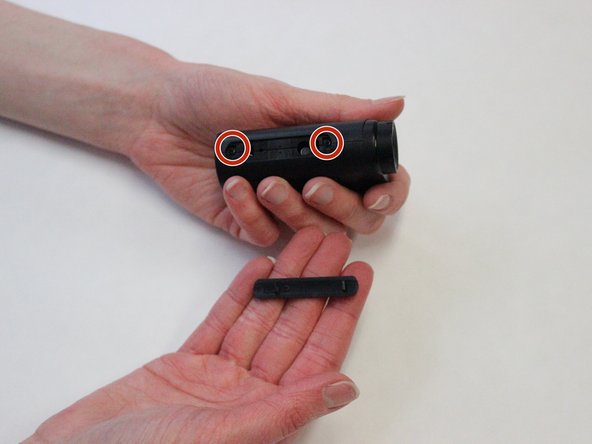
    • Locate the two screws on the top of the device.

  5. Sharper Image SVC430 Lens Replacement: step 5, image 1 of 1
    • Use the JIS J0 screwdriver to unscrew the two screws on the top of the device.

  6. Sharper Image SVC430 Lens Replacement: step 6, image 1 of 3 Sharper Image SVC430 Lens Replacement: step 6, image 2 of 3 Sharper Image SVC430 Lens Replacement: step 6, image 3 of 3
    • Use the plastic opening tool to pry off the back panel.

    • The back panel will come off easily.

  7. Sharper Image SVC430 Lens Replacement: step 7, image 1 of 1
    • Use the metal screwdriver to unscrew the screw from the back of the device.

  8. Sharper Image SVC430 Lens Replacement: step 8, image 1 of 1
    • Use the plastic opening tool to pry off the front panel of the device.

  9. Sharper Image SVC430 Lens Replacement: step 9, image 1 of 1
    • Using the screwdriver, unscrew the screw located underneath the front panel.

  10. Sharper Image SVC430 Lens Replacement: step 10, image 1 of 1
    • Be gentle with the device since there are wires attached to the front plate and two halves.

    • Gently pull both sides of the device to expose the interior of the device.

  11. Sharper Image SVC430 Lens Replacement, Lens: step 11, image 1 of 1
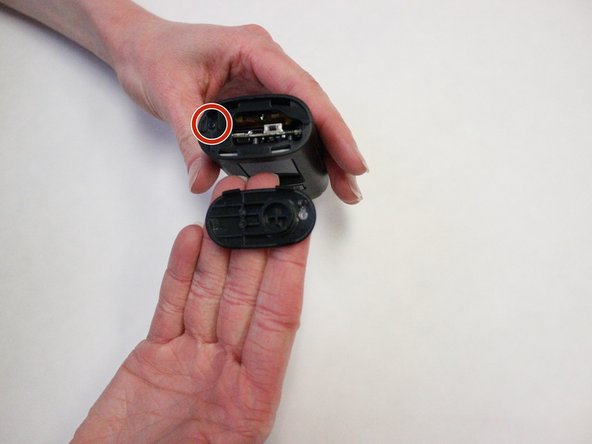
    • Behind the lens, use the metal screwdriver to unscrew the two screws holding the lens in place on the circuit board.

  12. Sharper Image SVC430 Lens Replacement: step 12, image 1 of 1
    • The lens should easily remove from the circuit board.

Conclusion

To reassemble your device, follow these instructions in reverse order.

One other person completed this guide.

0 Comments

Add Comment

View Statistics:

Past 24 Hours: 0

Past 7 Days: 0

Past 30 Days: 0

All Time: 186