Introduction
You'll be replacing the keyboard component of the Sharp PC - MM20!
What you need
-
-
Make sure the laptop is powered down.
-
Remove the battery from the laptop.
 Ask FixBot
-
-
-
Close the laptop.
-
Turn the laptop so that the back is facing you.
-
There will be three screws on the back. Remove each screw by using the screw driver.
-
-
-
Flip the laptop so that you can see the bottom.
-
Remove the screws shown in the picture.
-
-
-
-
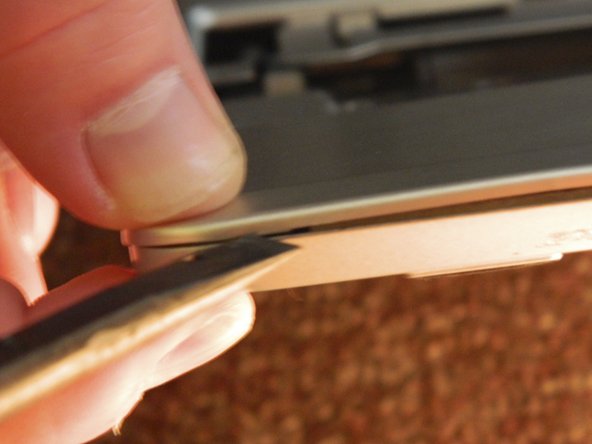
Open the laptop and focus on the front of the base of the laptop.
-
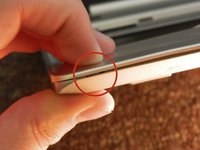
Notice that there are small notches in between the two plates of the laptop. There are several slots such as this that are found across the front base of the laptop.
-
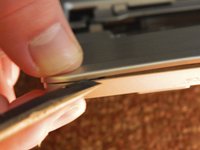
Take a flat edge and wedge it into the slot to pop it open.
-
-
Tool used on this step:Tweezers$4.99
-
Once the cover is loose, it should be able to shift somewhat freely. However, there are a few more connections holding it together.
-
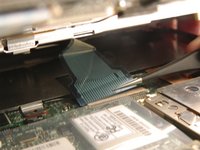
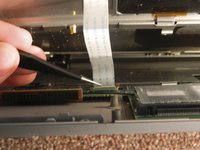
Use tweezers to delicately remove the flat cable that connects the keyboard to the laptop.
-
Remove the flat cable from the track pad of the laptop.
-
-
-
Lastly, take the old keyboard out of the base and replace it with the new keyboard.
-


To reassemble your device, follow these instructions in reverse order.
Cancel: I did not complete this guide.
2 other people completed this guide.
Team

Oakland University, Team 1-1, Ruszkiewicz Fall 2012 Member of Oakland University, Team 1-1, Ruszkiewicz Fall 2012
OAK-RUSZKIEWICZ-F12S1G1
1 Member
2 Guides authored