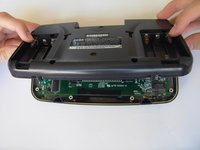
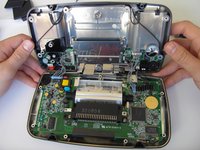
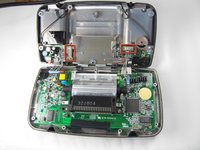
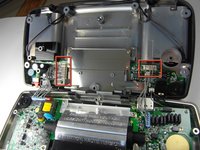
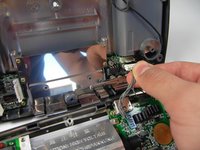
Sega Game Gear Case Replacement

What you need

  1. Sega Game Gear Case Replacement, Battery: step 1, image 1 of 1
    • Place your device upside down and locate the two battery compartments.

  2. Sega Game Gear Case Replacement: step 2, image 1 of 1
    • Press on the tabs at the bottom of the battery covers then lift up to remove.

    • Remove batteries if they are present.

  3. Sega Game Gear Case Replacement, Case: step 3, image 1 of 1
    • Remove the following screws:

    • Six Phillips screws

    • One 4.5 mm Gamebit screw

  4. Sega Game Gear Case Replacement: step 4, image 1 of 1
    • Use tweezers to take all other screws out.

  5. Sega Game Gear Case Replacement: step 5, image 1 of 2 Sega Game Gear Case Replacement: step 5, image 2 of 2
    • Gently open the case by unfolding it over the top of the Sega Game Gear.

    • Do not pull the back of the case away, as cables are connected between both sides.

  6. Sega Game Gear Case Replacement: step 6, image 1 of 3 Sega Game Gear Case Replacement: step 6, image 2 of 3 Sega Game Gear Case Replacement: step 6, image 3 of 3
    • Carefully unplug the 2 white-tipped connectors on the top cover.

Conclusion

To reassemble your device, follow these instructions in reverse order.

9 other people completed this guide.

Lauren Thurston

Member since: 04/15/10

431 Reputation

3 Guides authored

Team

Cal Poly, Team 28-33, Regan Spring 2010 Member of Cal Poly, Team 28-33, Regan Spring 2010

CPSU-REGAN-S10S28G33

5 Members

13 Guides authored

One Comment

Is this guide made to help replacing the Game Gear shell? Almost doesn't seem like a thorough guide, I'm still seeing screws on the motherboard in the last photo, I assume those get taken out too?

Alex Tomalty - Reply

Add Comment

View Statistics:

Past 24 Hours: 3

Past 7 Days: 26

Past 30 Days: 104

All Time: 19,646