
Free Shipping on Domestic Orders $75+

Sceptre X9 Komodo VII Video Motherboard Replacement

What you need

  1. Sceptre X9 Komodo VII Video Motherboard Replacement, Stand: step 1, image 1 of 1
    • Power off and unplug the monitor before starting.

    • Place the monitor face down on a soft, flat surface (such as a towel) to protect the screen.

    • Using a Phillips #2 screwdriver, remove the four 11.5 mm screws securing the stand.

    • Gently pull the stand out to detach it from the monitor. - Caution: Do not force the stand out. If it resists, check that all screws have been fully removed before pulling.

  2. Sceptre X9 Komodo VII Video Motherboard Replacement: step 2, image 1 of 1
    • Using the same Phillips #2 screwdriver, remove the two 11.5 mm screws securing the plastic bar.

    • Lift the bar away and set it aside.

    • Confirm the stand is stable and level before turning the monitor upright. Double-check that all screws are firmly tightened and parts are properly aligned to prevent instability or tilting after reassembly.

  3. Sceptre X9 Komodo VII Video Motherboard Replacement, Board Cover: step 3, image 1 of 1
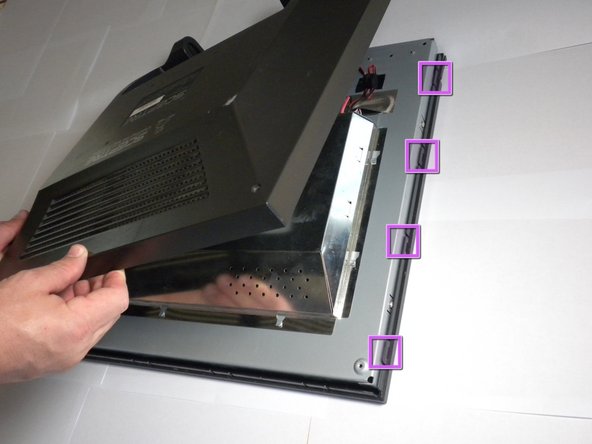
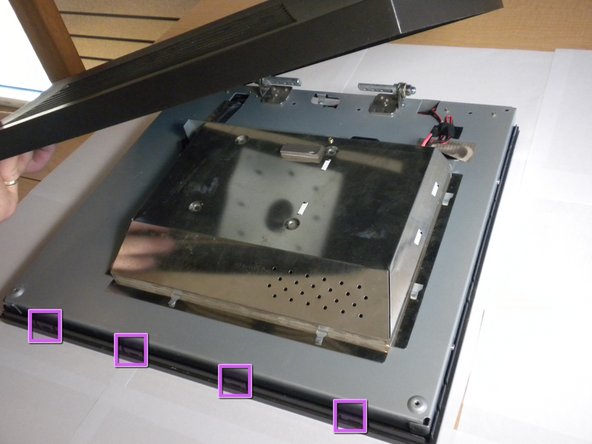
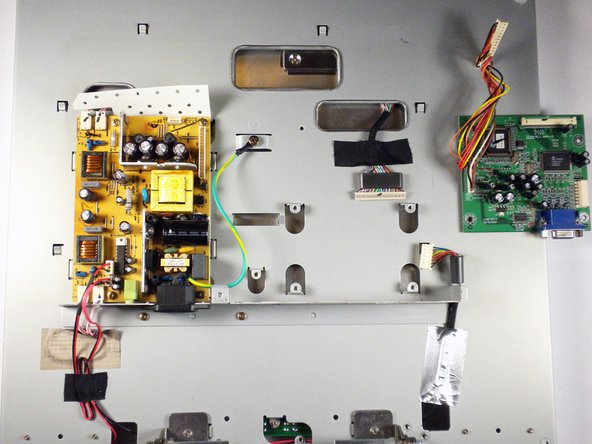
    • Using a #2 Phillips screwdriver, remove the six 7mm screws at the circled locations.

  4. Sceptre X9 Komodo VII Video Motherboard Replacement: step 4, image 1 of 3 Sceptre X9 Komodo VII Video Motherboard Replacement: step 4, image 2 of 3 Sceptre X9 Komodo VII Video Motherboard Replacement: step 4, image 3 of 3
    • Pry the monitor using the plastic opening tool to release the clips holding the cover on.

    • There are four clips on each side, four on the top, and one on the bottom.

    • You may hear a loud snapping noise when releasing the clips. Do not be alarmed, it is natural.

    • Once all the clips have been released, remove the cover by pulling it up.

  5. Sceptre X9 Komodo VII Video Motherboard Replacement: step 5, image 1 of 2 Sceptre X9 Komodo VII Video Motherboard Replacement: step 5, image 2 of 2
    • Using the #2 Phillips screwdriver, remove the one 6mm screw.

    • Unplug the indicated cable by pulling on the base.

    • Slide the cover toward the top of the monitor.

    • Remove the cover.

  6. Sceptre X9 Komodo VII Video Motherboard Replacement, Video Motherboard: step 6, image 1 of 3 Sceptre X9 Komodo VII Video Motherboard Replacement, Video Motherboard: step 6, image 2 of 3 Sceptre X9 Komodo VII Video Motherboard Replacement, Video Motherboard: step 6, image 3 of 3
    • Use caution when removing the connectors as they can easily break when removing.

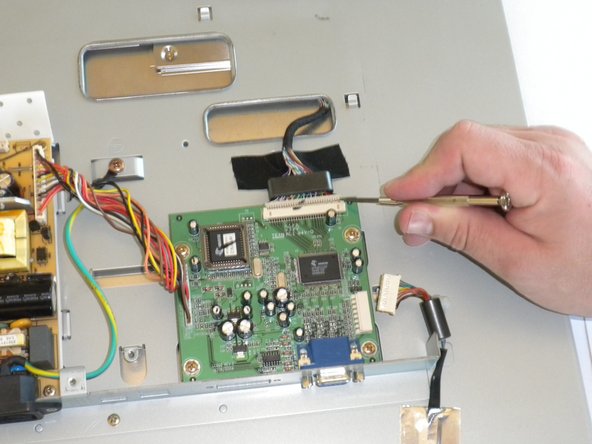
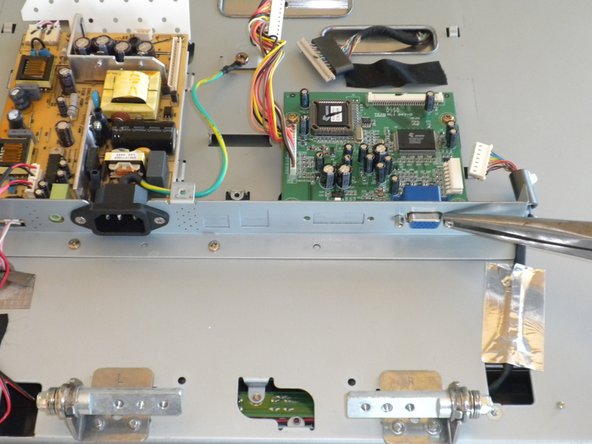
    • Disconnect the multi-pin connector at the top of the board by firmly grasping the connector and pulling to the side.

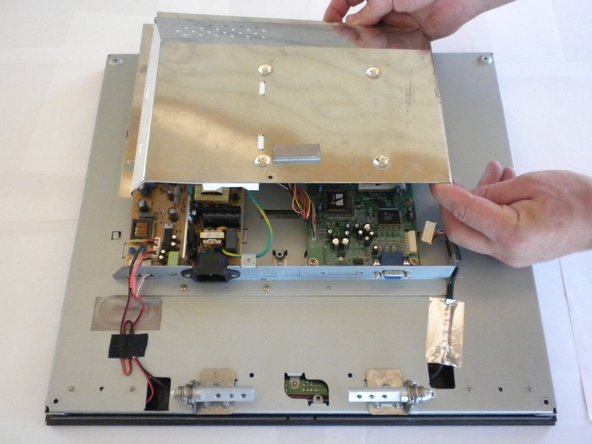
    • Disconnect the multi-pin connector that runs between the video motherboard and the power supply motherboard. Firmly grasp the connector and pull straight up.

    • A plastic opening tool can be used to assist in the removal of connectors.

  7. Sceptre X9 Komodo VII Video Motherboard Replacement: step 7, image 1 of 2 Sceptre X9 Komodo VII Video Motherboard Replacement: step 7, image 2 of 2
    • Remove the two 3/16" hex head screws from the VGA connecter. Use a pair of needle nose pliers if a wrench is not available.

  8. Sceptre X9 Komodo VII Video Motherboard Replacement: step 8, image 1 of 1
    • Remove the four 6.4mm #2 Phillips screws from the corners of the motherboard with a #2 Phillips screwdriver.

  9. Sceptre X9 Komodo VII Video Motherboard Replacement: step 9, image 1 of 2 Sceptre X9 Komodo VII Video Motherboard Replacement: step 9, image 2 of 2
    • Lift the motherboard straight up to remove it from the back panel.

Conclusion

To reassemble your device, follow these instructions in reverse order.

David Taylor

Member since: 09/26/12

10 Reputation

1 Guide authored

Team

Cal Poly, Team 16-56, Forte Fall 2012 Member of Cal Poly, Team 16-56, Forte Fall 2012

CPSU-FORTE-F12S16G56

5 Members

13 Guides authored

0 Guide Comments

Add Comment

View Statistics:

Past 24 Hours: 2

Past 7 Days: 2

Past 30 Days: 28

All Time: 830