Introduction
This is an easy to work on camera. The screws are easily accessible, none of them hidden. The case separates easily and does not require any special tools.
What you need
-
-
Remove the batteries and the memory card if so equipped.
-
Remove the two Phillips screws on the right.
-
Remove the four Phillips screws on the bottom.
-
-
-
-
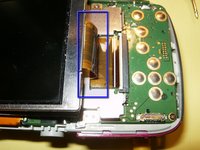
The LCD ribbon cable is folded under the holder. Do not try to remove the LCD yet. It will tear the ribbon cable.
-
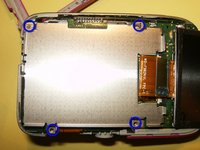
Fold the LCD way from the holder. Remove the four screws that secure the holder to the logic board.
-
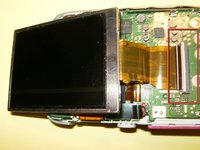
With the LCD holder out of the way, you can now open the ribbon cable connector. Use your fingernails to flip the white clasp away from the ribbon cable side. This will disconnect the cable. Remove the LCD and replace with the new one.
-


To reassemble your device, follow these instructions in reverse order.
Cancel: I did not complete this guide.
2 other people completed this guide.
