Free Shipping on Domestic Orders $75+

Samsung WB350F Menu/Control Buttons Replacement

What you need

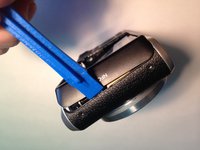
    1. Samsung WB350F Menu/Control Buttons Replacement, Rear Case: step 1, image 1 of 3 Samsung WB350F Menu/Control Buttons Replacement, Rear Case: step 1, image 2 of 3 Samsung WB350F Menu/Control Buttons Replacement, Rear Case: step 1, image 3 of 3
      • Remove the wristlet strap.

      • If you have difficulties use your plastic spudger. If you don't have a plastic spudger, you can also use a pen/pencil.

      Ask FixBot

      Add Comment

    2. Samsung WB350F Menu/Control Buttons Replacement: step 2, image 1 of 3 Samsung WB350F Menu/Control Buttons Replacement: step 2, image 2 of 3 Samsung WB350F Menu/Control Buttons Replacement: step 2, image 3 of 3
      • Remove five 3.2 mm screws with a Phillips #000 Screwdriver.

      • There is one silver screw on the bottom and two black screws on each side.

      • Keep the screws together for an easier re-assembly later.

      Ask FixBot
      Add Comment

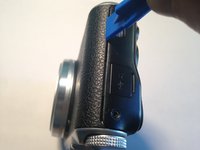
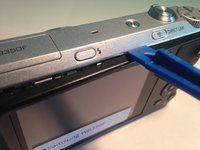
    3. Samsung WB350F Menu/Control Buttons Replacement: step 3, image 1 of 3 Samsung WB350F Menu/Control Buttons Replacement: step 3, image 2 of 3 Samsung WB350F Menu/Control Buttons Replacement: step 3, image 3 of 3
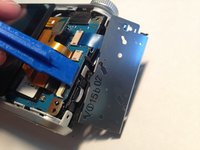
      • Open the case of the camera using your plastic opening tool.

      • Start on each end, working the tool into the opening and popping the casing up. Then work your way down the longer sides (top and bottom).

      • If you don’t have plastic opening tools, any flat plastic object, like a used gift card, can be used as an improvised alternative.

      Ask FixBot
      Add Comment

    4. Samsung WB350F Menu/Control Buttons Replacement: step 4, image 1 of 1
      • Remove the plastic casing, exposing the inner workings of the camera.

      Ask FixBot

      Add Comment

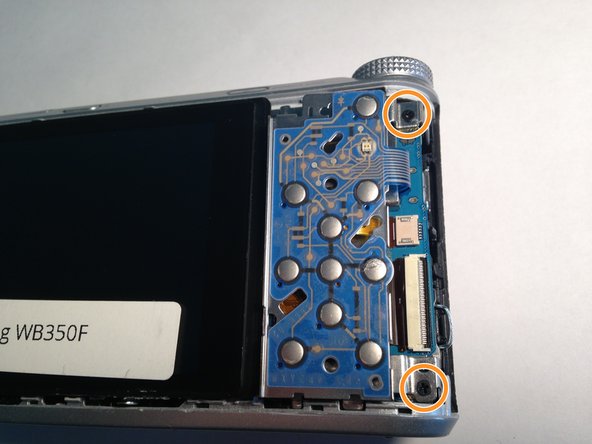
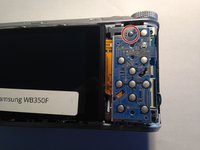
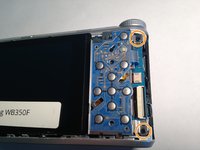
    1. Samsung WB350F Menu/Control Buttons Replacement, Screen: step 5, image 1 of 2 Samsung WB350F Menu/Control Buttons Replacement, Screen: step 5, image 2 of 2
      • Using your Phillips #000 Screwdriver, remove one 3.2 mm screw above the menu buttons panel.

      • Next, remove the two 3.2 mm Phillips #000 screws to the left of the menu buttons panel.

      Ask FixBot

      Add Comment

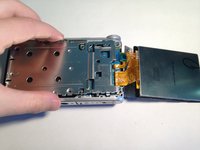
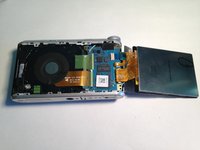
    2. Samsung WB350F Menu/Control Buttons Replacement: step 6, image 1 of 1
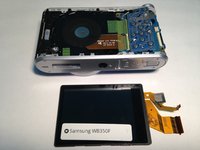
      • Move the menu button panel to the right as well as the screen.

      • Be careful because each are connected to the camera by a ribbon.

      Ask FixBot

      Add Comment

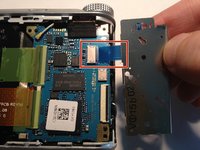
    3. Samsung WB350F Menu/Control Buttons Replacement: step 7, image 1 of 1
      • Remove two more 3.2 mm screws on the silver panel using your Phillips #000 Screwdriver.

      Ask FixBot
      Add Comment

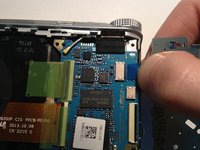
    4. Samsung WB350F Menu/Control Buttons Replacement: step 8, image 1 of 2 Samsung WB350F Menu/Control Buttons Replacement: step 8, image 2 of 2
      • Remove the silver panel.

      Ask FixBot
      Add Comment

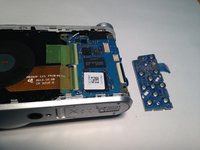
    5. Samsung WB350F Menu/Control Buttons Replacement: step 9, image 1 of 2 Samsung WB350F Menu/Control Buttons Replacement: step 9, image 2 of 2
      • Flip the screen back over.

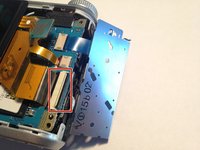
      • Using the plastic open tool, flip open the black retaining plastic piece holding the larger ribbon in place.

      Ask FixBot
      Add Comment

    6. Samsung WB350F Menu/Control Buttons Replacement: step 10, image 1 of 2 Samsung WB350F Menu/Control Buttons Replacement: step 10, image 2 of 2
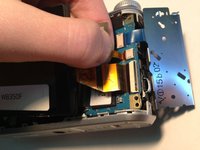
      • Carefully detach both ribbons by gently pulling one at a time.

      • The thinner ribbon isn't secured with a connector and you are able to pull it straight out.

      • Be sure to pull gently as you do not want to break either ribbon.

      Ask FixBot

      Add Comment

    1. Samsung WB350F Menu/Control Buttons Replacement, Menu/Control Buttons: step 11, image 1 of 3 Samsung WB350F Menu/Control Buttons Replacement, Menu/Control Buttons: step 11, image 2 of 3 Samsung WB350F Menu/Control Buttons Replacement, Menu/Control Buttons: step 11, image 3 of 3
      • Gently pull the ribbon in order to remove the menu/control button panel.

      • The ribbon isn't secured with a connector and you are able to pull it straight out.

      Ask FixBot

      Add Comment

Conclusion

To reassemble your device, follow these instructions in reverse order.

Cancel: I did not complete this guide.

Taylor Joubert

Member since: 03/04/16

273 Reputation

2 Guides authored

Team

0 Guide Comments

Add Comment

View Statistics:

Past 24 Hours: 3

Past 7 Days: 14

Past 30 Days: 48

All Time: 1,734