Introduction
This guide provides a walkthrough on replacing the Samsung WB150F lens assembly if your device has poor focus or uneven focus across an image.
A camera lens is a tool used to bring light to a fixed focal point.
Before using this guide, inspect the battery to ensure that the device is receiving power.
Prior to beginning, make sure to remove the battery from your camera and disconnect from any external power source.
What you need
-
-
The location of the battery compartment can be found on the underside of the camera.
 Ask FixBot
-
-
-
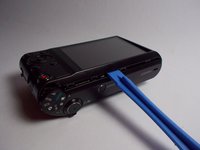
Have the lens of the camera face you. To open the battery compartment, slide the battery door lock towards the left. At the same time allow the battery door to swing open.
-
-
-
Gather a PHO Phillips head screwdriver and a plastic wedge. If you do not have a plastic wedge like the one pictured, a credit card or a guitar pick can be used.
-
-
-
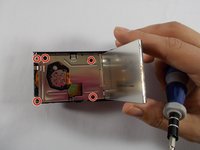
Take off the front casing by using your screwdriver to unscrew the screws circled in each of the photos (5 total).
-
The front casing can now be pulled from the camera.
-
-
-
-
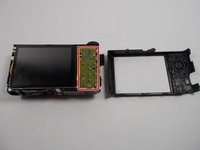
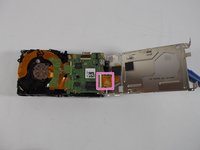
Flip the camera over and pry the back shell of the camera off with the plastic opening tool (or credit card or guitar pick). The screen-side of your camera should now resemble the camera in the second photo.
-
Note: removing the back shell does not require removing anymore screws, it should just snap off.
-
-
-
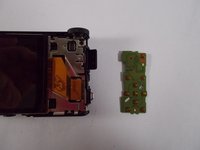
On the screen side, remove the button circuit board (outlined in red) from the camera by using the plug located in the upper right corner of the screen side.
-
-
-
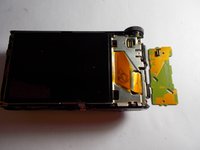
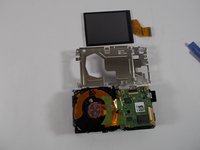
Remove the metal casing by lifting up the old screen and unscrewing the 5 screws circled in the first photo.
-
The LCD screen has a ribbon going to the main circuit board, as shown in the second photo, that needs to be detached.
-
Your camera should now resemble the third photo.
-
-
-
Disconnect the ribbon from the flash assembly.
-
Disconnect two ribbons from the lens assembly as shown in the second picture.
-
Disconnect the ground wire from the motherboard as shown in the third picture.
-
-
-
Lens assembly freely detaches from housing once both ribbons are detached from the motherboard.
-


To reassemble your device, follow these instructions in reverse order.
Team

IUPUI, Team 7-7, Beck Spring 2022 Member of IUPUI, Team 7-7, Beck Spring 2022
IUPUI-BECK-S22S7G7
4 Members
3 Guides authored