
Samsung Series 5 NP550P5C-T01US HDD; ODD Replacement

What you need

  1. Samsung Series 5 NP550P5C-T01US HDD; ODD Replacement, Get the Media Creation Tool: step 1, image 1 of 1
  2. Samsung Series 5 NP550P5C-T01US HDD; ODD Replacement, Allow in UAC: step 2, image 1 of 1
    • If you have UAC enabled click "Yes"

  3. Samsung Series 5 NP550P5C-T01US HDD; ODD Replacement, Accept Ts & Cs: step 3, image 1 of 2 Samsung Series 5 NP550P5C-T01US HDD; ODD Replacement, Accept Ts & Cs: step 3, image 2 of 2
    • Click "Accept"

    • Option: Actually read T&Cs

  4. Samsung Series 5 NP550P5C-T01US HDD; ODD Replacement, Create installation media: step 4, image 1 of 1
    • Select "Create installation media (USB flash drive, DVD or ISO file) for another PC"

    • Click "Next"

  5. Samsung Series 5 NP550P5C-T01US HDD; ODD Replacement: step 5, image 1 of 1
    • If you are creating a USB for another computer take care to get these settings correct for the computer it will be used on. Language is not so important as it can be changed later.

    • If you are creating a back up for the computer you are running the tool on, selecting the check box "Use the recommended options for this PC" will select the settings automatically.

  6. Samsung Series 5 NP550P5C-T01US HDD; ODD Replacement: step 6, image 1 of 1
    • Select "USB flash drive"

    • Click "Next"

    • By selecting "ISO file" you can create a disk image that can be burned to a CD or USB at a later date.

  7. Samsung Series 5 NP550P5C-T01US HDD; ODD Replacement: step 7, image 1 of 1
    • Now select the USB drive you wish to put the tool on.

    • If your drive does not appear here, make sure it is correctly inserted and detected by Windows.

  8. Samsung Series 5 NP550P5C-T01US HDD; ODD Replacement, Download and verify: step 8, image 1 of 3 Samsung Series 5 NP550P5C-T01US HDD; ODD Replacement, Download and verify: step 8, image 2 of 3 Samsung Series 5 NP550P5C-T01US HDD; ODD Replacement, Download and verify: step 8, image 3 of 3
    • Now windows will download and verify the installation files.

  9. Samsung Series 5 NP550P5C-T01US HDD; ODD Replacement, Writing to disk: step 9, image 1 of 2 Samsung Series 5 NP550P5C-T01US HDD; ODD Replacement, Writing to disk: step 9, image 2 of 2
    • Now windows will write the installation files to your drive.

  10. Samsung Series 5 NP550P5C-T01US HDD; ODD Replacement, Final steps: step 10, image 1 of 2 Samsung Series 5 NP550P5C-T01US HDD; ODD Replacement, Final steps: step 10, image 2 of 2
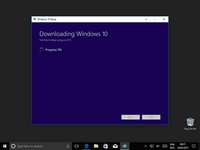
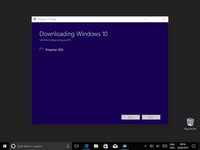
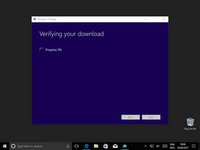
    • Once it's finished writing to the disk click "Next"

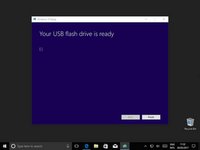
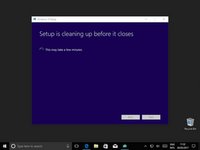
    • And after a short wait you're done!

  11. Samsung Series 5 NP550P5C-T01US HDD; ODD Replacement, Power the computer off completely: step 11, image 1 of 1
    • Remove the battery, and power brick

  12. Samsung Series 5 NP550P5C-T01US HDD; ODD Replacement, Open the computer up: step 12, image 1 of 1
    • Remove the main cover of the lower side of the computer

  13. Samsung Series 5 NP550P5C-T01US HDD; ODD Replacement, (Optional) Remove the DVD Drive: step 13, image 1 of 3 Samsung Series 5 NP550P5C-T01US HDD; ODD Replacement, (Optional) Remove the DVD Drive: step 13, image 2 of 3 Samsung Series 5 NP550P5C-T01US HDD; ODD Replacement, (Optional) Remove the DVD Drive: step 13, image 3 of 3
    • Unscrew and remove as shown above

    • Remove the back bracket from the back of the optical drive, and the faceplate and instal the both of them in the new DVD Drive.

  14. Samsung Series 5 NP550P5C-T01US HDD; ODD Replacement, Remove the HDD/SSD: step 15, image 1 of 2 Samsung Series 5 NP550P5C-T01US HDD; ODD Replacement, Remove the HDD/SSD: step 15, image 2 of 2
    • Unscrew and remove the HDD/SSD by the tab provided by the manufacturer.

    • Beware of the pegs on the lower left corner and the upper right corner.

  15. Samsung Series 5 NP550P5C-T01US HDD; ODD Replacement, Prepare the new ssd for installation: step 16, image 1 of 2 Samsung Series 5 NP550P5C-T01US HDD; ODD Replacement, Prepare the new ssd for installation: step 16, image 2 of 2
    • Remove the adaptor placed directly over the data connector.

    • then remove the drive from the caddy

  16. Samsung Series 5 NP550P5C-T01US HDD; ODD Replacement, Instal new drive: step 17, image 1 of 1
    • Revert the order from the last two steps and instal the new SSD/HDD.

    • Don't forget that to avoid any problems it is recommended that either no OS is loaded on the drive, and if there is any it is properly setup to allow for hardware swaps and not cause any issues.

Conclusion

To reassemble your device, follow these instructions in reverse order, do not forget to securely screw everything in place, but beware to not over-tighten, which can cause severe damage to the device.

One other person completed this guide.

Enzo Claudino

Member since: 06/23/20

199 Reputation

1 Guide authored

0 Comments

Add Comment

View Statistics:

Past 24 Hours: 1

Past 7 Days: 2

Past 30 Days: 9

All Time: 451