
15% Off Selected iFixit Tools — Limited Time
Free Shipping on Domestic Orders $75+

Samsung Rogue Camera Replacement

What you need

  1. Samsung Rogue Camera Replacement, Battery: step 1, image 1 of 2 Samsung Rogue Camera Replacement, Battery: step 1, image 2 of 2
    • Before disassembling your Samsung Rogue, make sure it is powered off.

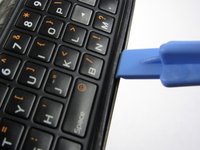
    • With your thumbs, push down on the back cover of your phone and slide it away from the camera.

    Ask FixBot

    Add Comment

  2. Samsung Rogue Camera Replacement: step 2, image 1 of 2 Samsung Rogue Camera Replacement: step 2, image 2 of 2
    • You can now remove the battery by prying it up with your finger.

    Ask FixBot

    Add Comment

  3. Samsung Rogue Camera Replacement, Motherboard: step 3, image 1 of 1
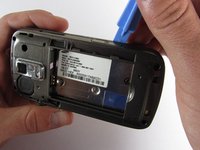
    • Use a plastic opening tool to carefully pry the back cover surrounding the camera up from the phone.

    Ask FixBot

    Add Comment

  4. Samsung Rogue Camera Replacement: step 4, image 1 of 1
    • Remove the five 3.4mm Philips screws securing the backing of the phone.

    Ask FixBot

    Add Comment

  5. Samsung Rogue Camera Replacement: step 5, image 1 of 3 Samsung Rogue Camera Replacement: step 5, image 2 of 3 Samsung Rogue Camera Replacement: step 5, image 3 of 3
    • Use a plastic opening tool to carefully pry off the back cover.

    • Make sure you are prying along the edge and not between the two halves of the phone that slide away from each other.

    • Be careful to not drop the volume changing piece, for it can easily slip out.

    Ask FixBot

    Add Comment

  6. Samsung Rogue Camera Replacement: step 6, image 1 of 1
    • Remove the two 3.45 mm Philips screws below the white sticker.

    Ask FixBot

    Add Comment

  7. Samsung Rogue Camera Replacement: step 7, image 1 of 2 Samsung Rogue Camera Replacement: step 7, image 2 of 2
    • Carefully lift the motherboard up from the bottom edge.

    • The film of wires is still attached to the motherboard, so do not completely remove the motherboard just yet or you may damage it.

    Ask FixBot

    Add Comment

  8. Samsung Rogue Camera Replacement: step 8, image 1 of 2 Samsung Rogue Camera Replacement: step 8, image 2 of 2
    • Use a plastic opening tool to disconnect the film from the motherboard.

    Ask FixBot

    Add Comment

  9. Samsung Rogue Camera Replacement, Speaker/Antenna: step 9, image 1 of 1
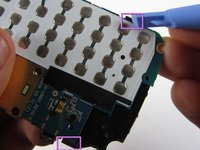
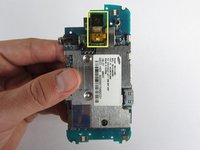
    • On the underside of the motherboard, remove the single 3.3mm Philips screw.

    Ask FixBot

    Add Comment

  10. Samsung Rogue Camera Replacement: step 10, image 1 of 3 Samsung Rogue Camera Replacement: step 10, image 2 of 3 Samsung Rogue Camera Replacement: step 10, image 3 of 3
    • The speaker and the antenna are both connected on the same black piece.

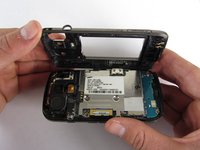
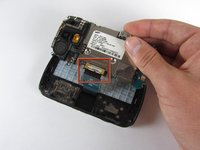
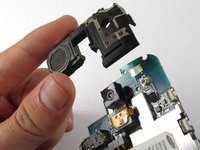
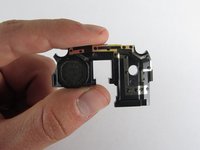
    • Use a plastic opening tool to pop off the edges of the speaker/antenna piece from the motherboard.

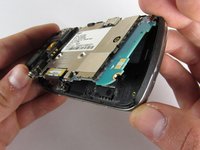
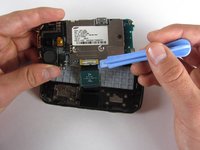
    • Turn over the motherboard and carefully lift the speaker/antenna piece straight up.

    • The camera is held in the middle of the speaker/antenna piece. Make sure to lift directly up when lifting the speaker/antenna piece, otherwise you can risk damaging the camera.

    Ask FixBot

    Add Comment

  11. Samsung Rogue Camera Replacement, Camera: step 11, image 1 of 3 Samsung Rogue Camera Replacement, Camera: step 11, image 2 of 3 Samsung Rogue Camera Replacement, Camera: step 11, image 3 of 3
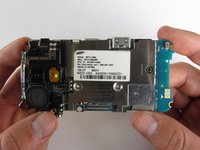
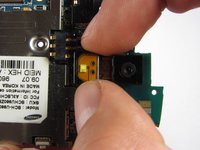
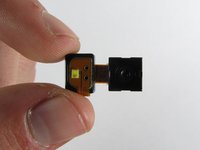
    • With two fingers carefully detach the camera from the motherboard by lifting straight up.

    • Do not pick it up by the camera itself. Handle the little black box it is attached to instead.

    Ask FixBot

    Add Comment

Conclusion

To reassemble your device, follow these instructions in reverse order.

Cancel: I did not complete this guide.

Viktoria Mikoultchik

Member since: 04/15/12

25 Reputation

7 Guides authored

Team

Cal Poly, Team 7-32, Maness Spring 2012 Member of Cal Poly, Team 7-32, Maness Spring 2012

CPSU-MANESS-S12S7G32

4 Members

20 Guides authored

0 Guide Comments

Add Comment

View Statistics:

Past 24 Hours: 2

Past 7 Days: 8

Past 30 Days: 35

All Time: 509