Introduction
Replace the right wheel of your POWERbot. This can be done to resolve a persistent error code (C 03) and/or to simply eliminate movement issues.
What you need
-
-
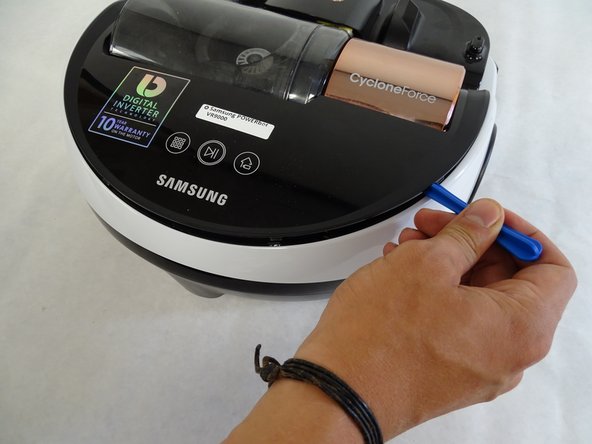
Slide the plastic opening tool to the left, remaining under the black cover, until two left side pins have been detached. Then slide the plastic opening tool to the right until two right side pins have been detached.
-
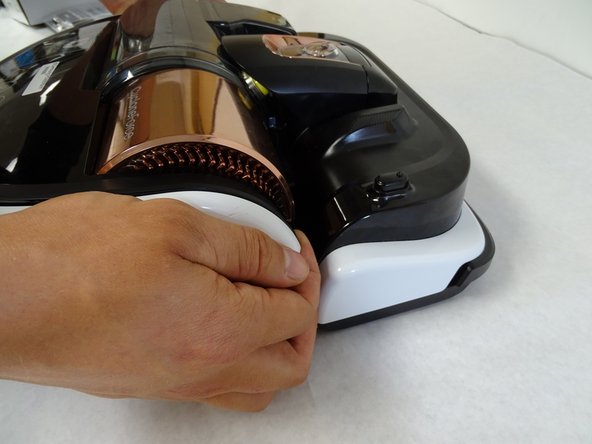
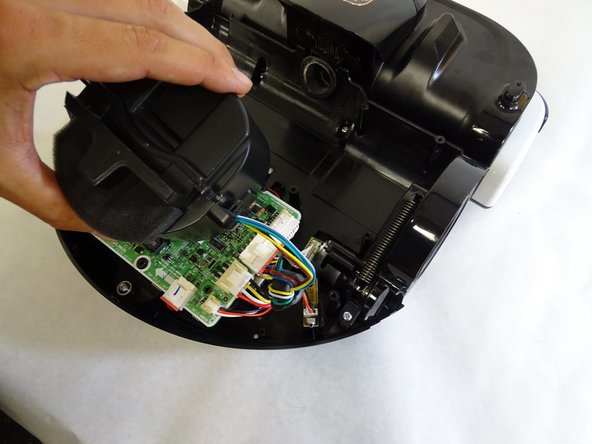
Grab the two clips near the front of the black cover, on in front of each wheel. Pull the clips away from the wheels.
I needed to replace the left drive wheel on a SR20J9250U model. It is largely the same and many parts have VR9000H stamped on them. I will add any differences as I see them.
For this step, there are three clips plus the clip in front of the wheel on each side. First clip is approx 6 cm from the centre at the back. Next is approx 11cm from the first clip and the third is 11 cm from the second clip (almost above the wheel). Then there is the clip in front of each wheel that you can see.
-
-
-
-
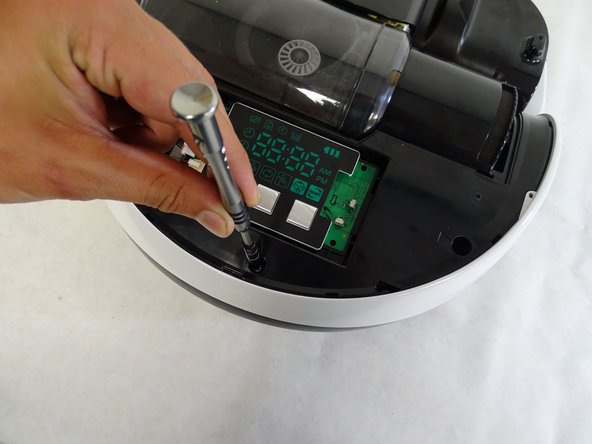
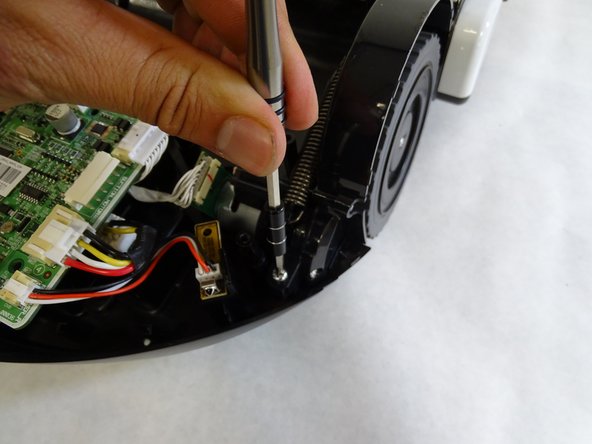
Remove the three 6mm Phillips #1 screws in the holes near the back of the device.
-
-
-
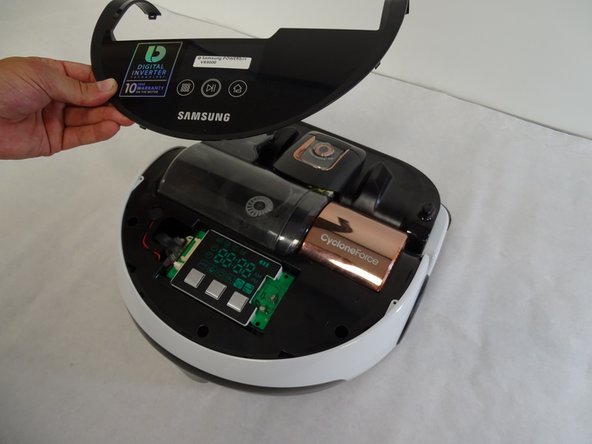
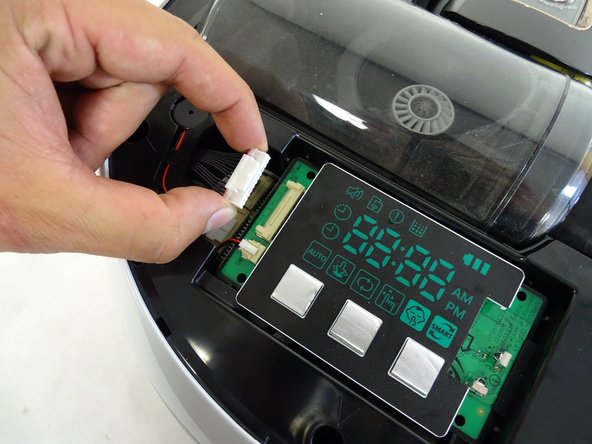
Remove the top chassis from the POWERbot by grabbing the wheel covers and lifting upwards.
-
-
-
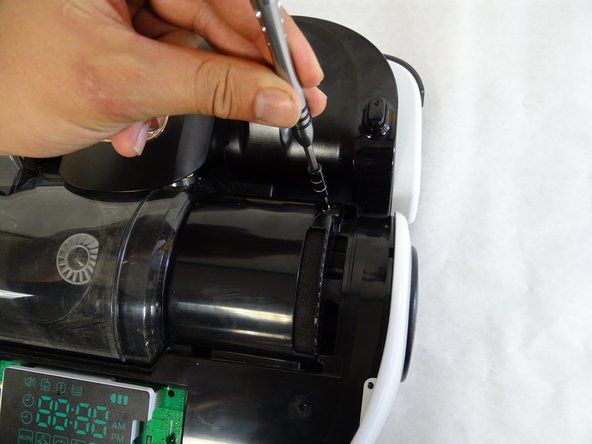
Remove the three 5mm Phillips #1 screws in the holes around the vacuum motor.
-
-
-
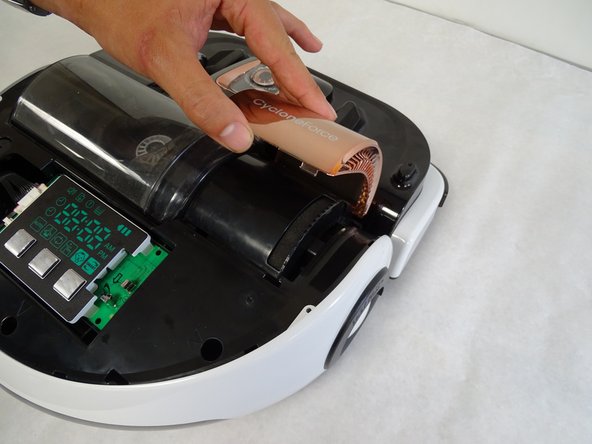
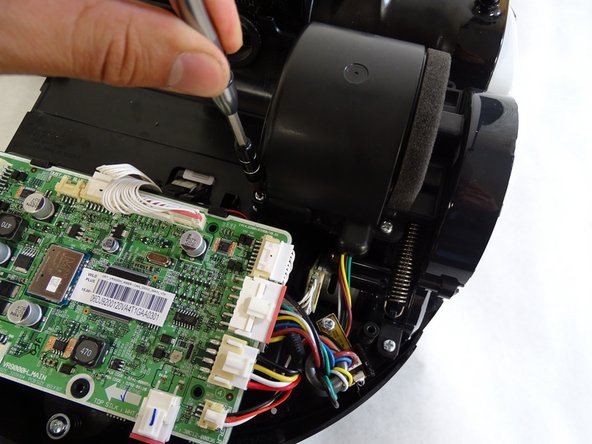
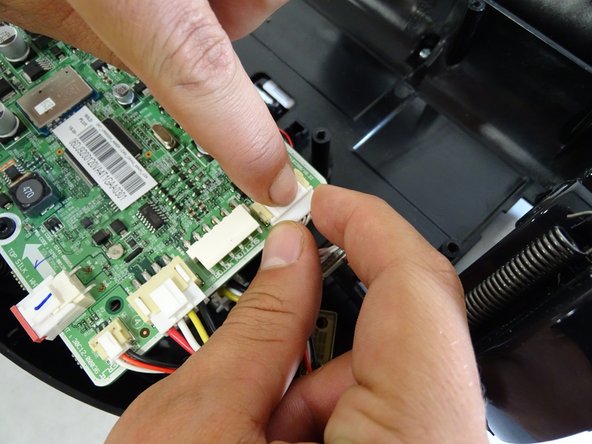
Remove the driving wheel assembly from the POWERbot by grabbing the wheel and lifting upwards.
Excellent directions, thank you for creating them so spot on. No physical evidence of any debris and visually connections are all intact, must be a faulty wire. Hopefully I can buy just the circuit wire and connector from the wheel to the motherboard without replacing the entire wheel and housing. Fortunately I haven't had any problems with plastic pieces breaking off attaching the wheel spring and I have had my robo vac for several years now running 3 to 4 times a week. Once again, thank you.
-


To reassemble your device, follow these instructions in reverse order.
To reassemble your device, follow these instructions in reverse order.
Cancel: I did not complete this guide.
19 other people completed this guide.
Team

Cal Poly, Team S15-G3, Banghart Spring 2017 Member of Cal Poly, Team S15-G3, Banghart Spring 2017
CPSU-BANGHART-S17S15G3
4 Members
14 Guides authored
18 Comments
Great instructions, thank you. Would you happen to know where I can aquire this part or the gear wheels as that's what I think is the problem. Thanks Stephen Rawlings
GREAT INSTRUCTIONS!!! I would have to say there is a design flaw where the wheel spring attaches. I have two of these vacuums and they both have had the same problem now 4 times the small plastic peice that holds the spring snaps off and you can not reattach the spring. I would assume that there is no quick fix and samsung would sell you the whole drive wheel. Is there a place where you can purchase parts ???
Did you find the answer to this question? Mine has had the same thing happen.
did you manage to fix ?
am i wanting the right wheel motor, are you willing to sell?
nique88 -
Very helpful, thank you!! My son has a 3d printer so may be able to create the part you are still looking for that part, @lightningrods
Super fantastic directions, no physical evidence of any debris must be a faulty wire. Visually connection are all intact.
Great, so I followed all the steps. Got it down and checked the wheels. Built it back up again. The left wheel is not moving as free as the right so the C03 error is not going
Any suggestions on what could be wrong with the wheels? What should I replace or repair?
Mostly engines are broken in wheels, but as I found out they do not sell separate engine, need to buy whole wheel
worked about 2 1/2 yrs then C03 notice which says right wheel problem . Bought new right wheel still C03 . Paid over $800, Going to trash it Will away from Samsung vacs . Maybe all products .
Dear John, Did you try to fix it and it doesn’t work? I’m wondering if I should invest money for wheel or it is better to leave it.
Dear Instruction Creator,
I try to find what wheel I need to buy but picture 8 made me confused. Am I right that on picture 8 is screen of wheel from different side than on others. As I see you were take off wheel which was on the right ( when picture from the top and on right side of the camera) but on this 8 is opposite? Please let me know. Thank you.
Awesome instructions - thank you so much! You saved my Powerbot!!!!
This was perfect. Thank you for taking the time to put this together.
Thanks for the great instruction. I just finished installing with a replacement wheel from eBay, but got the exact same results. It starts, goes about 6”, then stops and flashes the error message. I could buy another replacement wheel, but they aren’t cheap and don’t want to keep throwing money at if this isn’t the root problem. Any suggestions?
Awesome instructions. Samsung wanted 249 dollars to repair. The part cost $40 and was easy with these instructions.