Introduction
Laptops overheating has been a prevalent problem since their conception. The usual culprit of this can be attributed to a broken or slow ventilation system. The Samsung Odyssey uses the HexaFlow cooling system to prevent overheating, but issues can still arise. This guide will show you how to replace the fan in your laptop.
What you need
-
-
Remove the eleven 6.6 mm screws on the back of the computer using the Phillips #0 screwdriver.
-
-
-
-
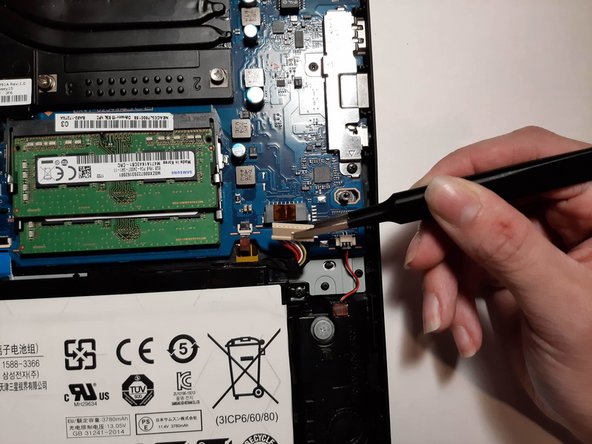
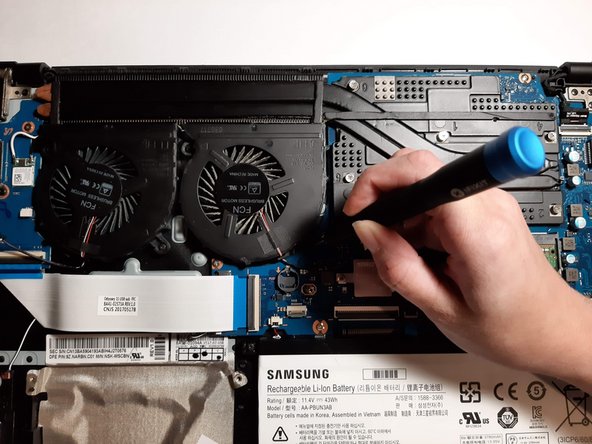
Disconnect the fans from the motherboard by pulling the plugs away from their connectors.
-
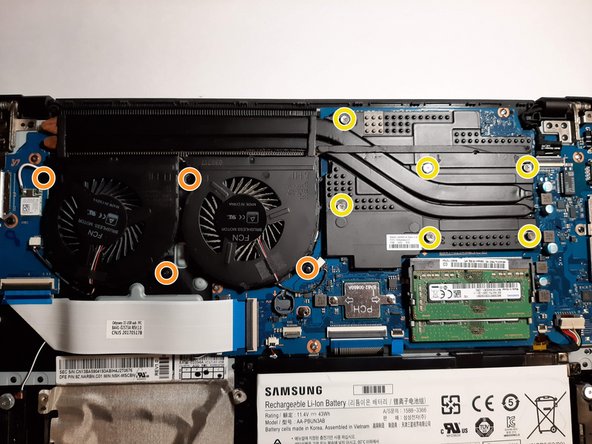
Using the Phillips #0 screwdriver, remove the four 4.6mm screws.
-
Using the same screwdriver, unscrew the six screws surrounding the heat sink.
-
Remove the fan assembly from the device.
-


To reassemble your device, follow these instructions in reverse order.
To reassemble your device, follow these instructions in reverse order.
Cancel: I did not complete this guide.
4 other people completed this guide.

Team

Embry-Riddle Aeronautical University, Team S24-G6, McClure Fall 2019 Member of Embry-Riddle Aeronautical University, Team S24-G6, McClure Fall 2019
ERAU-MCCLURE-F19S24G6
4 Members
5 Guides authored